
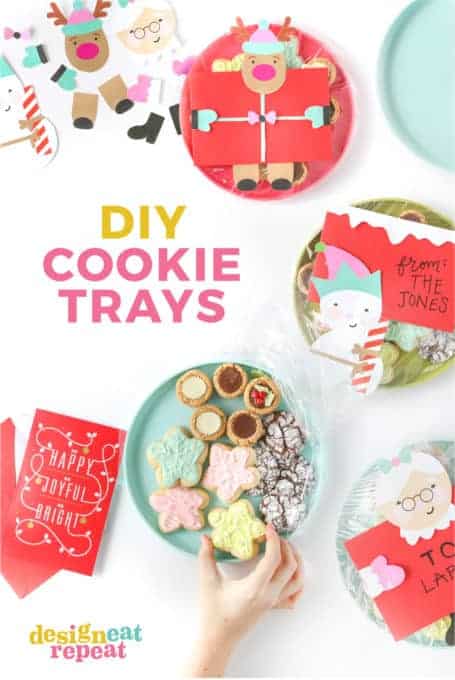
This post has been sponsored by American Greetings. All thoughts and opinions are my own. Create homemade holiday treats for neighbors, friends, and family with these fun DIY cookie tray ideas! Simply attach the free printables to store-bought greeting cards and envelopes for a fun and easy way to decorate cookie trays!

When it comes to holiday baking, I don't mess around. Each year we make hundreds of cookies to gift to neighbors, teachers, and friends and in the past, we have typically assembled the cookie trays with boring paper plates and saran wrap. So this year, I'm stepping up my cookie gifting game with 3 easy cookie tray ideas using a few simple materials (that can all be found at our favorite one-stop shop...Target!).
What You Need to Make These Cookie Tray Ideas
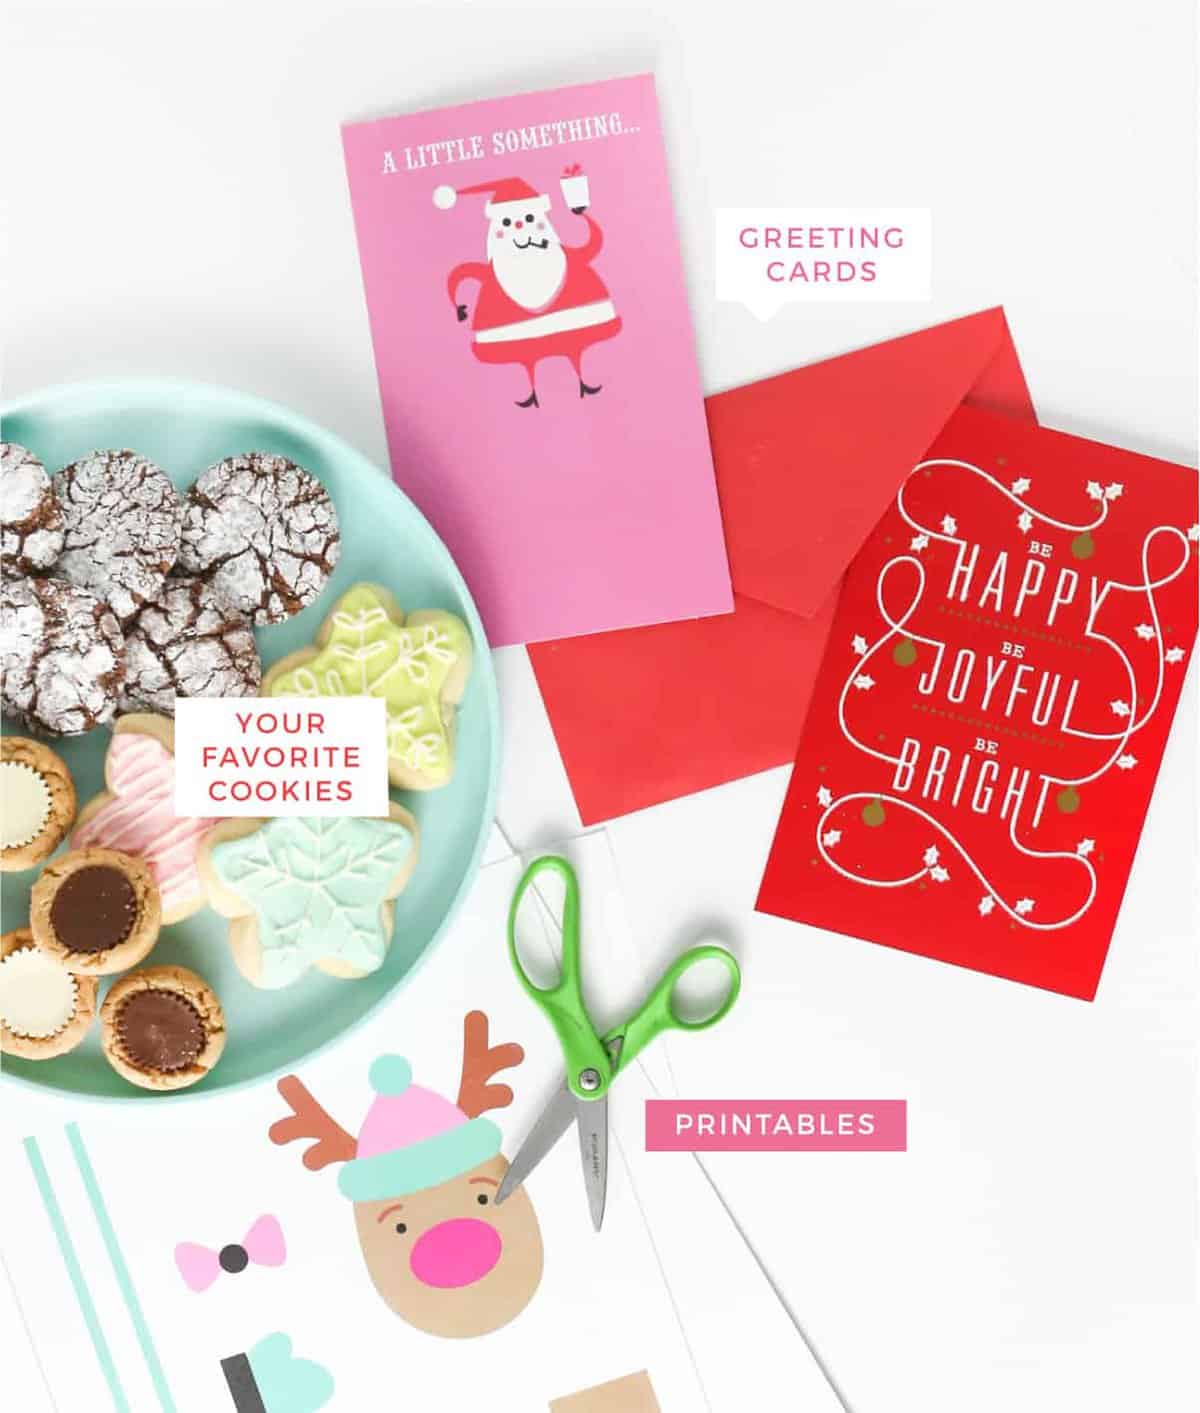
- Plastic/Paper Plates: I found these adorable, sturdy plastic plates in the dinnerware section at Target for a few dollars each. Perfect for gifting, as you don't have to worry about getting your fancy trays back!
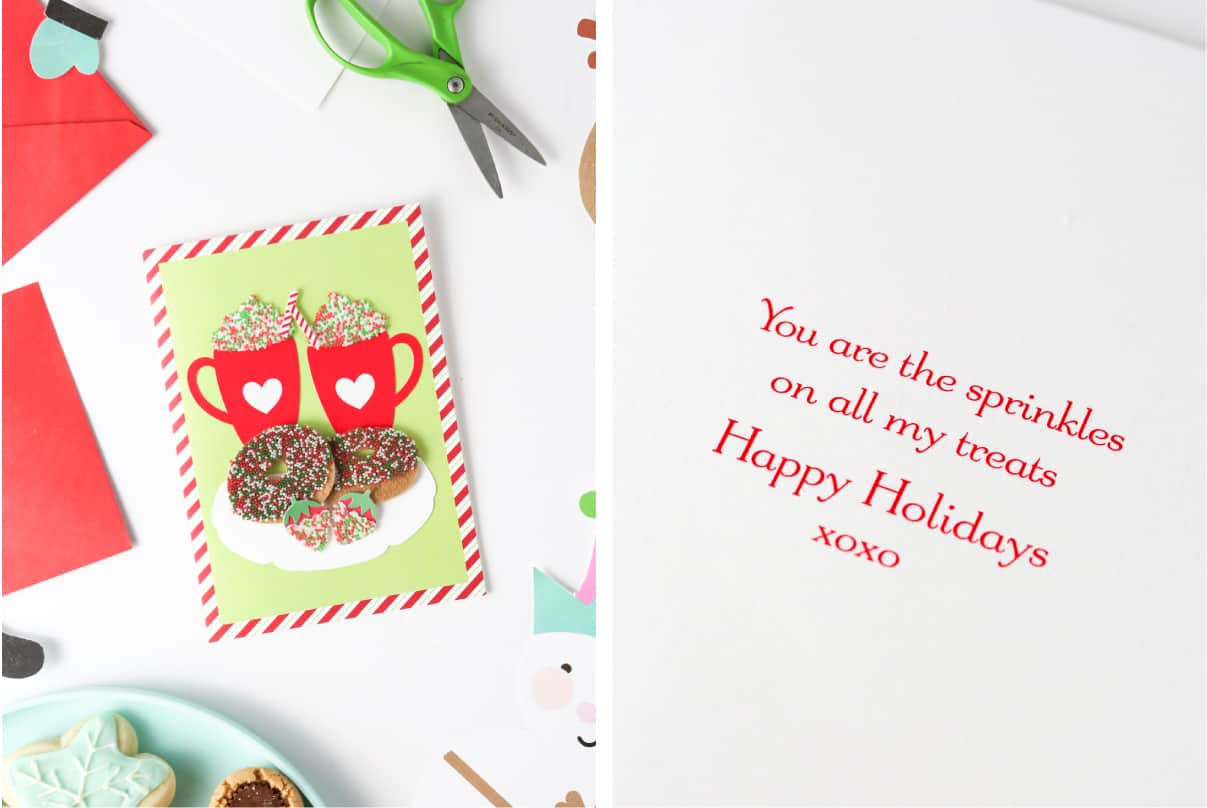
- Greeting Cards: Target has tons of well-designed holiday cards to choose from in their card aisle. I also found more holiday boxed card sets back in the Christmas section, which are great for gifting multiple trays! (ie. The red cards below came in a 10pk and ended up being cheaper than buying 10 separate cards.) The printables will fit best on 5.5 x 7.5" sized cards, which is what most cards you'll find at Target are.
- Printable Envelope Attachments (download here): Use these to dress up solid colored envelopes and give life to your typical cookie trays!
- Tools: Saran Wrap, Tape, Scissors/Exacto Knife

How to Assemble these Easy Cookie Trays
Step 1: Print Templates
Use your home printer to print the Christmas printables on cardstock (I use this).
Step 2: Cut
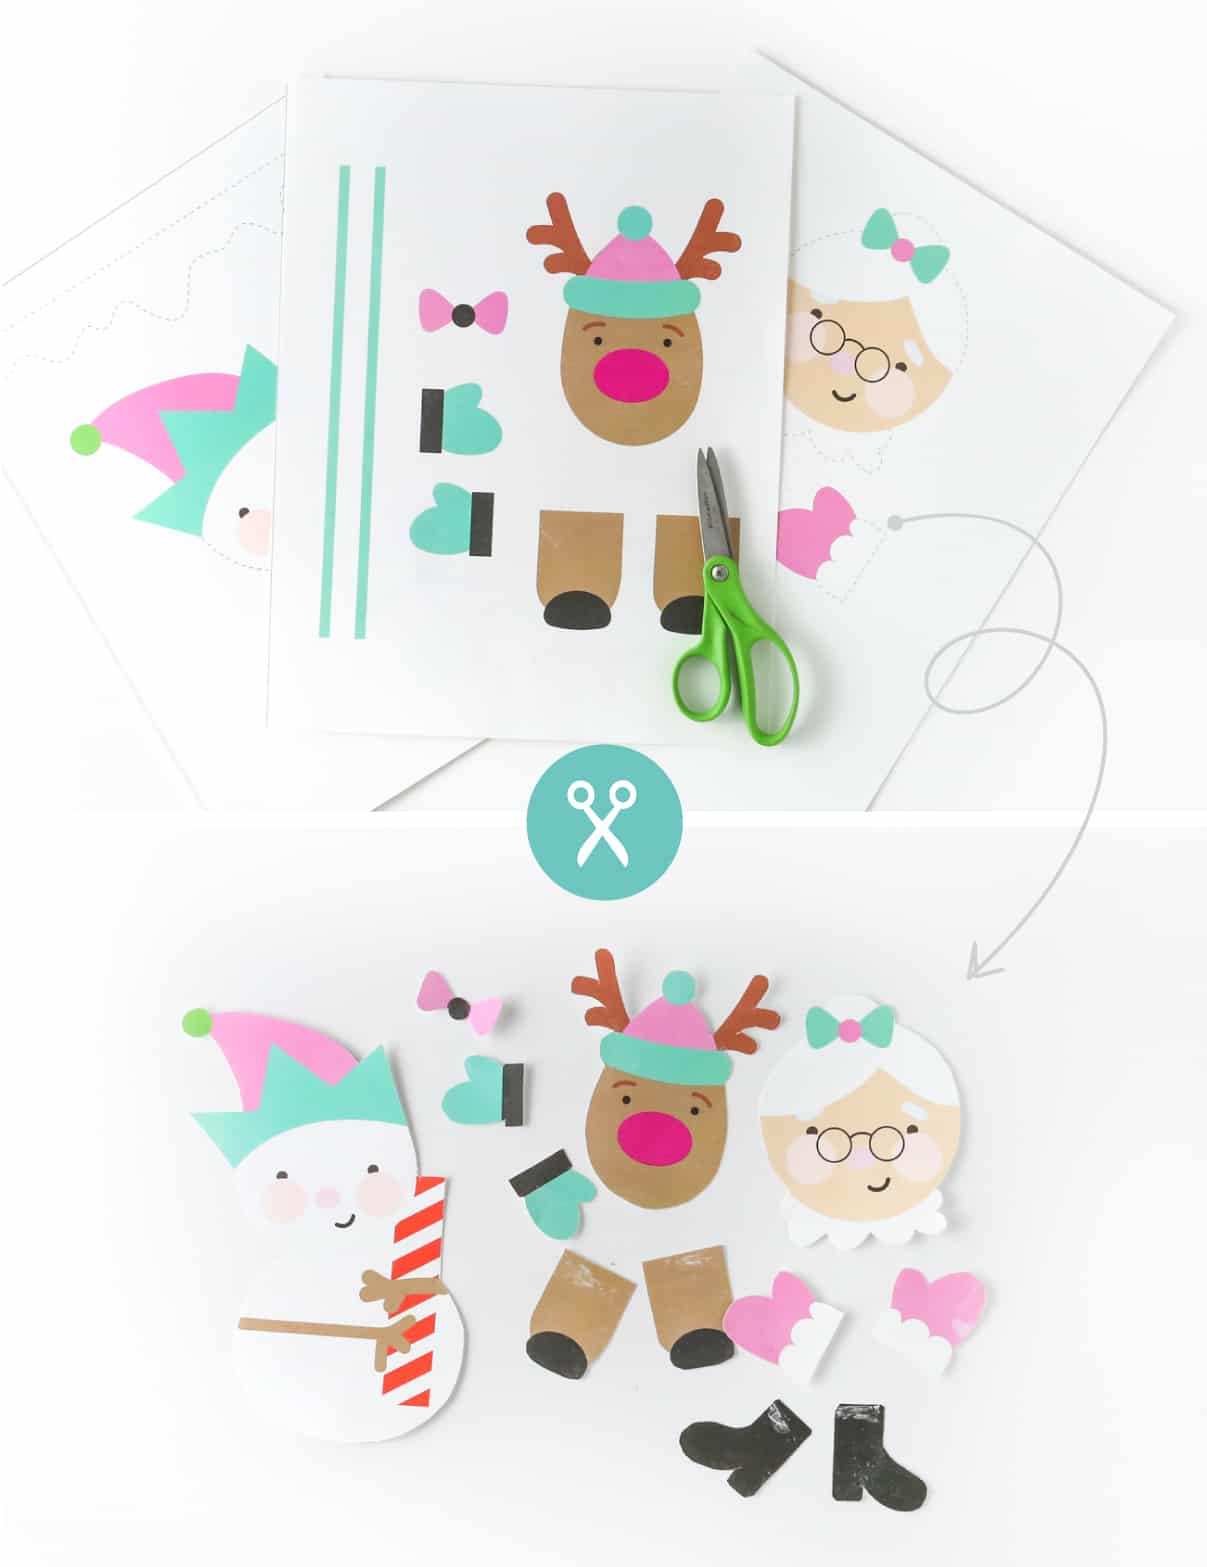
Use scissors or exacto knife to cut out each of the shapes. Set aside.
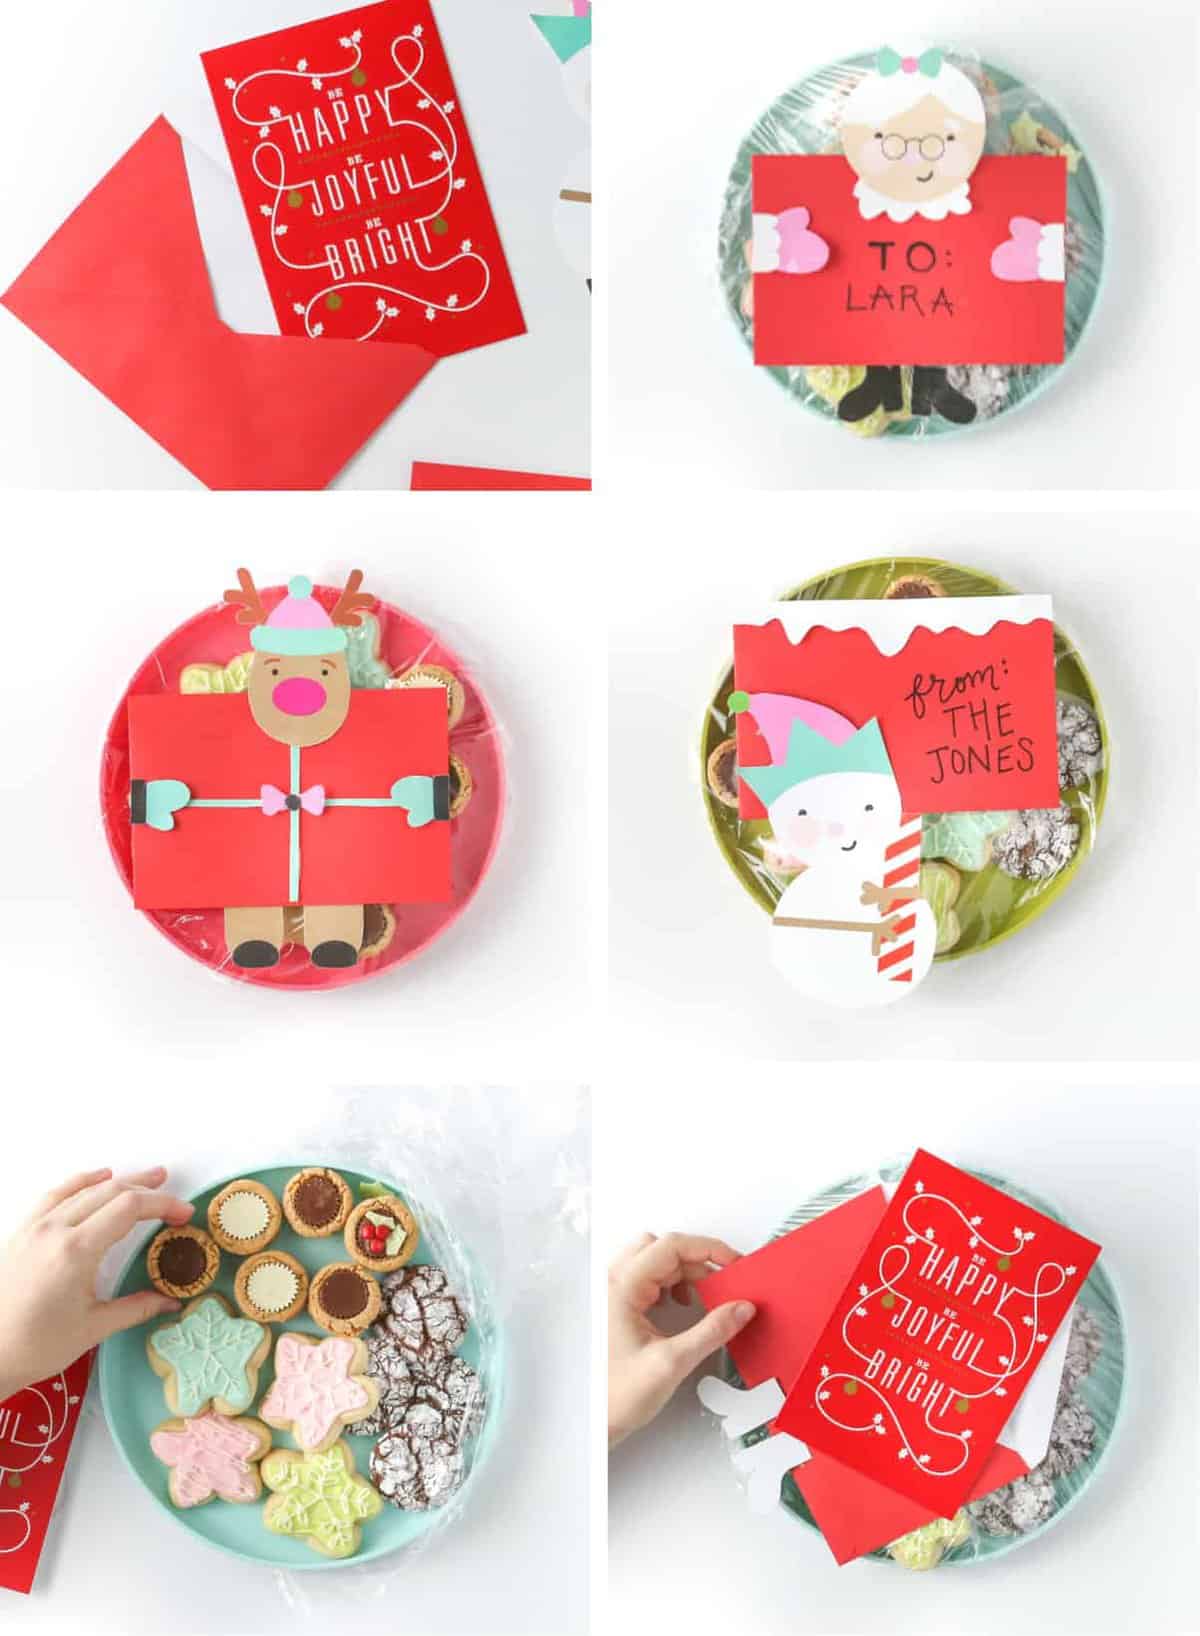
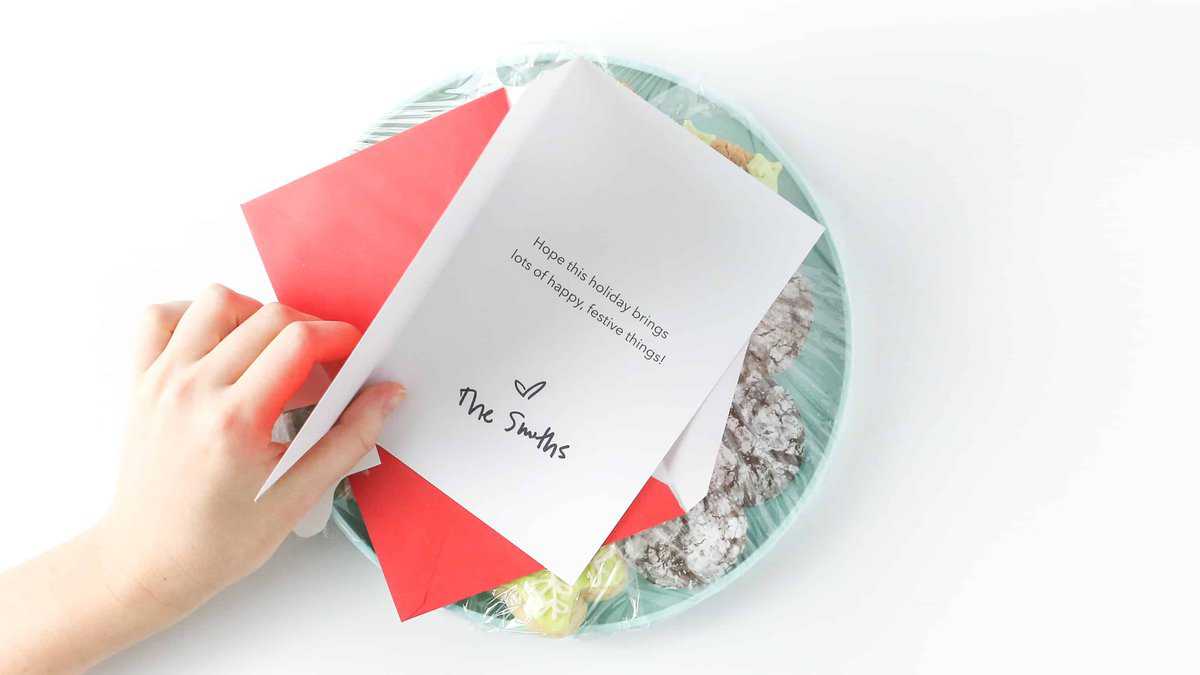
Step 3: Write Note & Slip in Envelope
Personalize each greeting card and slip into the envelope! I love the bright & modern vibe of these cards and as a picky designer, I appreciate having well-designed options to choose from (like seriously guys, a holiday donut card with actual 3-d SPRINKLES!). And my favorite part? The red cards even have glitter accents (hard to see in the photos), making them even more happy, joyful, and bright. Target for the win, for the 500th time.
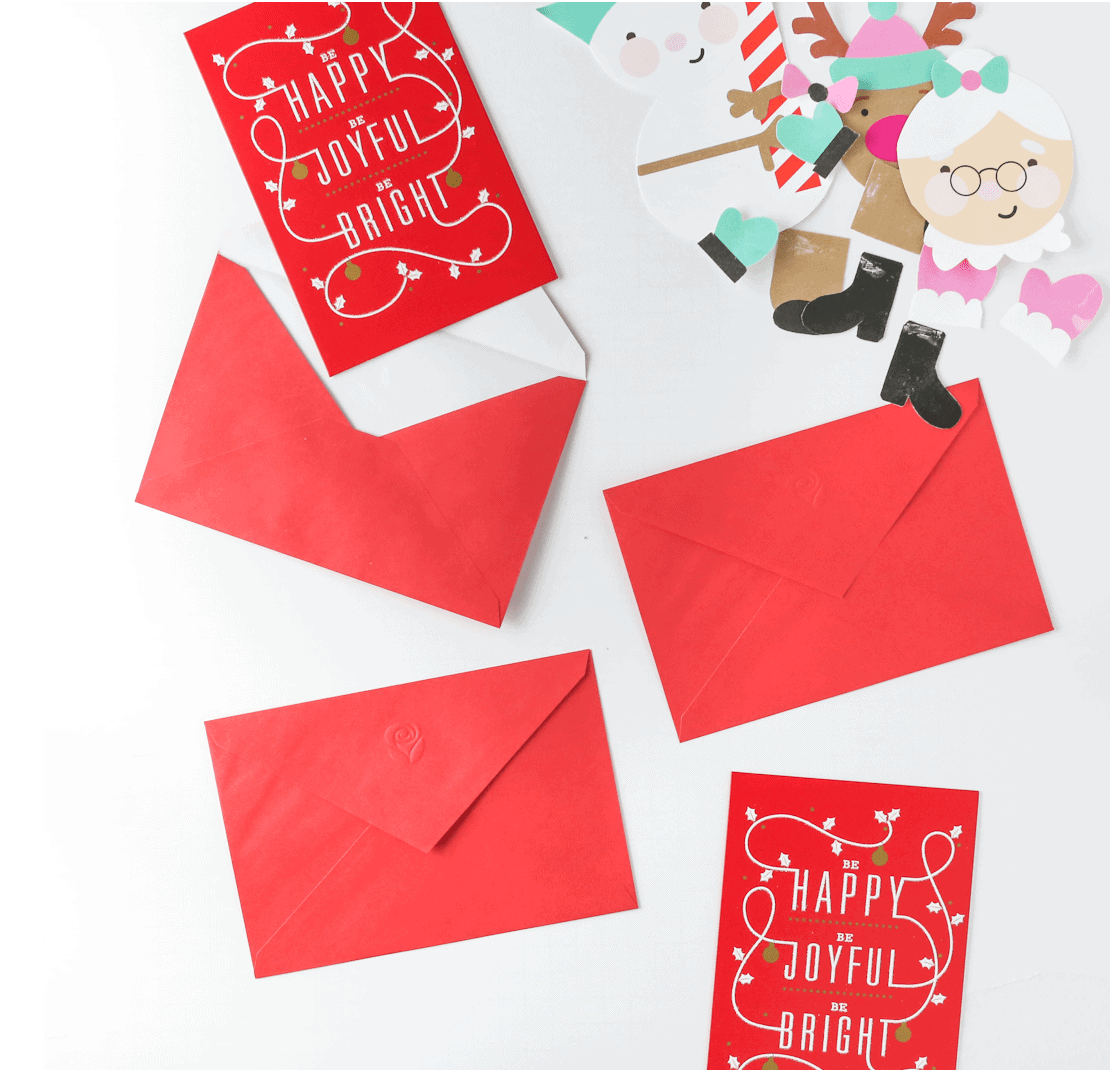
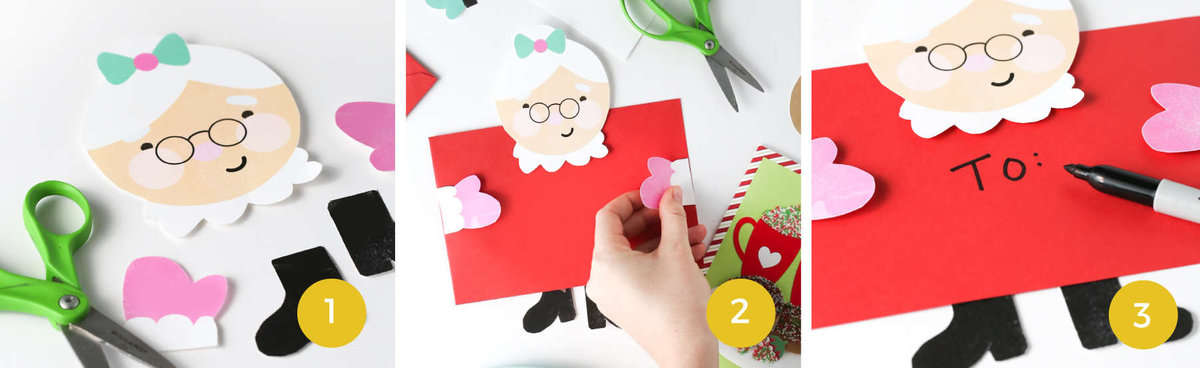
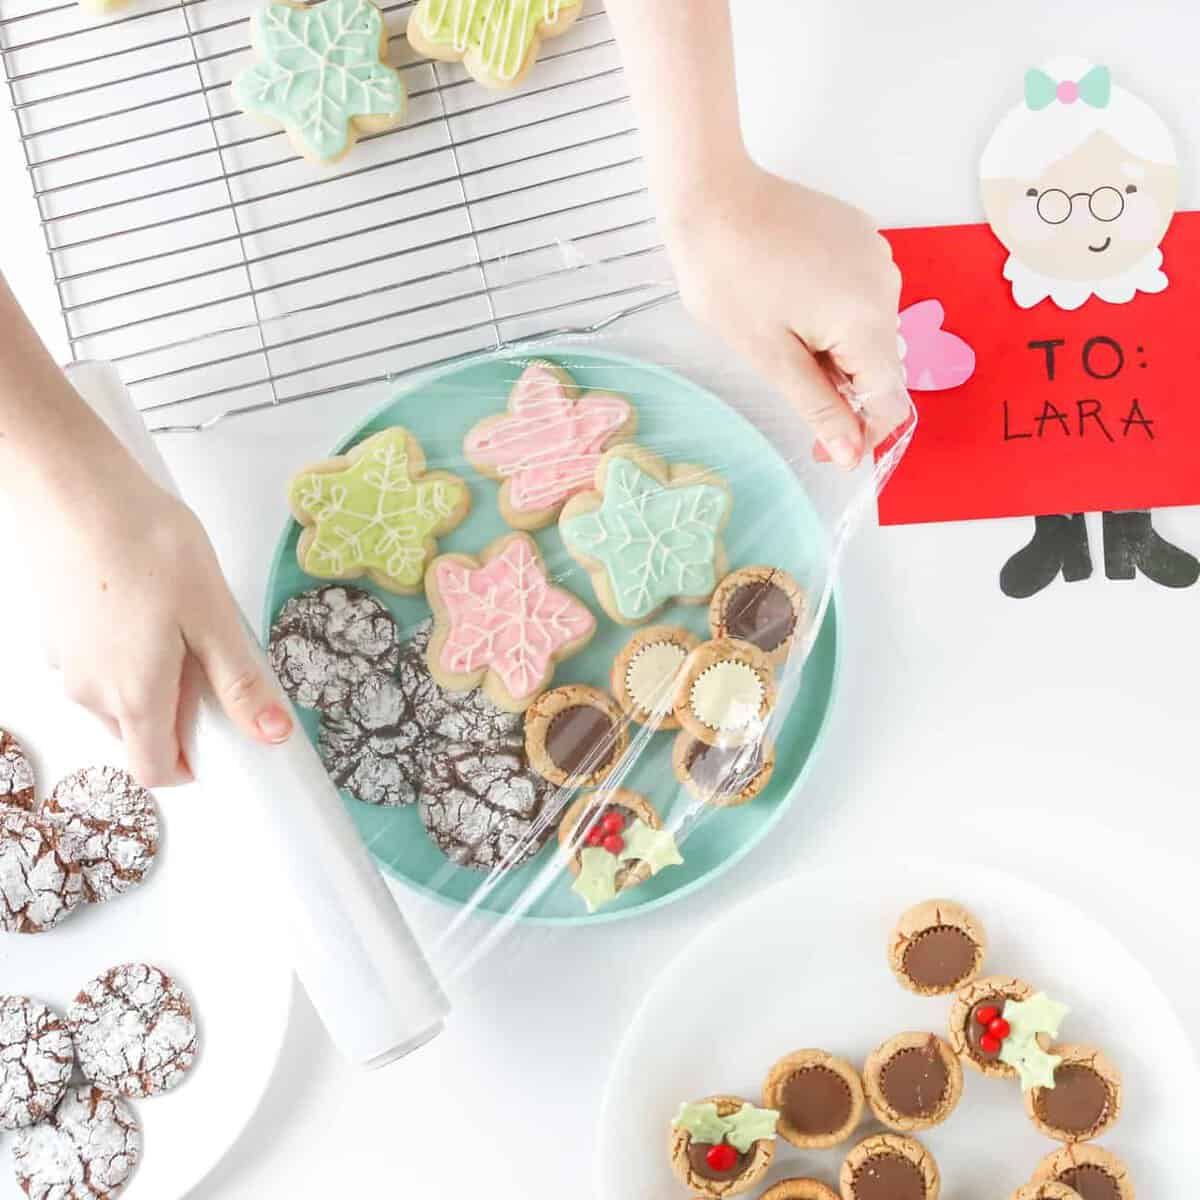
Step 4: Decorate Envelopes with Character Cut-Outs
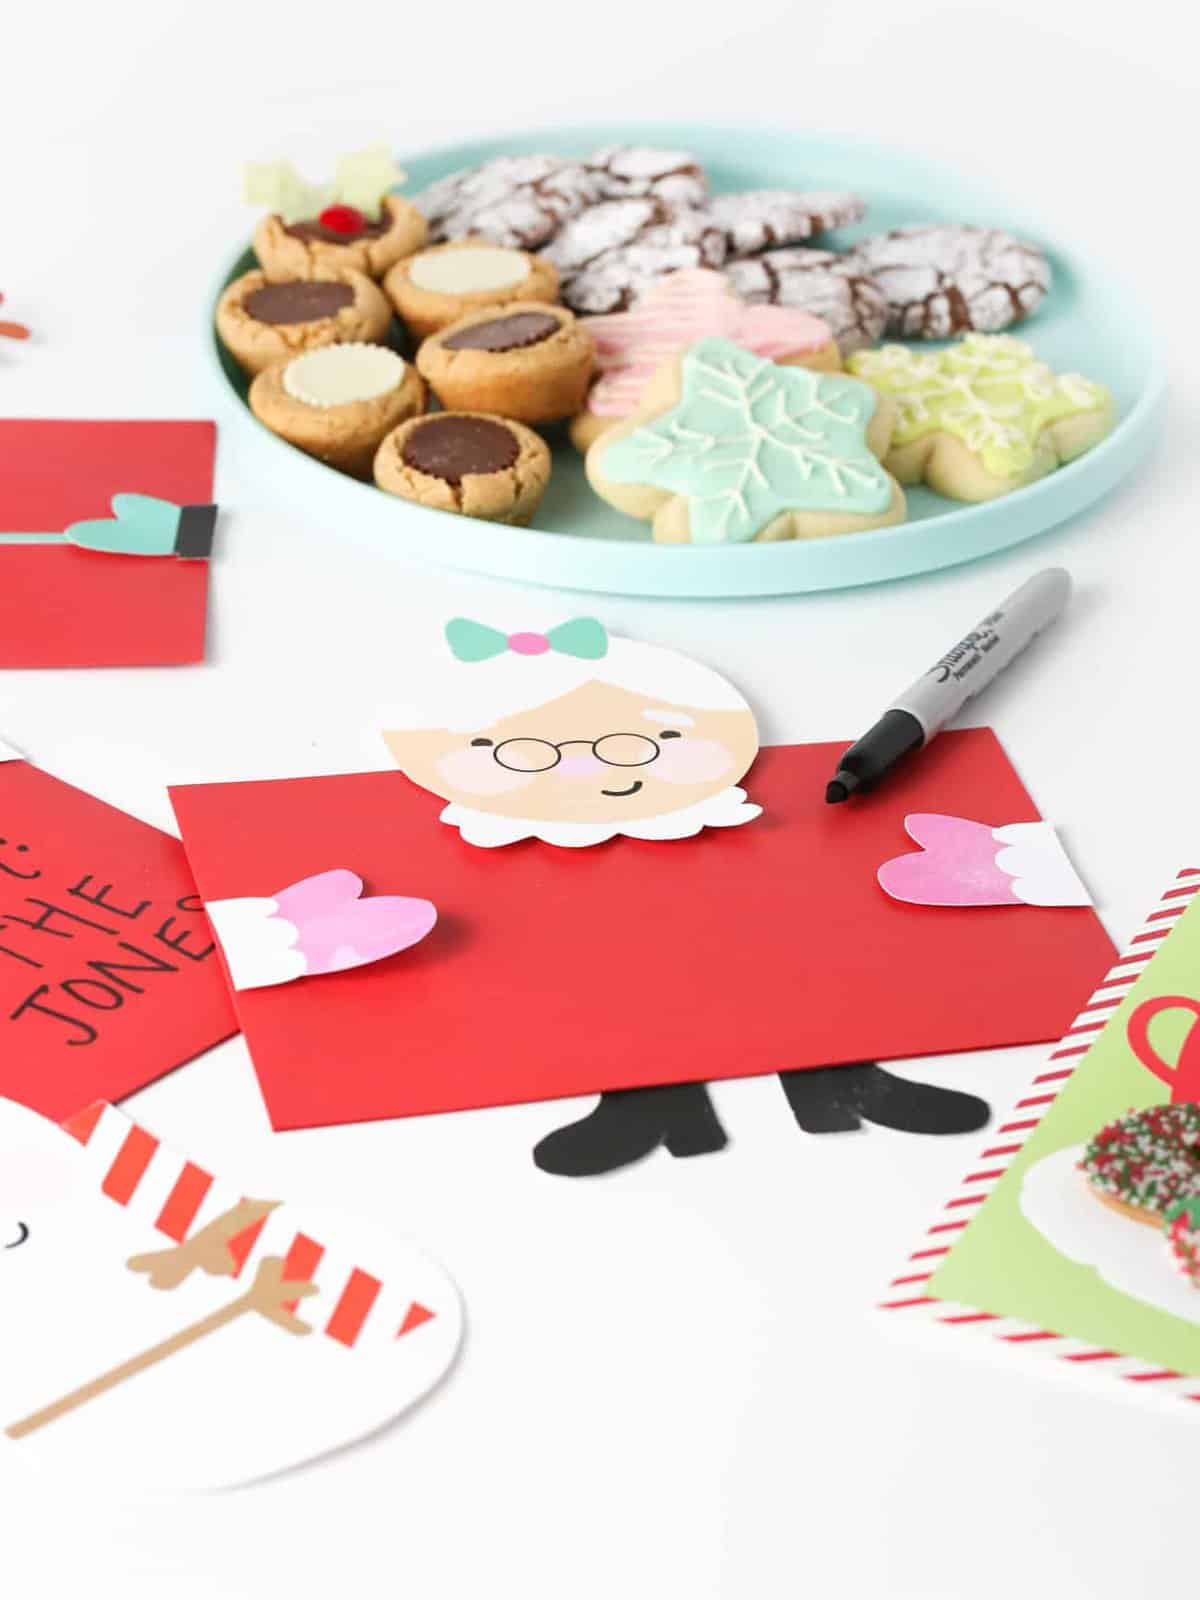
Once the envelopes are sealed and the printables are cut, it's time to decorate! Simply use double-sided tape (or a glue stick) to attach the faces, mittens, and feet to each envelope then use a marker to add the recipient's name (or your "from" name) to the front of the envelope.
I can't decide which of these little characters is my favorite. I'm kind of loving the wannabe-elf snowman picketing the North Pole.
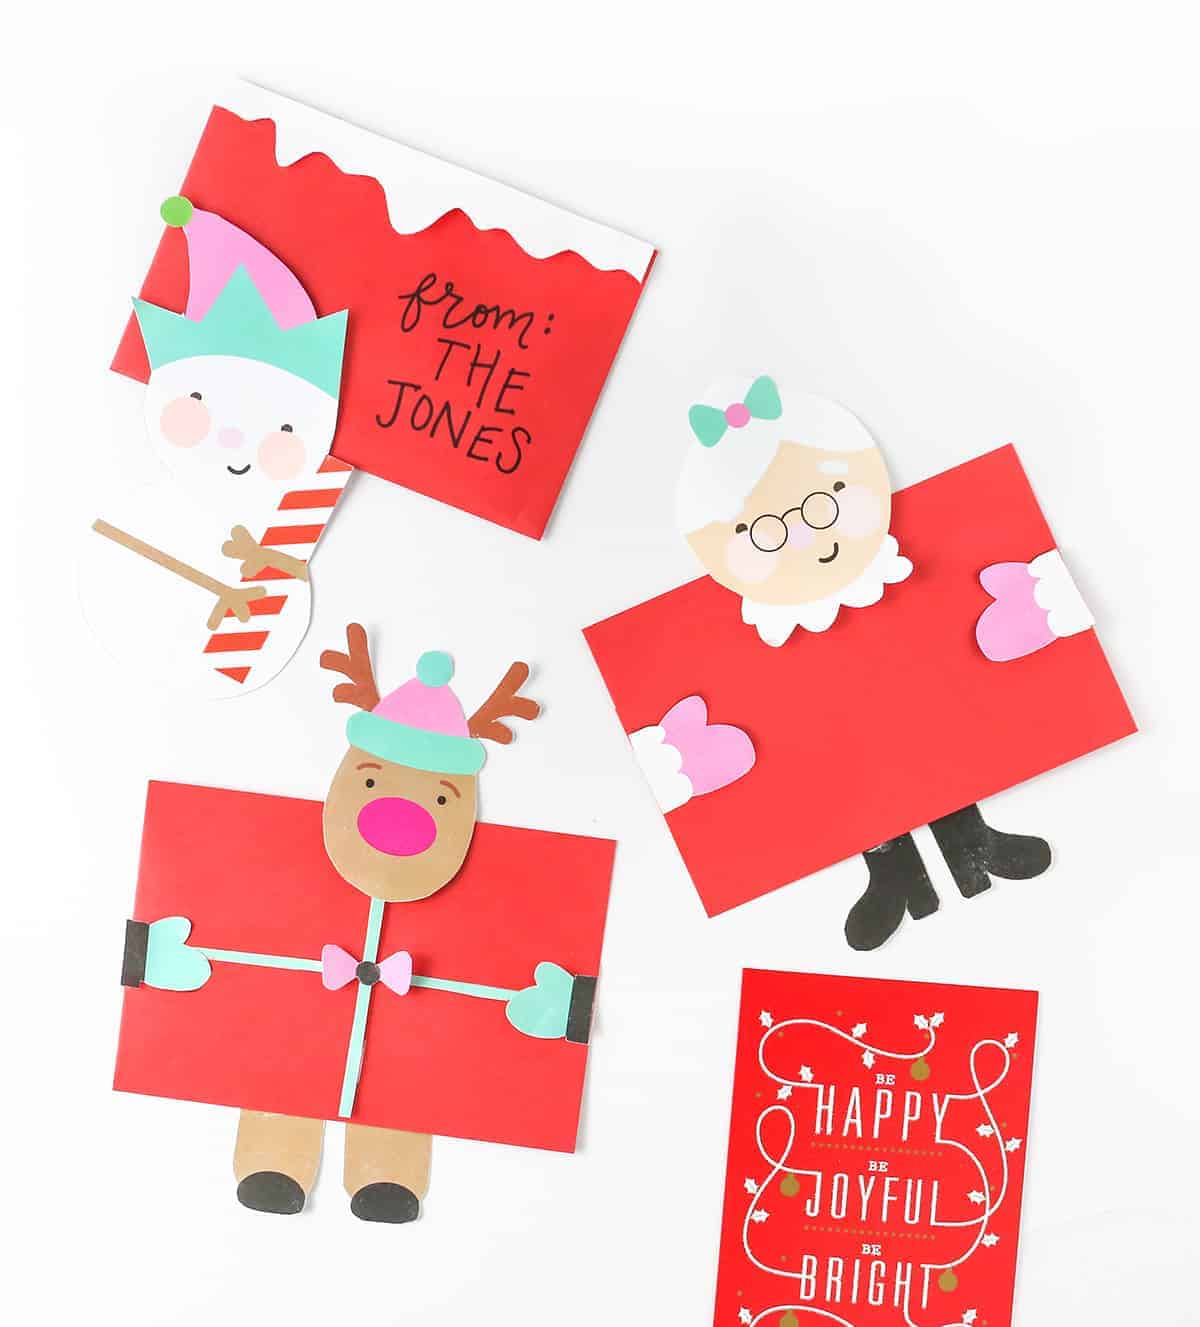
But then again, Mrs. Claus is likely the cookie master so I'd probably take her cookies over a reindeer's any day.
Step 5: Wrap Cookie Plate and Attach Card
Once the cards and envelopes are customized, wrap each plate in plastic wrap and use a piece of tape to attach the card on top.
Cookie Tray Tips:
The cookies shown here are part of our annual line-up and are a crowd favorite every time! The one trick I like to use for making cookie trays is to make the cookies smaller than you typically would (I use a one-tablespoon sized cookie scoop). This will not only allow you to get more cookies out of each batch, but the bite-size allows people to try all the different kinds without feeling like they have to break them in half. (Because seriously, what kind of animal puts half a cookie back on the tray?! LOL)

My Favorite Cookie Tray Recipes
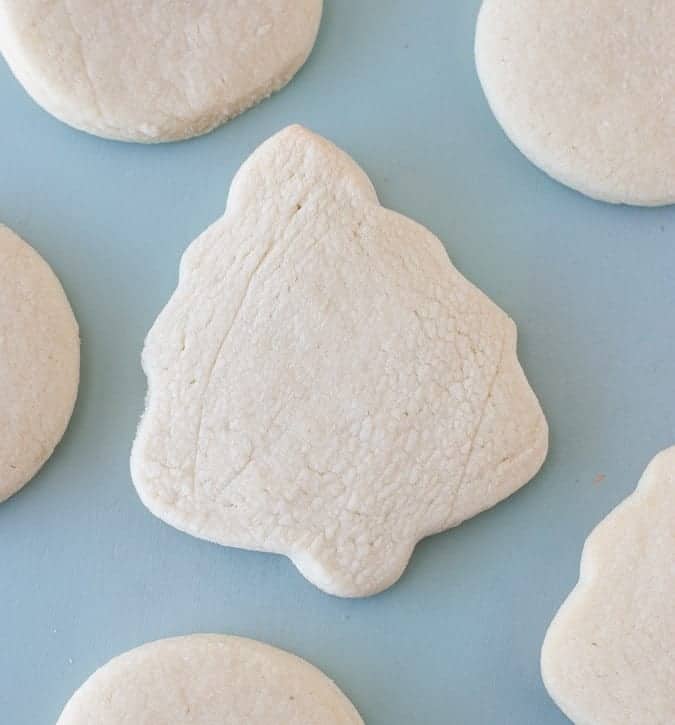
Perfect Cut Out Sugar Cookies: Use homemade royal icing or canned frosting to decorate to your favorite holiday shapes (I just used a snowflake cookie cutter to make these easy snowflakes!). Whatever frosting you use, you just want to make sure it's one that sets/hardens or you'll be left with smeared frosting in your cookie tray.
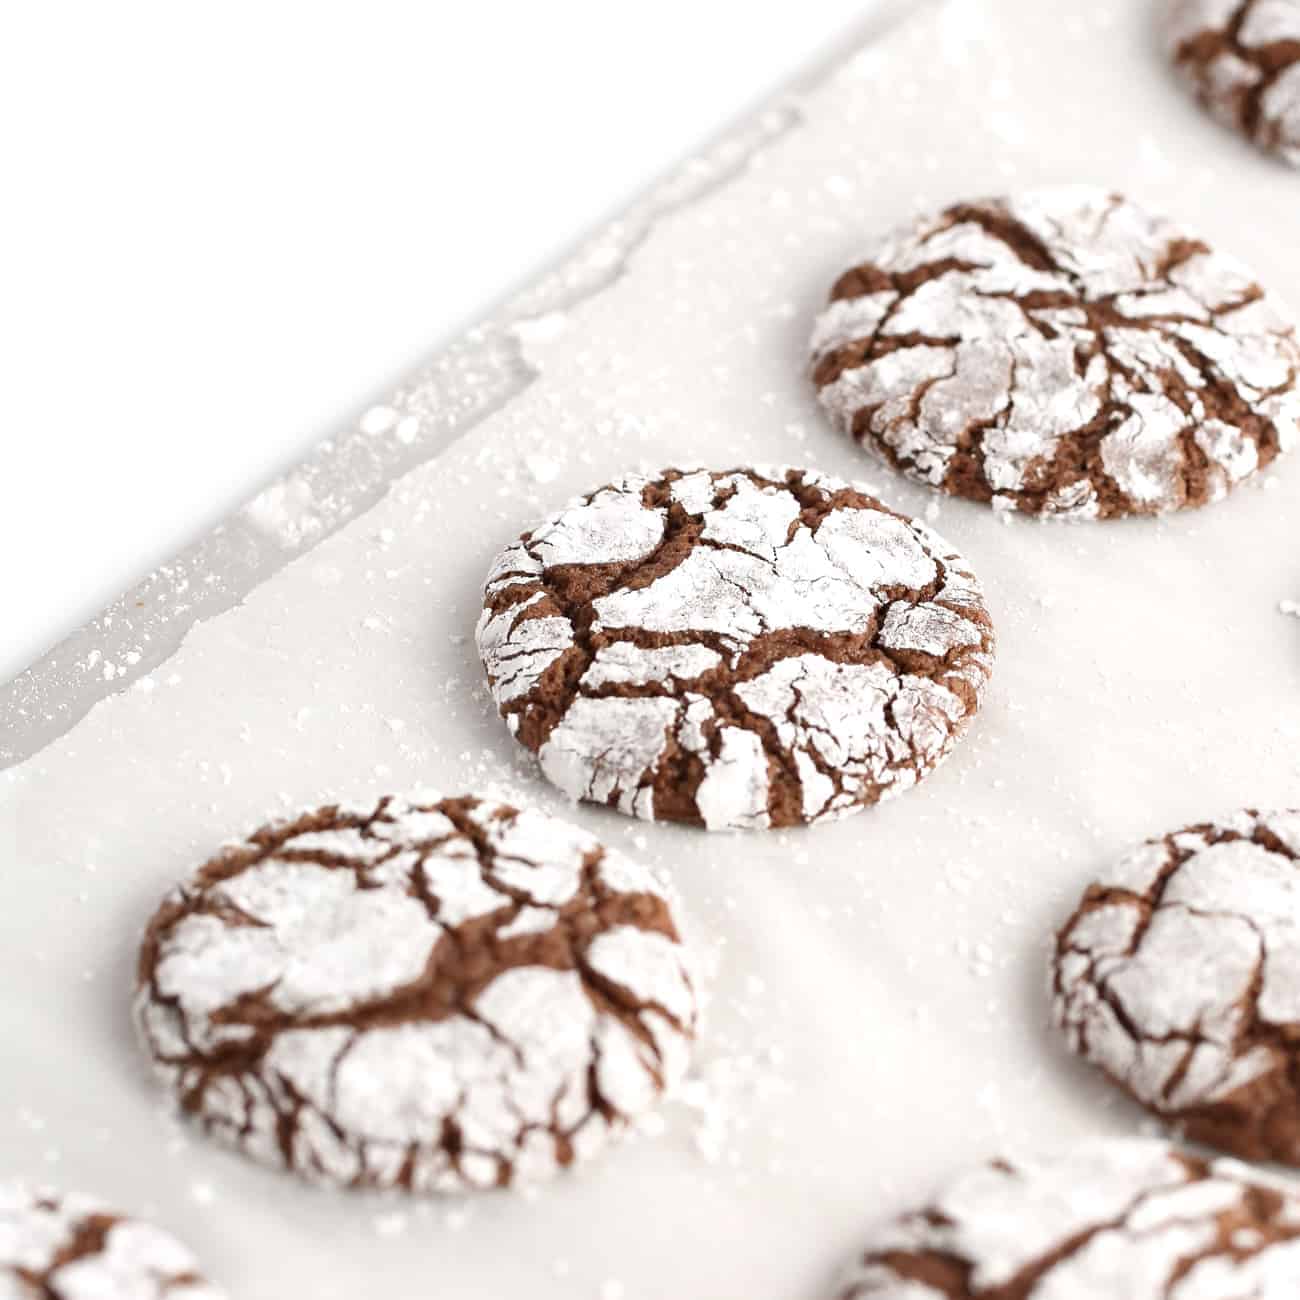
Chocolate Brownie Cookies: Unlike the traditional version of these powdered sugar cookies (that have coconut), these brownie cookies are a kid-favorite to both make and eat! The kids will have fun rolling the balls in powdered sugar and placing them on the tray to bake.
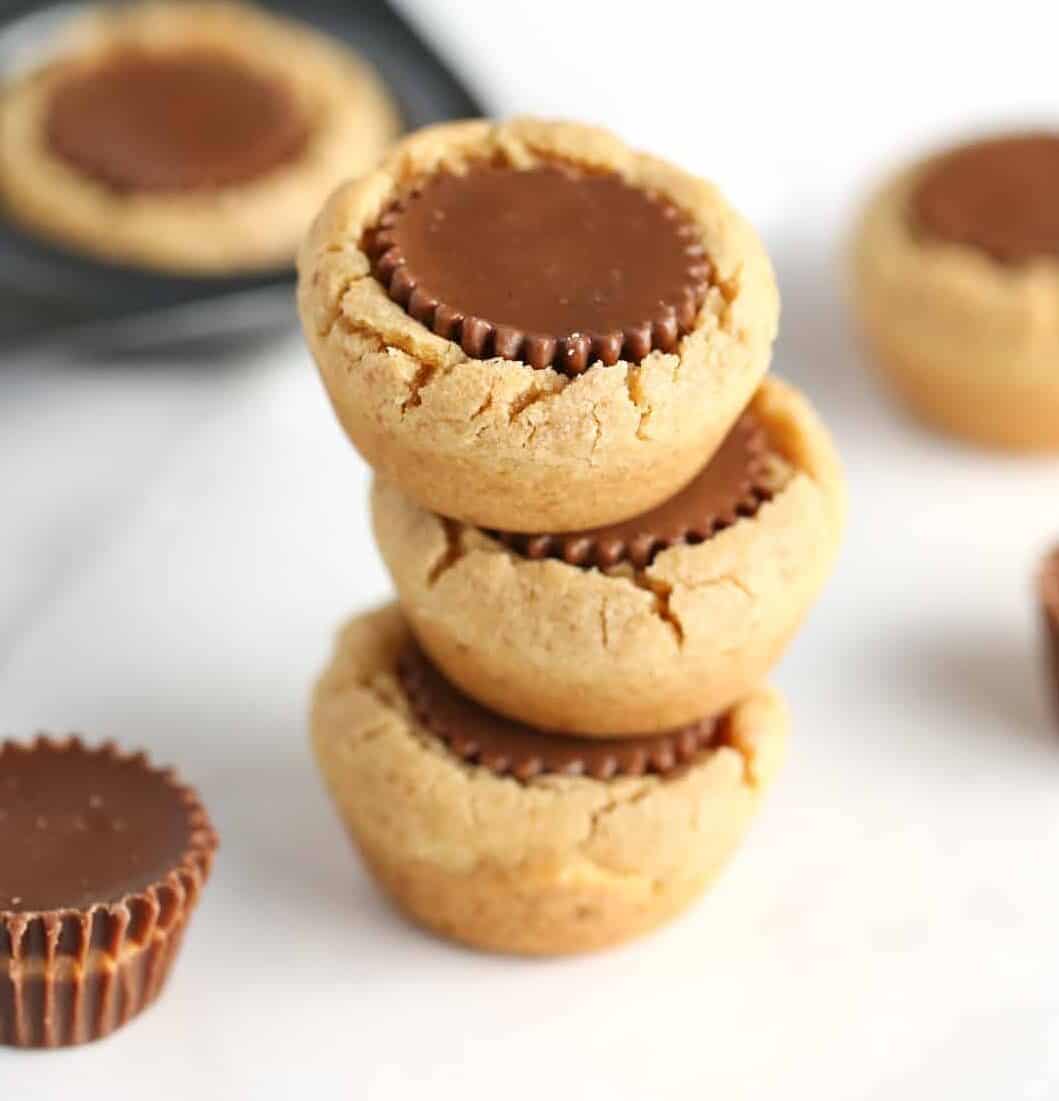
Peanut Butter Cup Cookies: These are another favorite around here that are usually the first to disappear from the cookie trays! Use a mix of regular or white chocolate peanut butter cups to add some variety to your cookie gift!
Fun, huh? Like I said earlier, my favorite part of these DIY cookie trays is that you can literally pick up everything you need at Target, bake, and gift! Get the kids involved (the older ones can help cut the printables!) and no matter how perfect their cookies look, you can guarantee that you'll have fun & thoughtful cookie tray packaging to make up for it!
When shopping for your holiday cards this year, be sure to check out the fun and festive options offered by American Greetings at Target!