
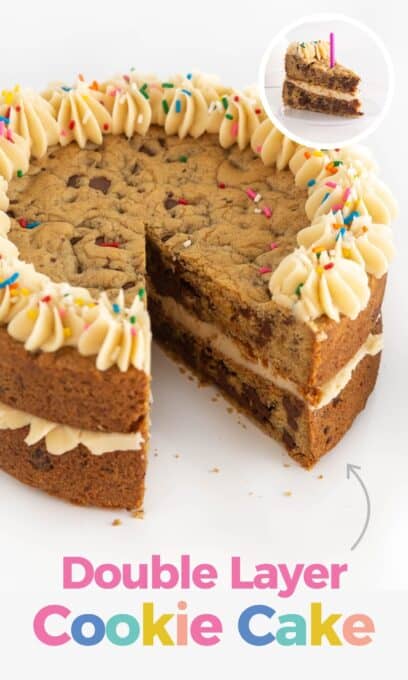
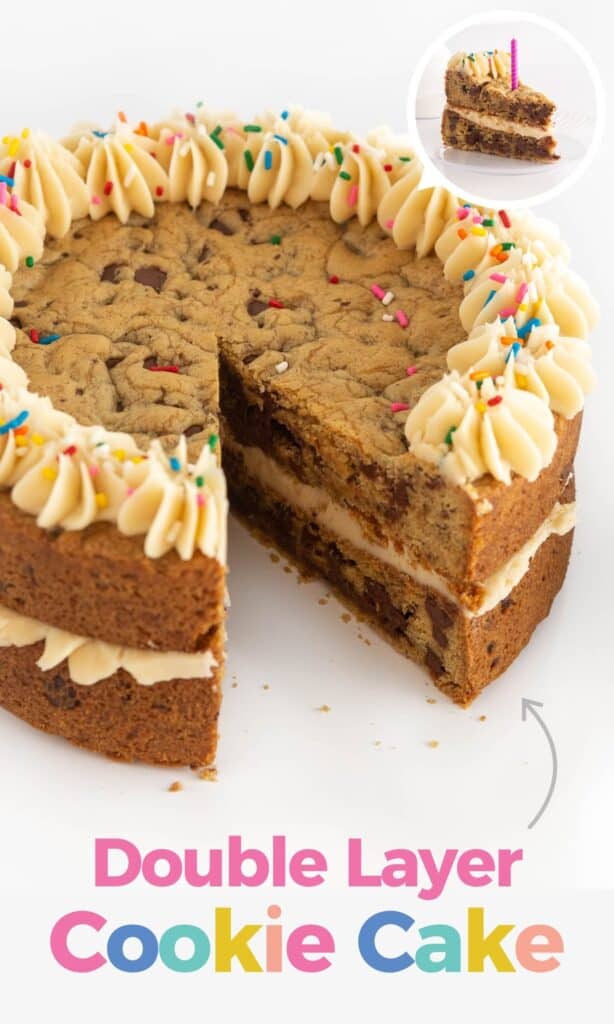
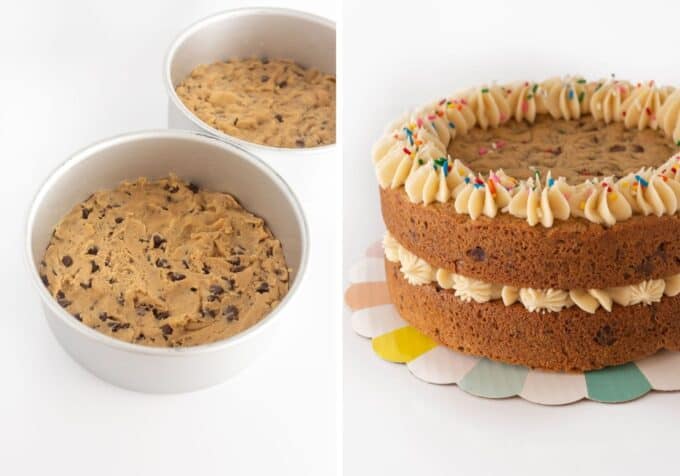
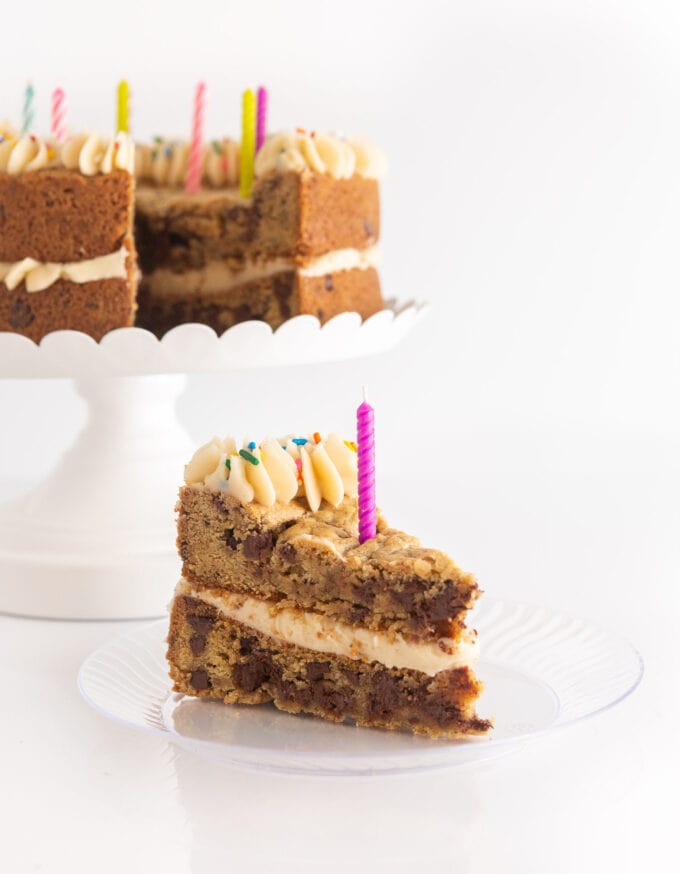
This double-layer cookie cake is thick, chewy, and easy to make at home! Filled with chocolate chips and vanilla buttercream, it's the ultimate birthday cake for cookie cake lovers!
Cookie cake is my family's go-to birthday cake of choice! While we grew up getting them from Sam's Club or Walmart, I'm here to show you that you can make homemade cookie cakes at home for half the cost!
I've adapted my chocolate chip cookie cake base for this layered cookie cake recipe, but you can turn any of my other flavors into layered cookie desserts! Between my chewy funfetti cookie cake, chewy M&M cookie cake, and red velvet cookie cake, I've got you covered!
Why I Love This Layered Cookie Cake
- Thick & chewy: I used my tried and true homemade cookie cake recipe but doubled the batch and baked it in two 8" round cake pans to make it extra thick and durable!
- Cheap to make: If you bought this at a bakery or Great American Cookie you'd likely pay at least $25! At less than half the cost, you can bake these for every birthday!
- Customizable: Fill and top it with colored frosting, sprinkles, and birthday candles!
Tips for Success
- Use parchment paper: To ensure the cookie cakes invert cleanly from the pan, I highly recommend greasing the pan and lining the bottom with parchment paper.
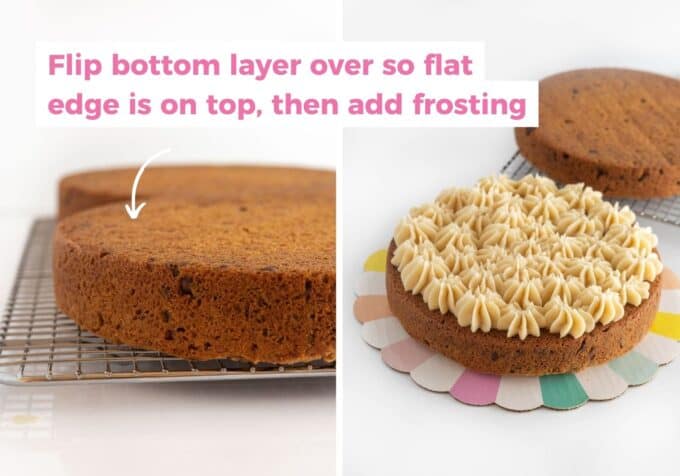
- Flip bottom layer upside down: To ensure your cake is even when stacked, flip the bottom layer upside down so that the top is totally flat.
- Bake until lightly brown: To ensure a durable cake, I do recommend baking this until the edges are golden brown. While underbaked cookies are delicious, they will lack some durablity.
- Adjust for pan sizes: While we used 8" round cake pans, you can also make different sized layered cookie cakes (see FAQ section below for tips!).
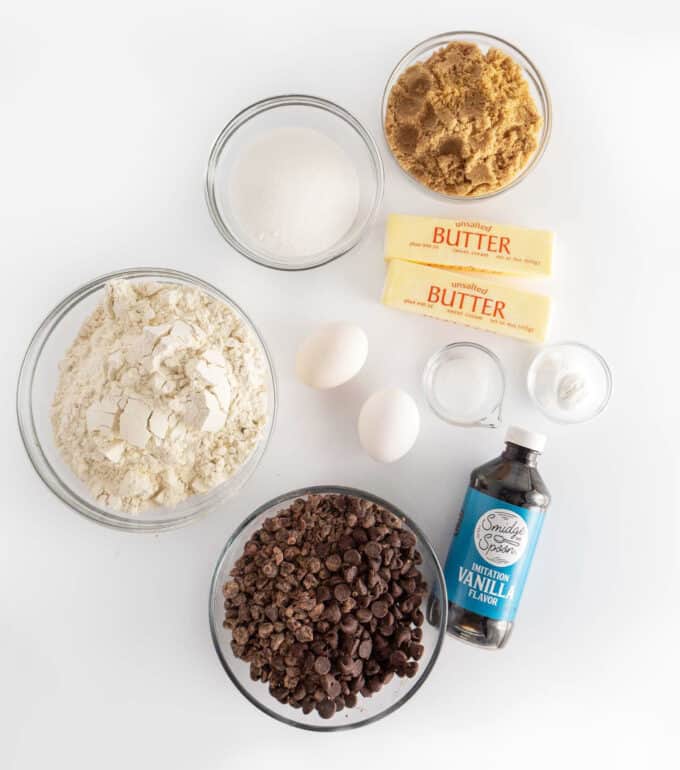
Ingredients for Layered Cookie Cake
- Cookie Cake: butter, white sugar, brown sugar, eggs, vanilla extract, baking soda, baking powder, flour, and semi-sweet chocolate chips.
- Homemade Frosting: butter, powdered sugar, vanilla extract, salt, and milk.
- Pans: (2) 8-inch cake pans (or make a DIY foil pan!)
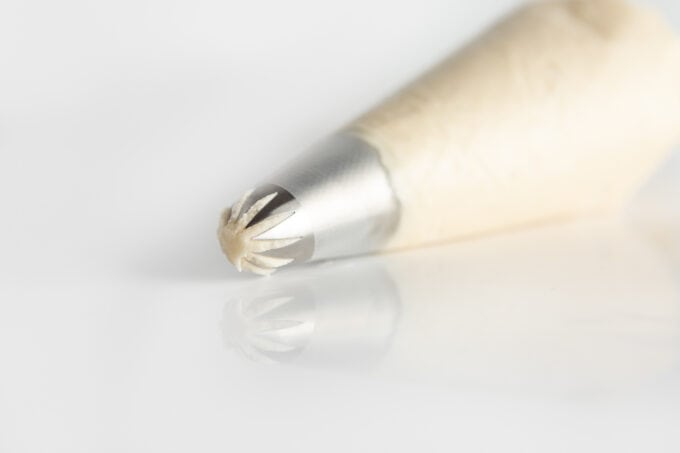
- Decoration: Large star piping tip & sprinkles
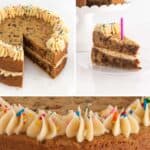
How to Make A Double Layer Cookie Cake:
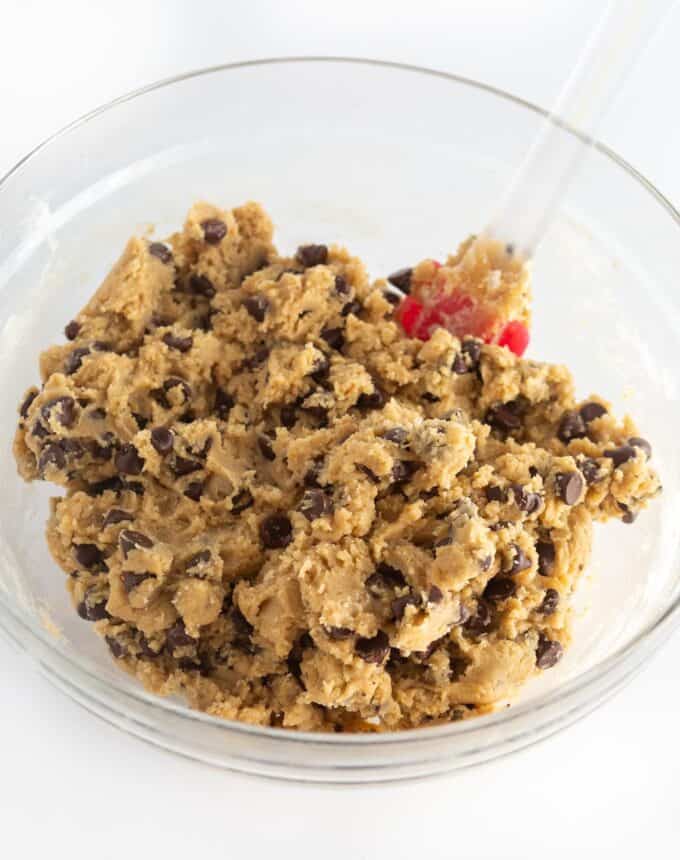
Step 1: Make Dough
In a small microwave-safe bowl, melt the butter for 30-60 seconds until fully melted (you don't want it piping hot). Transfer butter to a large mixing bowl and add in white sugar and brown sugar. Use a spatula (don't use a mixer!) to stir by hand until combined. Mix in eggs.
Next, add in baking soda, baking powder, and salt and mix again. Add flour and mix until all the flour disappears into the dough. Lastly, mix in the 1 cup of chopped chocolate chips and 1 cup of whole chocolate chips.
Tip: Work quickly, as allowing the dough to sit too long will cause it to dry out.
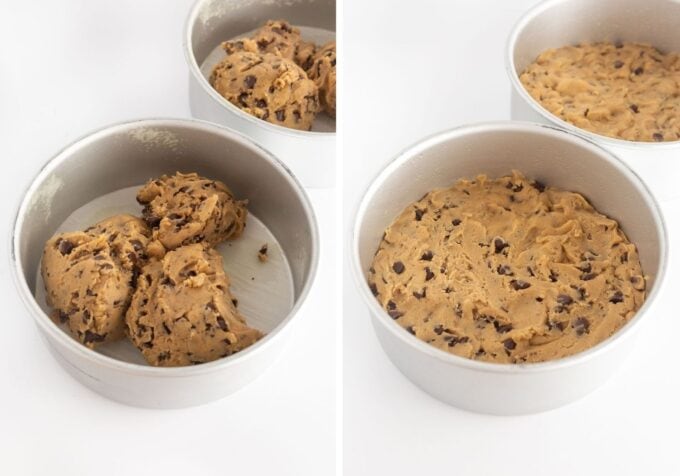
Step 2: Press Into Pan & Bake
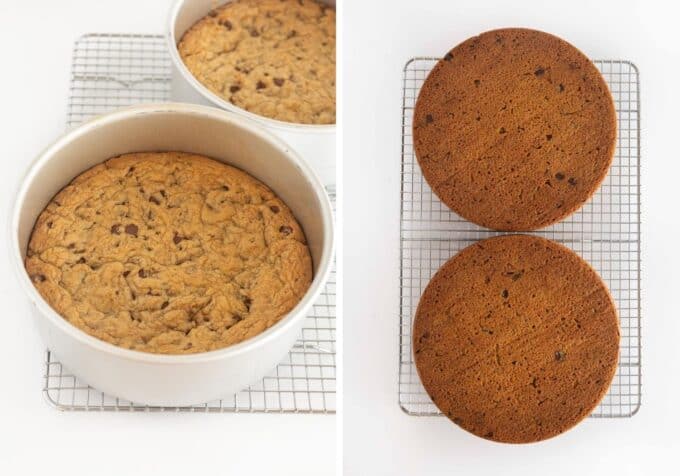
Grease two 8-inch round cake pans with nonstick cookie spray and line the bottom with parchment paper. Divide dough in half and press into each pan (this recipe makes 5 cups of dough, so it will be 2.5 cups in each pan).
Bake at 350 degrees for 22-26 minutes or until edges are lightly brown. Allow the cookie cakes to completely cool before removing from the pans.
Step 3: Remove from Pan
Once cookie cakes are fully cooled, run a knife along the edges to loosen. Using a swift motion, flip the cookie cakes upside down onto a baking sheet or cooling rack. Tap on the bottoms to release.
Step 4: Make frosting & add to bottom layer
Make buttercream frosting according to the recipe card below. Place one of the cookies upside down onto your serving platter (for the bottom layer, we want the flat edge to be on top). Spread or pipe two-thirds of the frosting onto the bottom layer.
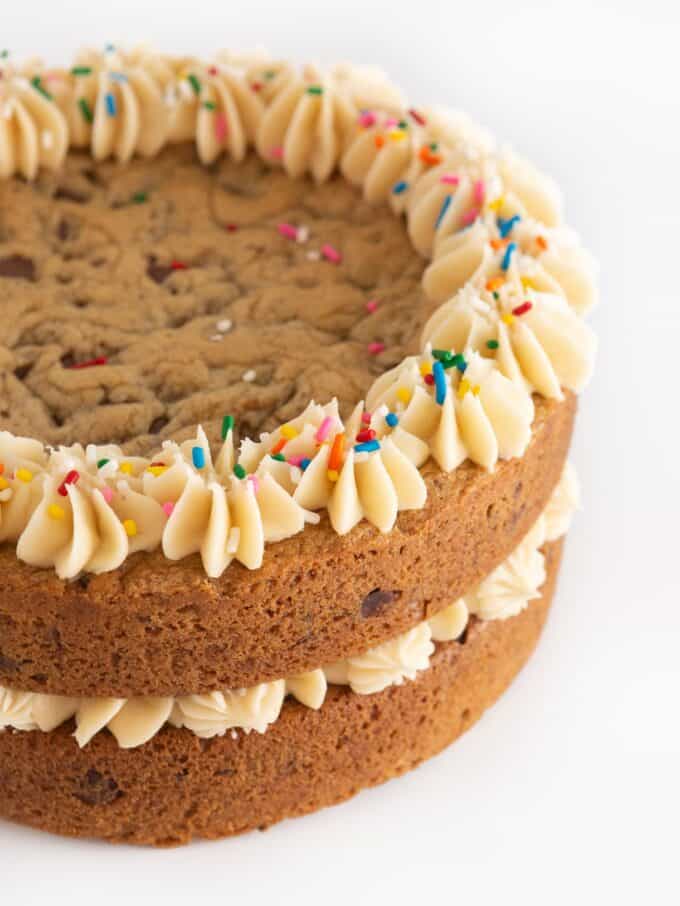
Step 5: Pipe border on top & decorate
Once smooth, place the remaining cookie on top. Use your remaining frosting and a large star piping tip to pipe around the edges, then add sprinkles.
Tip: This frosting develops a crust quickly, so be sure to add sprinkles right away.
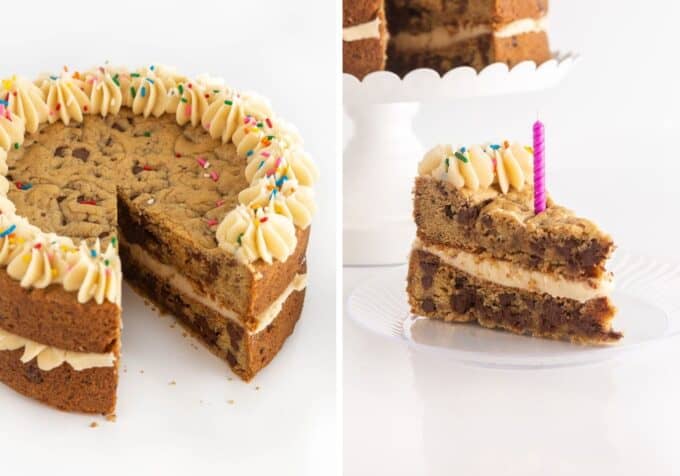
Step 6: Cut & Serve
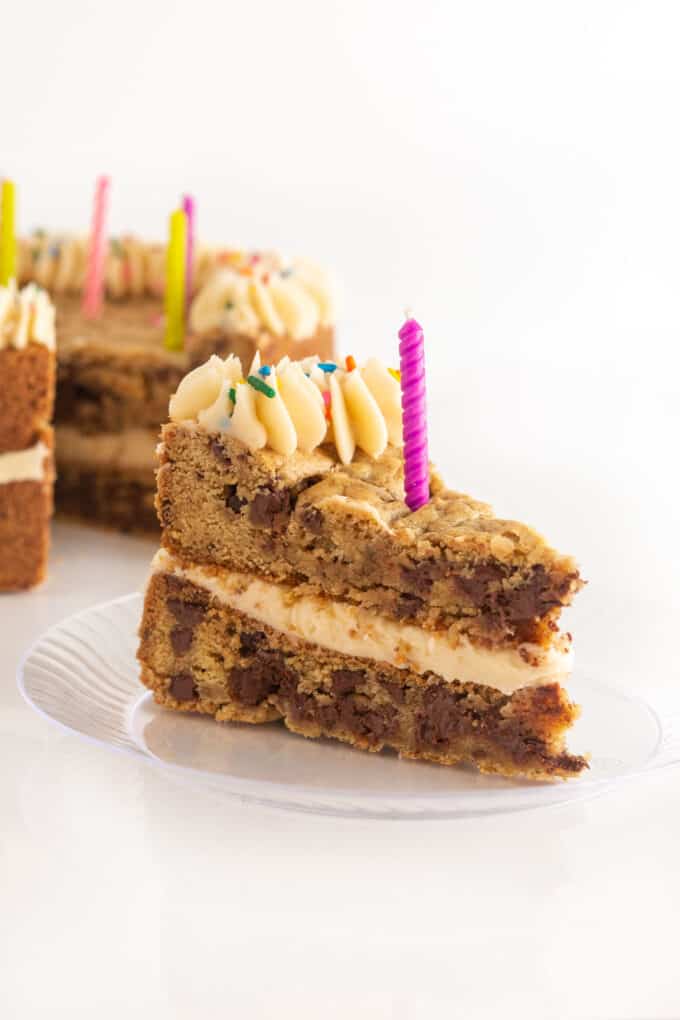
To cut, use a large serrated edge knife in a back and forth motion to carefully cut through the layered cake. I cut mine in slices but you can cut it into smaller rectangles to serve more people.
Tip: For a cleaner cut, I recommend refrigerating the cake for 30 minutes to allow the frosting to harden. Then, wipe off your knife between each cut to avoid the frosting from smearing.
Storage & Freezing Tips
Storing: After decorating, allow frosting to harden, and then carefully wrap the cookie in plastic wrap. This cookie cake is best to eat within 2 days; after that it starts to dry out.
Make-Ahead/Freezing: If you need to make this more than 3 days ahead, freeze the unfrosted, unlayered cookie cakes in plastic wrap and a ziploc bag. When ready to serve, let thaw to room temperature and decorate.
Frequently Asked Questions:
Yes, you can adjust this base recipe to different pan sizes. If you don't have a round cake pan, don't forget that you can make a DIY Cookie Cake Pan (any size!) out of aluminum foil or use a springform pan.
- 6-inch cookie cake recipe: Cut recipe in half for 2 layers. For 4 layers, keep recipe the same as below and bake in 4 pans.
- 8 or 9-inch layered cake: use recipe and amounts as directed in this post
- 12-inch round layered cake: double the amounts in my Homemade Cookie Cake Recipe
- Double-layered sheet pan cookie cake: double the dough and frosting in my Sheet Pan Cookie Cake
You sure can! This recipe would also be fun to make with any of my other cookie cake flavors below. For each of the recipes below, double the dough and triple the frosting recipes to make it a layer cookie cake.
- Chewy Funfetti Cookie Cake
- Chewy S'mores Cookie Cake
- Red Velvet Cookie Cake
- Frosted Sugar Cookie Layer Cake (a bit more fragile!)
- Chewy Gluten-Free Cookie Cake
Other Layered Cookie Cake Ideas:
- I've also seen people make layered cookie cake for weddings, which is a fun & unique change!
- To make this a 3 layer cookie cake, simply divide the dough into 3 pans and make them a bit thinner. Bake for closer to 12-14 minutes.
- To make a layered cookie cake number, bake my Sheet Pan Cookie Cake, cut it in half and then stack it into two layers. Print off a large number to use as your stencil.
- For an extra layer of chocolate, drizzle or pour chocolate ganache on top.
Double Layer Cookie Cake
Ingredients
Cookie Cake Recipe
- 1 cup unsalted butter You will be melting this
- 1 cup light brown sugar
- ½ cup granulated sugar
- 2 large eggs
- 1 tablespoon vanilla extract
- 1 teaspoon baking soda
- ½ teaspoon baking powder
- ½ teaspoon salt
- 3 cups all-purpose flour
- 2 cups semi-sweet chocolate chips (You'll be chopping 1 cup and adding the remaining 1 cup whole).
Vanilla Buttercream Frosting
- ¾ cup unsalted butter softened to room temperature
- 3 ¾ cups powdered sugar
- 1 tablespoon vanilla extract
- ¼ teaspoon salt
- 3 tablespoons milk
Instructions
- Preheat oven to 350℉.
- Place 1 cup of the semi-sweet chocolate chips in a plastic bag and use a rolling pin to break them down into small pieces (set the other 1 cup of unchopped chocolate chips aside).
- In a small microwave-safe bowl, melt the 1 cup unsalted butter i.e. 2 sticks[/adjustable] for 20-30 seconds until JUST melted.
- Add in ½ cup granulated sugar and 1 cup light brown sugar and use a spatula to stir until combined (* do not use a mixer!*). Add in 2 large eggs and 1 tablespoon vanilla extract, then mix. Next, add in 1 teaspoon baking soda, ½ teaspoon baking powder, and ½ teaspoon salt and mix again. Add in 3 cups all-purpose flour and mix until all the flour disappears into the dough.
- Add the 1 cup of chopped chocolate chips and 1 cup of whole chocolate chips into the dough and mix. Immediately proceed to pressing into pan (you don't want the dough sitting out or it will set too much with the melted butter).
- Grease (2) 8-inch round cake pans and line bottom with parchment paper (see notes below for alternate pans). Divide dough among the two pans and press into an even layer.
- Bake at 350℉ for 22-26 minutes or until cookie is lightly golden brown. While cookies are baking, make frosting.
- Allow to cool completely. Run a knife along the edges to loosen, then invert onto a cookie sheet or cooling rack.
To decorate:
- Place one of the cookies upside down onto your serving platter (for the bottom layer, we want the flat edge to be on top).
- Using a knife or large star piping tip, spread or pipe two-thirds of the frosting onto the bottom layer. Once smooth, place the remaining cookie on top (as shown in the photos in the post above). Use your remaining frosting and a large star piping tip to pipe around the edges, then add sprinkles.
To Make Frosting:
- Beat the softened ¾ cup unsalted butter i.e. 1 ½ sticks[/adjustable] butter on medium-high speed for 2-minutes until smooth. Turn the mixer to low speed then add the powdered sugar ¼ cup at a time (3 ¾ cups powdered sugar total). You may need to stop and scrape down sides. Add 1 tablespoon vanilla extract and ¼ teaspoon salt and turn mixer to medium speed. One tablespoon at a time, add milk (3 tablespoons milk total). Beat on high for 2-3 minutes until creamy and the frosting is at a good consistency to pipe. If it looks too runny, add more powdered sugar. If it looks too stiff, add a tiny bit of milk until you get to the desired consistency.This will make just enough frosting to pipe a border along the edges, as well as write a phrase on top.
Notes
Nutrition
If you make these (keyword), be sure to leave a comment below and tag me on Instagram @designeatrepeat. I LOVE seeing what you made!
What are your thoughts about using chocolate icing instead of the buttercream?
Do you have a recommended recipe? Thanks!
This recipe is so easy to make and DELICIOUS! Basically foolproof, my cake turned out perfect
Thank you so much for taking the time to leave a review, Christine! I really appreciate it!
I made this for my daughter’s birthday and it was a hit! I will be making this again!! The cookie was moist and delicious and the icing was fantastic!!
That makes me so happy to hear! Thank you so much for taking the time to leave a review, Denise! I really appreciate it!
I have a 9inch round pan, will that work?
Yes, that will work. Just bake slightly less time since they'll be thinner.
This double-layer cookie cake came out wonderful. I love to bake and this will be a cake I make on the regular for my husband and kiddos (I will change the chocolate chips and maybe even add Oreo pieces). Thank you for this recipe.
So happy to hear you enjoyed this recipe! Thank you so much for leaving a review, Laurette!
I made this for my husband's birthday and it turned out amazing! The only difference was I used salted butter for both the cake and frosting instead of unsalted butter. I just omitted adding additional salt. I also only needed to bake the cakes for 20 minutes (another reviewer mentioned overbaking so I just kept an eye out for when it looked done). Both the cake and frosting turned out great!
So happy to hear you enjoyed the recipe! Thank you so much for leaving a review, Sara! I really appreciate it!
In the beginning (where the recipe is outlined)it says cook time is 16 minutes, but in the body of the recipe it says cook time is 24 to 26 minutes. I went with 25 minutes and got a crispy cookie.
Hi Mandy - thanks for noting that! We got that fixed at the top.
Could I freeze the cakes if the bottom seems too doughy?
Yes, you could do that. You'll just want to thaw before serving or else it will be very hard to cut.
I rate the recipe as a 5 cuz it was so simple to follow and looked amazing, but it wasnt thick and chewy it was so dry. The cookie just crumbled into dry bits when i ate it. I am 1000% making it again I just wonder where I went wrong!? I followed it exaclty? Did I cook it too long? I only cooked it for 24 minutes? it tasted like too much flour but I used the exact amount of flour i tripled checked myself?
Hmm! It definitely sounds like it baked too long. What color/type of pans did you use? Also, do you use an internal oven thermometer? Ovens typically run 25 degrees hot, so that could definitely be a factor. Next time I would bake it for 5 fewer minutes and see how it looks. With these, it's best to take them out when it's lightly brown even if the centers don't look fully set, as it will set while it's cooling.
Would any measurements need to be changed if using browned butter?
Since brown butter boils out some of the liquid when heating, just be sure to use the full amount it states (so brown more butter than the recipe asks for, then measure). Or reduce the flour just a tad bit!
Thank you! Made this yesterday, was quick and easy and went over very well.
That's awesome to hear! Thank you so much for leaving a review, Precious!
This recipe is so so good! I made it for my husbands birthday. It was even better the second day.
So glad that you found the recipe delicious!
Thank you for taking the time to leave a review Lindsey.
This turned out amazing! Absolutely delicious. Baked just right, cut super easily. I made it the day before and even frosted it—still perfect!
So glad you loved it, Aimee! Thanks so much for taking the time to leave a review!