
You don't even need an ice cream maker OR stovetop to make this amazing, rich, and creamy chocolate no-churn ice cream. All you need is 4 ingredients, a hand mixer to whip the cream, and a spatula (and hand!) to stir it all together. It's not only a fun summer activity for kids, but tastes just like you bought a specialty chocolate ice cream from a shop (for much cheaper!).
I've have had a hate-hate relationship over the years with my ice cream maker. Between losing the parts to having to plan 48 hours in advance to freeze the barrel (umm..I want ice cream NOW), to having to cook the custard base on the stove, to having it not "churn" properly and turn into a soupy mess, I decided it was time to tackle that no-churn ice cream life.
I remember seeing the concept of no-churn in magazines and cookbooks while I was younger but always thought no-churn meant no-good-flavor-or-texture. But little did I know that no-churn would be even better and creamier and easier and less messy and perfect than any ice cream I've ever made with an electric ice cream maker.
And from coming from a ice cream snob who is very picky about the quality taste of chocolate, trust me when I say that this is the perfect indulgence. It might not win any awards for diet ice cream or be something you keep fully stashed (as that would be #dangerous), but the splurge is worth it for a easy summer treat and activity with the kids.
What is no-churn ice cream?
No-churn ice cream is a quick & easy way to make creamy, decadent chocolate without needing equipment. The pros are:
- No Cooking Needed: Instead of using a standard custard base that you have to cook on the stove and cool before churning, no-churn ice cream uses a sweetened condensed base and whipped cream.
- No Ice Cream Maker Needed: You can make this simply by stirring the ingredients in a bowl.
What You Need to Make Easy Chocolate No-Churn Ice Cream
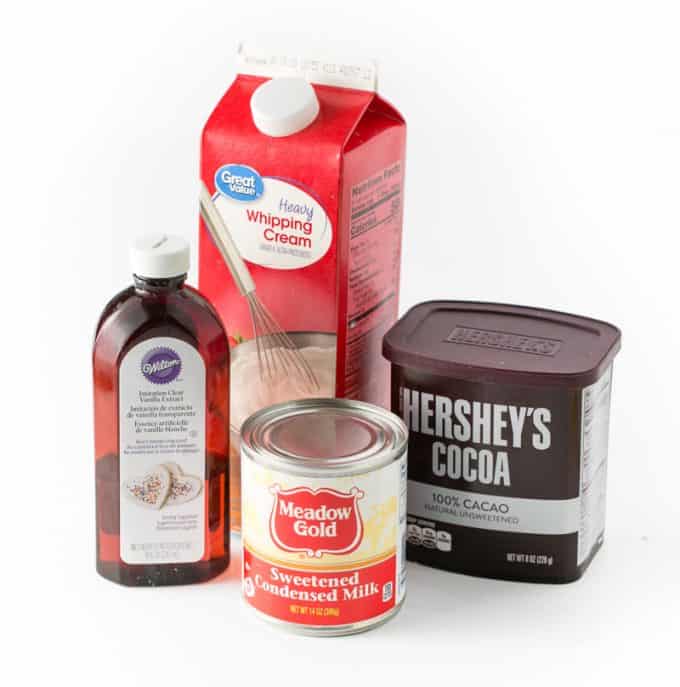
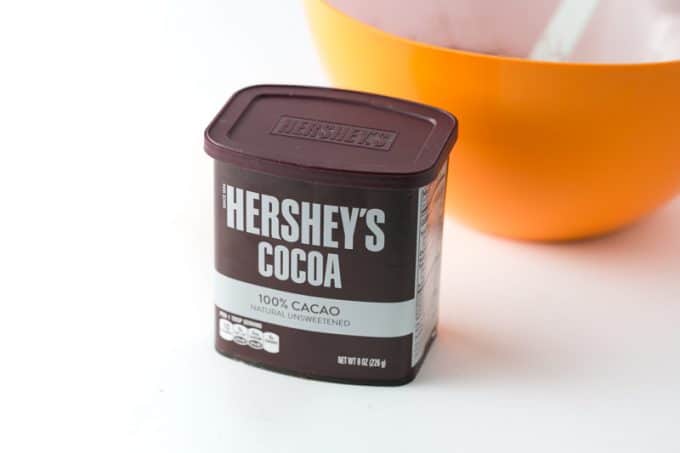
- Unsweetened Cocoa Powder (I prefer Hershey brand)
- Sweetened Condensed Milk
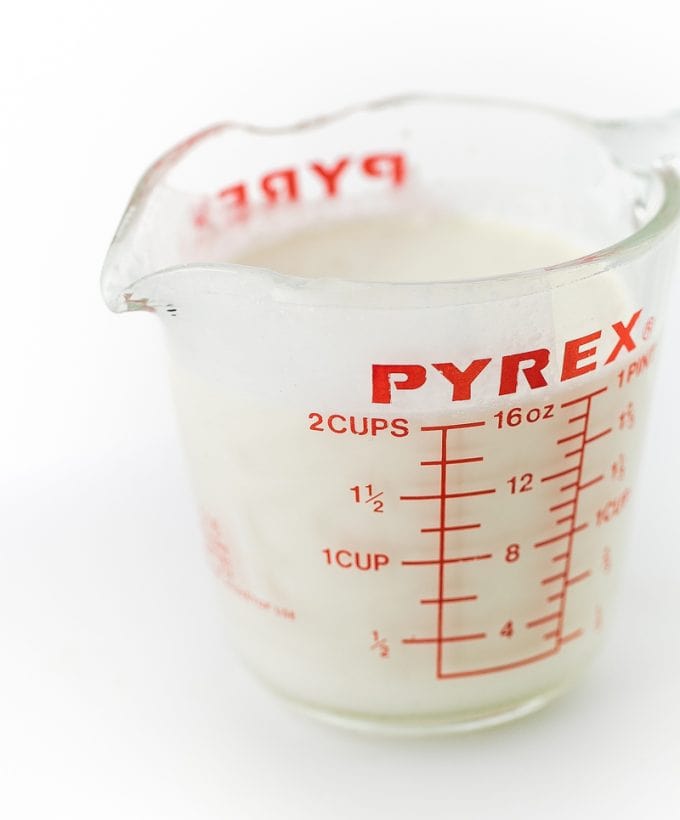
- Heavy Whipping Cream
- Vanilla Extract
How to Make Easy Chocolate No-Churn Ice Cream
Step 1: Whip The Cream
In a large bowl, use an electric mixer to whip the heavy cream until you get stiff peaks. As in, when you lift up the beater, the whipped cream stands at attention and doesn't immediately "melt" back in. Do not overbeat - if your whipped cream starts to look "chunky" then stop the mixer immediately (or you'll end up with butter!).
Tip: If using a Kitchenaid stand mixer, my cream (straight from the fridge) was the perfect consistency when beat with the whisk attachment on Level 4 speed for 3-3.5 minutes.
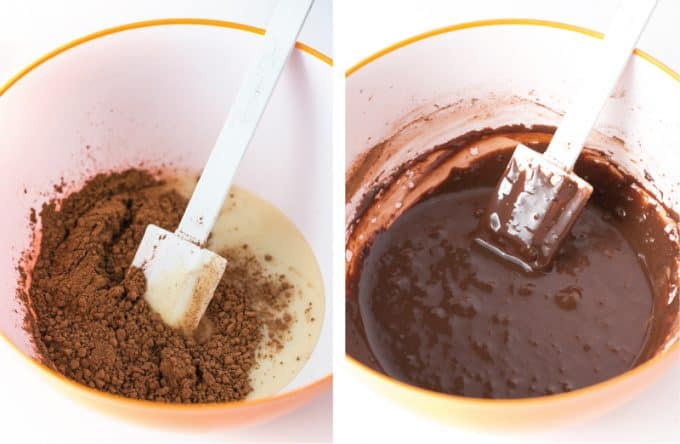
Step 2: Mix Together Other Ingredients
In a separate bowl, mix together the cocoa powder, can of sweetened condensed milk, and vanilla extract. I find the Hershey Unsweetened brand to be fabulous in terms of getting a rich chocolate flavor.
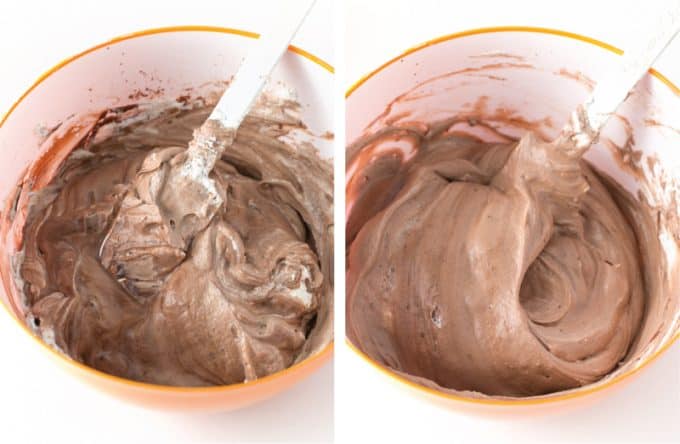
Step 3: Fold In Cream
Using a spatula (not a mixer!), gently fold the whipped cream into the chocolate mixture until it is all combined. You do not want to use an electric mixer or stir this fast or you will lose some of the light texture.
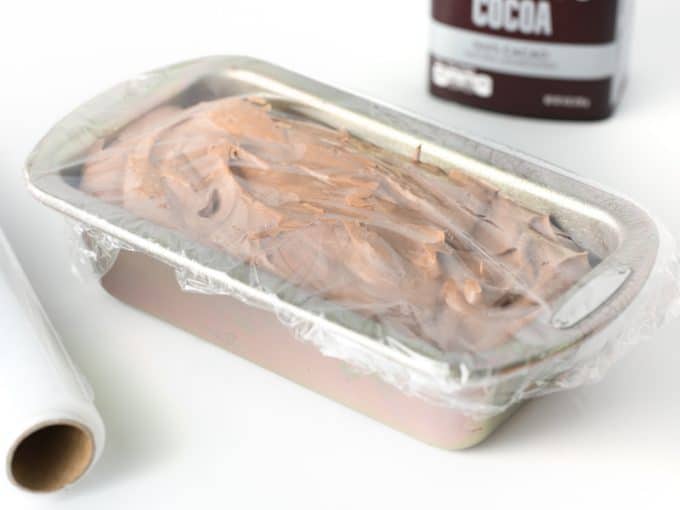
Step 4: Pour In Loaf Pan And Freeze
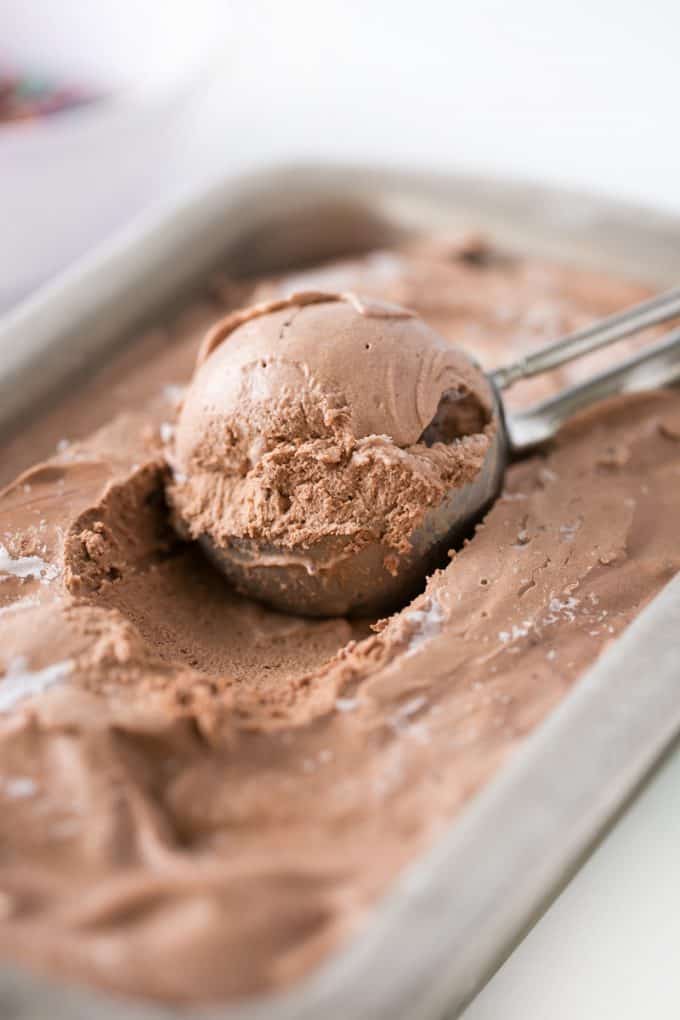
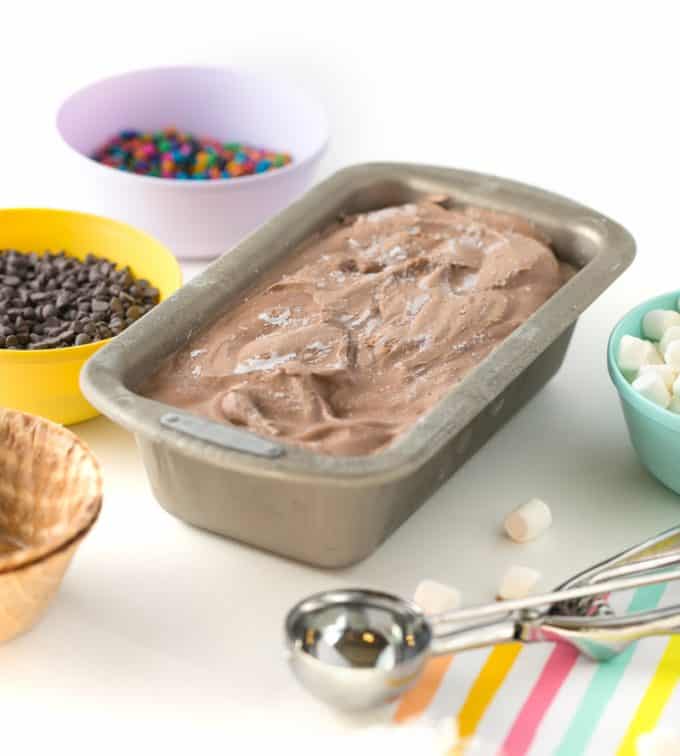
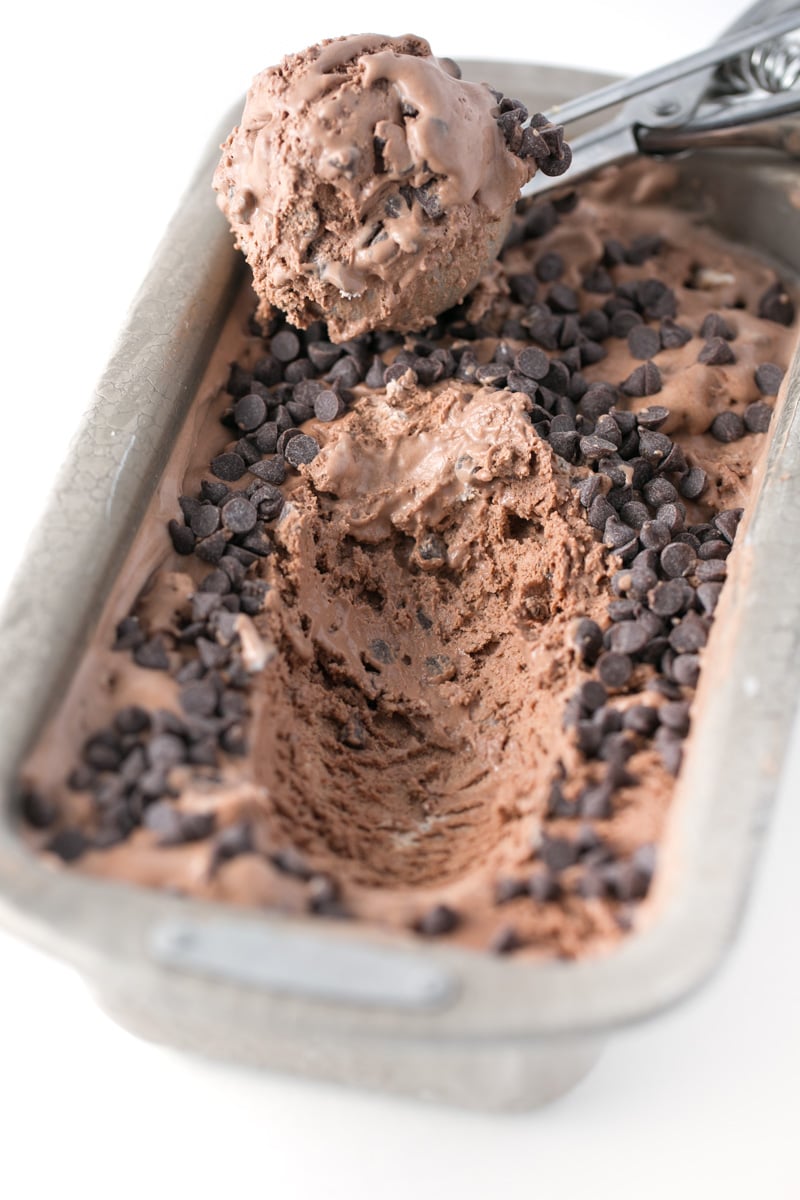
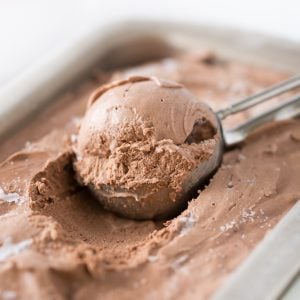
Pour the mixture into a 6 x 8" sized metal loaf pan, cover with plastic wrap, and freeze for 6-8 hours (or overnight). If desired, put a layer of mini chocolate chips on top.
Step 5: Scoop, Top and Enjoy!
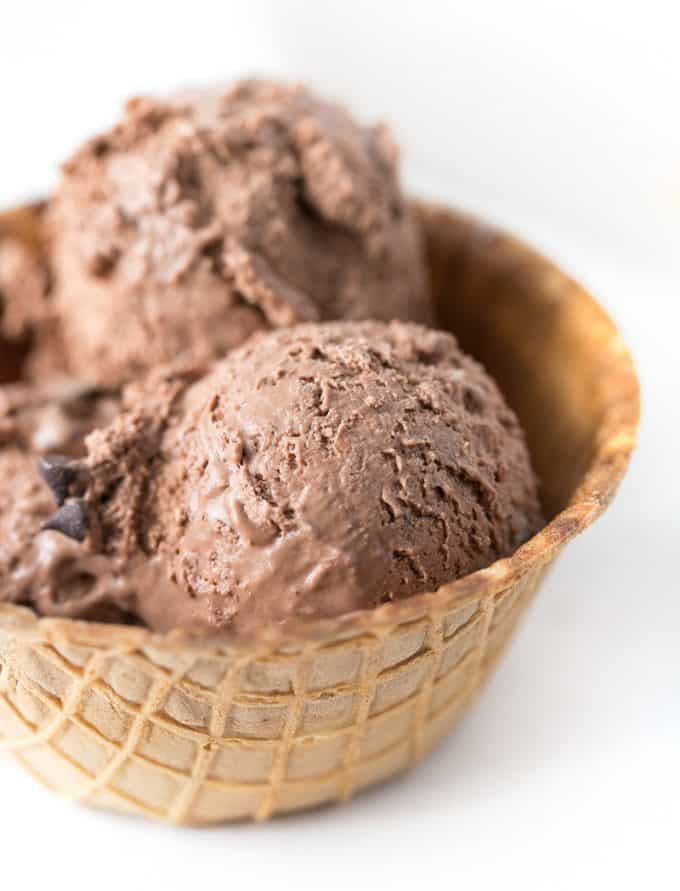
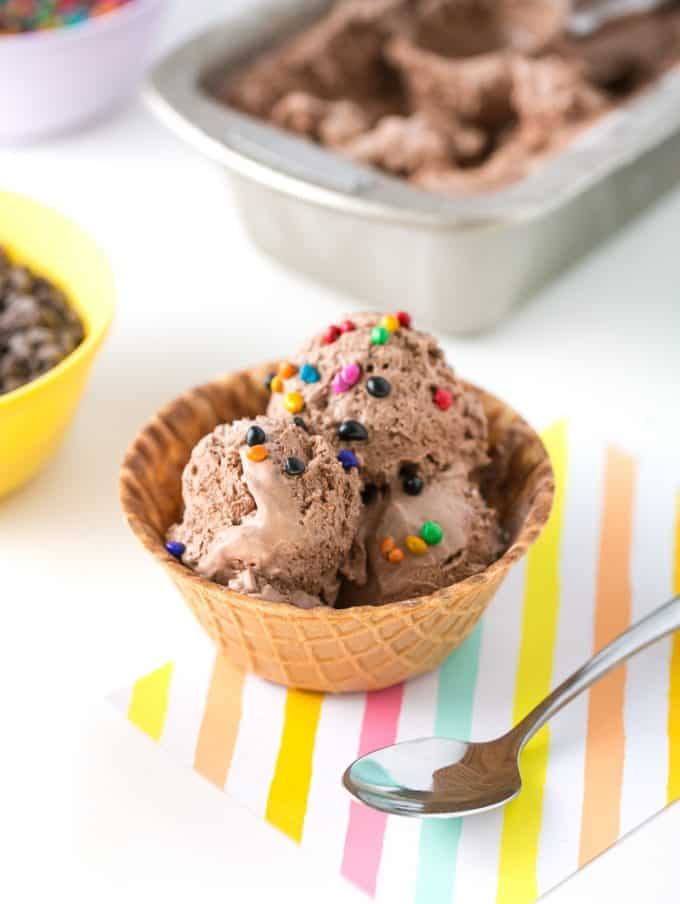
Mix in your favorite candy add-ins like chocolate chips, sprinkles, or marshmallows and enjoy! This no-churn ice cream will melt quicker than most store-bought brands, so eat it quickly if you're putting it in a cone!
Ice Cream Topping & Mix-In Ideas
- Mini Chocolate Chips
- Marshmallows
- Sprinkles
- Homemade Caramel Sauce (<so good!)
- Reeses cups or chunks of peanut butter cookies
- Whipped Cream
- Chocolate Sauce
- Chopped Nuts
Frequently Asked Questions:
What brand of cocoa powder is best?
I prefer Hershey's unsweetened, as this produces a rich chocolate flavor. I probably wouldn't recommend "Hershey's Dark" as the regular kind is plenty rich, but might be worth a try if you are a mega chocolate fan!
Does no-churn ice cream taste good?
Yes, so unbelievably good (and I'm a ice cream snob). I was hesitant on making no-churn because I thought the taste and texture would be sacrificed but it's truly so rich, creamy, and delicious.
How long to freeze no-churn ice cream?
This will typically be frozen enough to scoop within 6-8 hours but I prefer it overnight, as it will become even more stiff and scoopable.
What containers to use for no-churn ice cream?
A 6 x 8" metal loaf pan will help it freeze faster, but you can also store it in a plastic container with a lid for more long-term storage.
Easy No-Churn Chocolate Ice Cream
Ingredients
⭐️ Before you begin! If you make this, will you do me a huge favor afterwards and leave a review and rating letting me know how you liked this recipe? This helps my small business thrive so I can continue providing free recipes and high-quality content for you.
Instructions
- In a large bowl, use an electric mixer to whip the 2 cups heavy whipping cream until you get stiff peaks. As in, when you lift up the beater, the whipped cream stands at attention and doesn't immediately "melt" back in. Do not overbeat - if your whipped cream starts to look "chunky" then stop the mixer immediately (or you'll end up with butter!).Tip: If using a Kitchenaid stand mixer, my cream (straight from the fridge) was the perfect consistency when beat with the whisk attachment on Level 4 speed for 3-3.5 minutes.
- In a separate bowl, mix together the ½ cup unsweetened cocoa powder, 1 can sweetened condensed milk, and 1 ½ teaspoons vanilla extract. I find the Hershey Unsweetened brand to be fabulous in terms of getting a rich chocolate flavor.
- Using a spatula (not a mixer!), gently fold the whipped cream into the chocolate mixture until it is all combined. You do not want to use a electric mixer or stir this fast or you will lose some of the light texture.
- Pour the mixture into a 8x5" sized metal pan and freeze for 6-8 hours (or overnight).
If I could give this a 10, I would!!! I put 8 miniature peanut butter cups in the food processor and sprinkled them on top before freezing, and this was THE most delicious ice cream EVER !!!! Now my friends are begging me to make it for them EVERY DAY. I've made lots of no churn ice cream and this is the best by far. Thank you!!
That peanut butter cup addition sounds AMAZING, Jacki, so glad everyone loves it! 😍
Let me know how you guys like it!!