
It's been over 3 years since I last shared my photo setup and while a lot has stayed the same, a lot has also changed. Not only have I added a few things to my gear, but I've also moved twice since the last set up I posted. With each apartment I've lived in, I've had a huge adjustment period of figuring out the lighting in terms of what time of days the light is the best, what window to shoot in front of, etc. It's been a learning curve, but I think I'm getting to the point of figuring out the lighting in my current place. Still not as great as the light from this place, but better than I had in my last dark dungeon apartment!
Camera
Shortly after the last post, I invested in a new camera, a Canon EOS 5D Mark III . My previous camera, the Canon Rebel XSi served me a good 10ish years before it went into retirement and a mighty good camera it was. It was still fully functioning when I switched it out, but I decided it was time to upgrade because I was no longer getting the quality of images I needed from it. I don't know all the technical terms, but I compared the photos taken on both cameras using the same lens, and the Rebel photos were quite a bit more pixelated. And at the time, I was doing quite a bit of client styling work and I needed the images be super crisp when zoomed in.
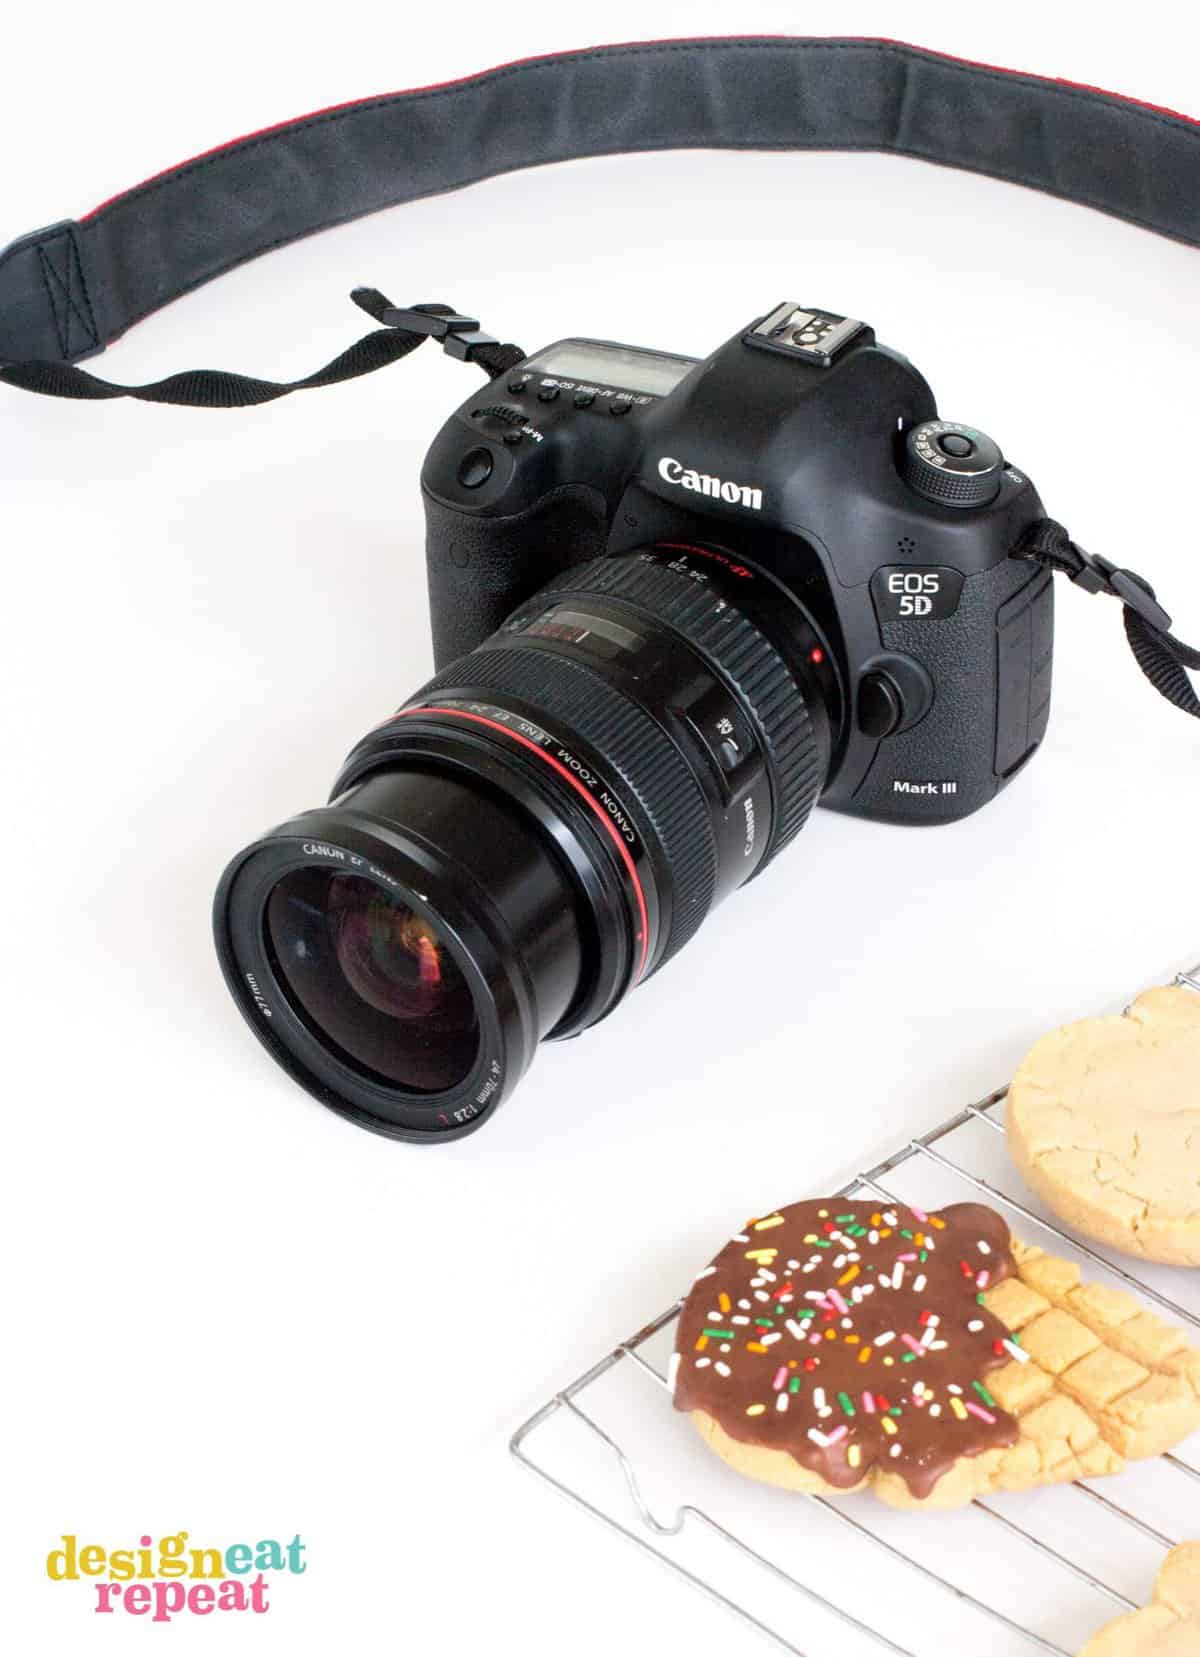
At the time I wrote the last post, I had just gotten a 24-70mm 2.8L lens off of Craigslist and I'm happy to report that I'm still using that lens today. I can't say enough great things about this lens, in that it has great zoom capabilities making it ideal for large overhead shots. The problem with my original was that it didn't zoom, so if I wanted to shoot overhead I would basically have to glue the camera to the ceiling (which for the record I never did).
The 50mm not only covers the wide area, but it also has a lot of focus points to make everything in the photo pretty sharp. (Note that the camera you see on the tripod in this post show my Canon Rebel with 50mm 1.4 only because I needed my Mark III & 1.4 lens to actually shoot these photos!)
My only issue now is that I feel like it's time for a professional camera & lens cleaning and I'm putting it off. (If anyone knows a great service in the Salt Lake area, please let me know! I'm scared to drop my baby off to a stranger!)
Lighting
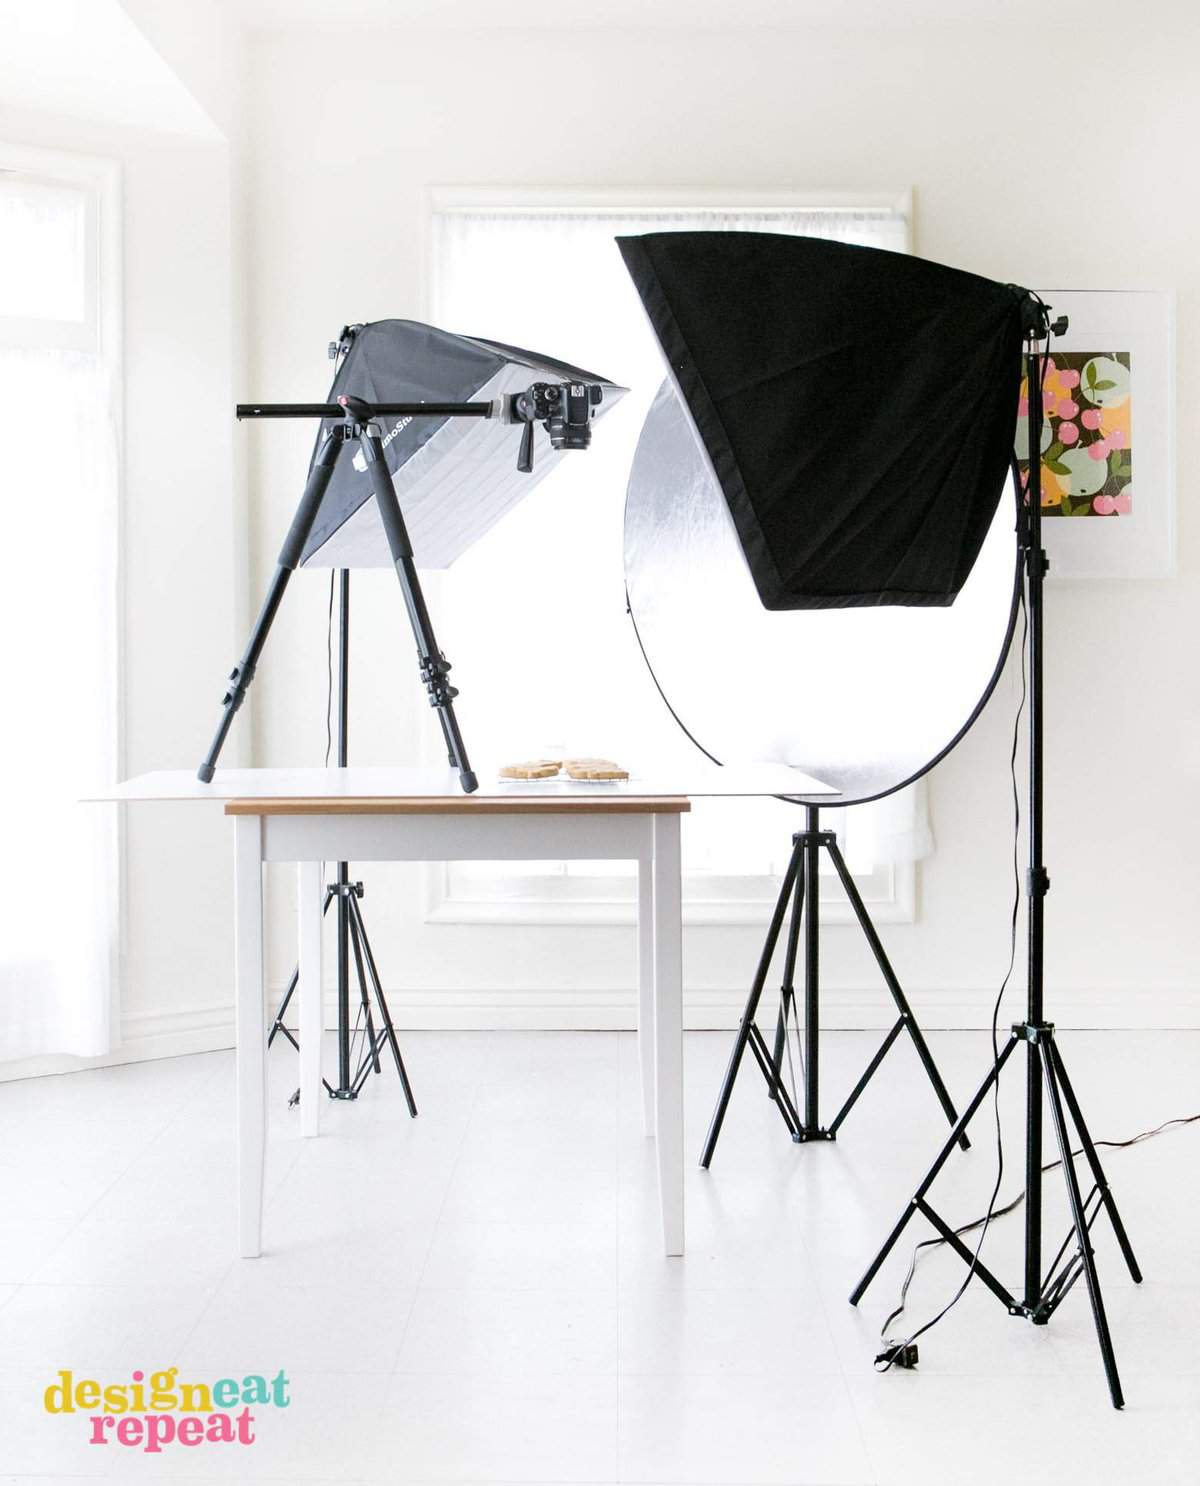
One of the biggest updates I've made recently is investing in some artificial lighting. I got these a few months back when I was forced to shoot at night or on weekends, so the artificial soft-boxes really helped for shoots I couldn't do during the daylight. Now that I work from home full-time, I try to shoot with natural light (if possible) so I'm mainly using these soft-boxes to boost the light on the more overcast days.
I got these two LimoStudio soft-box lights from Amazon (bulbs included!). My one complaint with them is that the stands are pretty lightweight, making them pretty easy to knock right on over (which I've done way too many times already). So if you get them, I'd recommend somehow strapping a weighted object to the bottom so they aren't so prone to fall over.
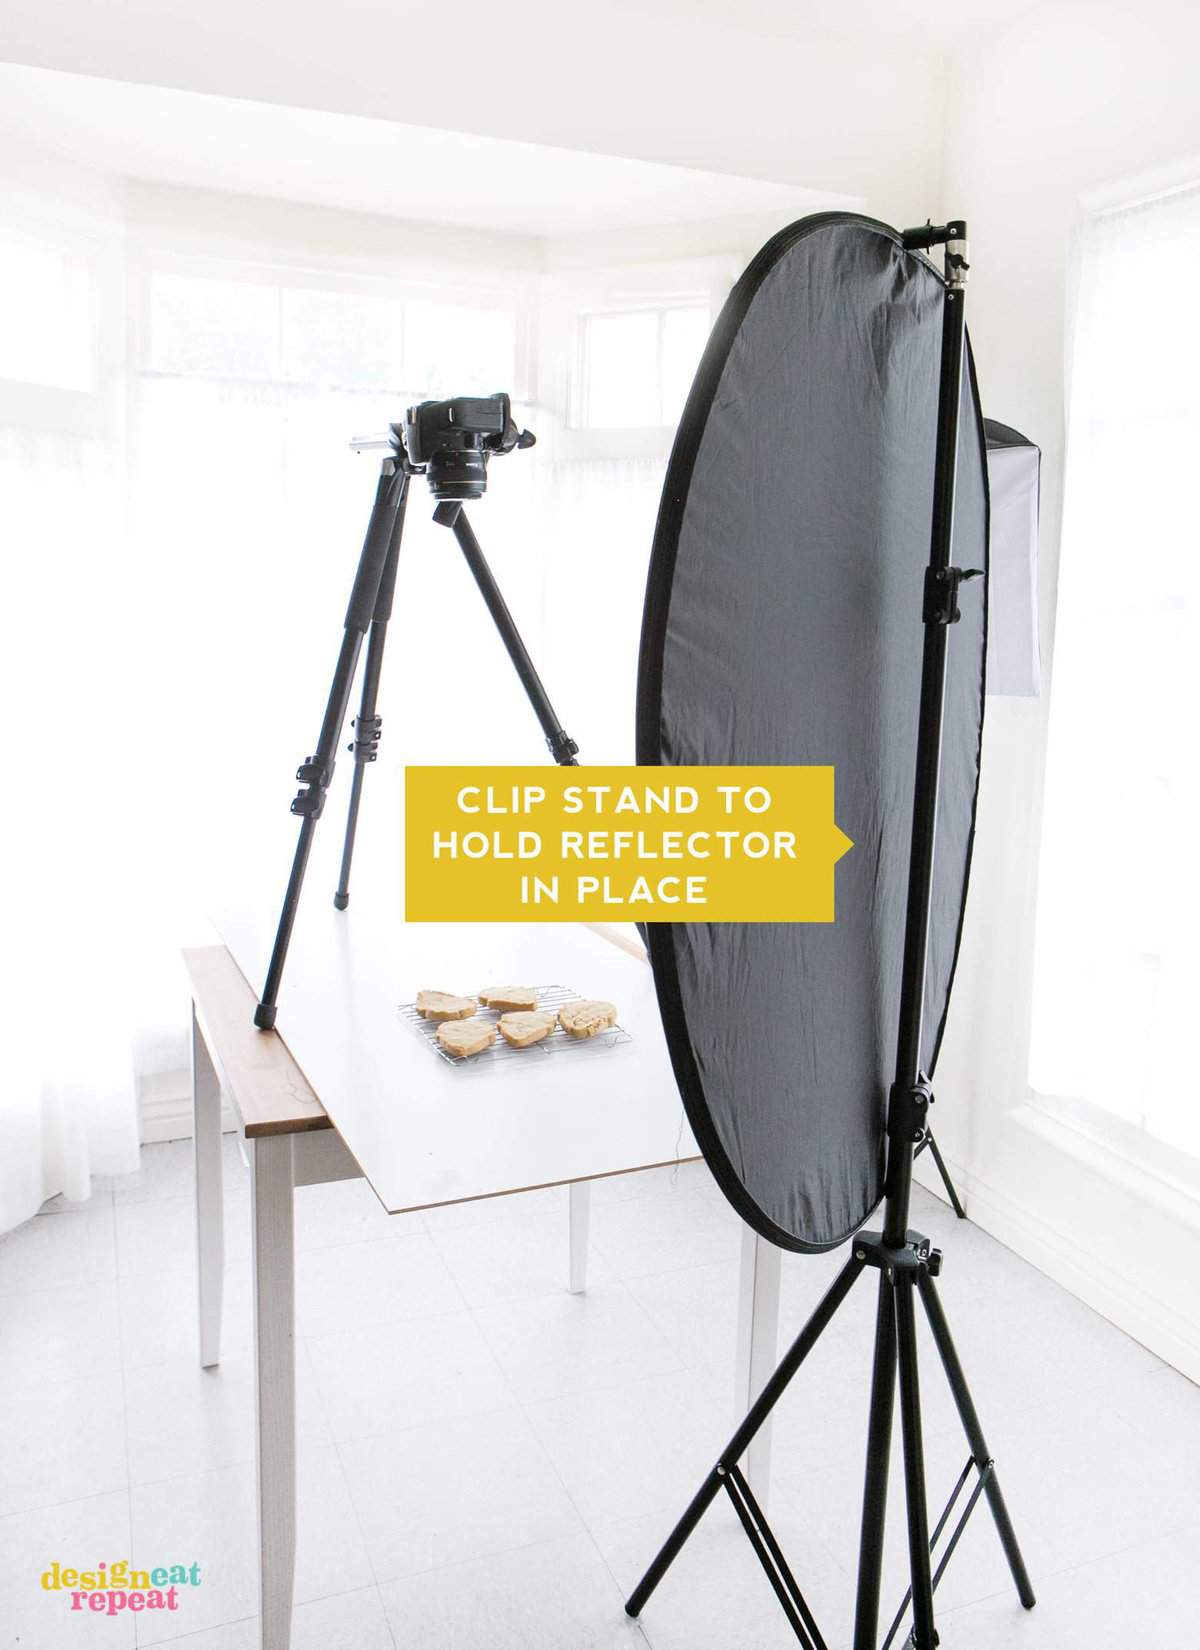
The other thing I invested in lately is an adjustable clip stand for my disc light reflector. It's actually quite embarrassing what kind of yoga type poses I was doing before to try to simultaneously hold the reflector and shoot. I tried balancing it on a chair, tying it to the back of my barstool with a string, pressing it against the wall - but I would just get so frustrated with it during shoots that I would stop using it. (Which I always regretted come editing time when there were harsh shadows!)
I actually get frustrated just thinking about it and it's easily the best $24 I've spent this year. Again, it's a little lightweight but I don't mind it as much for this because even if it does fall over, it's not like huge glass lightbulbs are going to shatter onto my kitchen floor.
Tripod
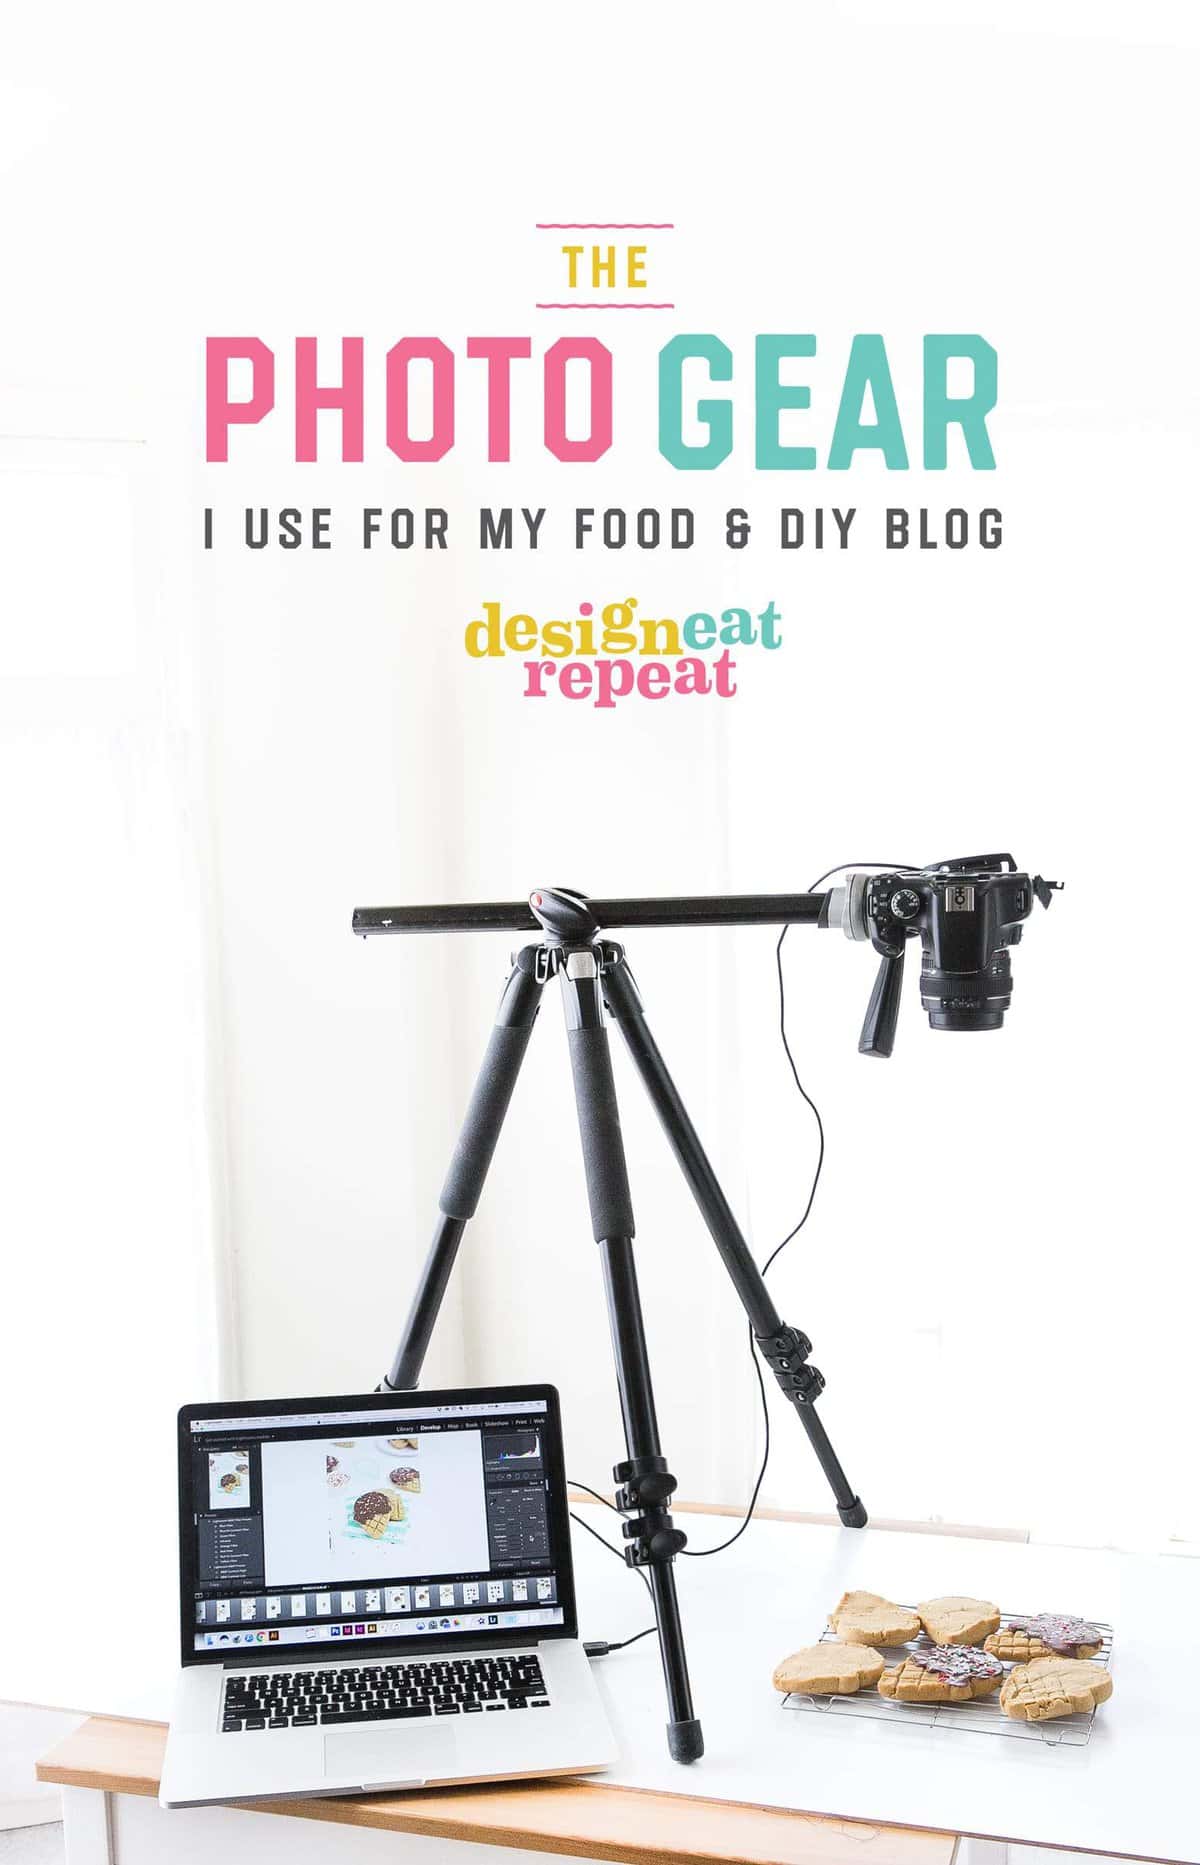
I still use the same tripod (Manfrotto 055XPROB Pro Tripod (Update: model no longer sold, linked similar) with the Junior Head) and although it's given me a good run, I think it will be making a retirement soon. As I start to do more videos, I really need something that can go even taller so that I can place it over a table and still cover most of the background.
Right now, I have to balance the tripod ON the table, which makes it really hard to work around when styling. I could technically place the boards on the floor, but the light from the windows doesn't quite work the way I want it to when it's placed down there. I'd ideally like something anchored to the ceiling but that's definitely not going to happen any time soon, LOL.
(Update: I've been eyeing upgrading to the Manfrotto 028 Triman Tripod since it can extend quite a bit higher than my current one, but by the time you add in the lateral side arm (to make to go overhead) and the geared head you're looking at a steep investment. So it might be a while for that upgrade. Anyone use that one and have thoughts?)
Editing
As far as editing goes, I still strictly use Adobe Lightroom & Photoshop. The thing I've always liked about Lightroom is that you don't have to be skilled in editing levels & curves like you do in Photoshop. Which I think makes it a much easier interface to learn. I use Lightroom as the first initial edits to boost the whites and colors, bring it into Photoshop to do any spot removals or specific background clean-up, and then end up exporting the final through Lightroom.
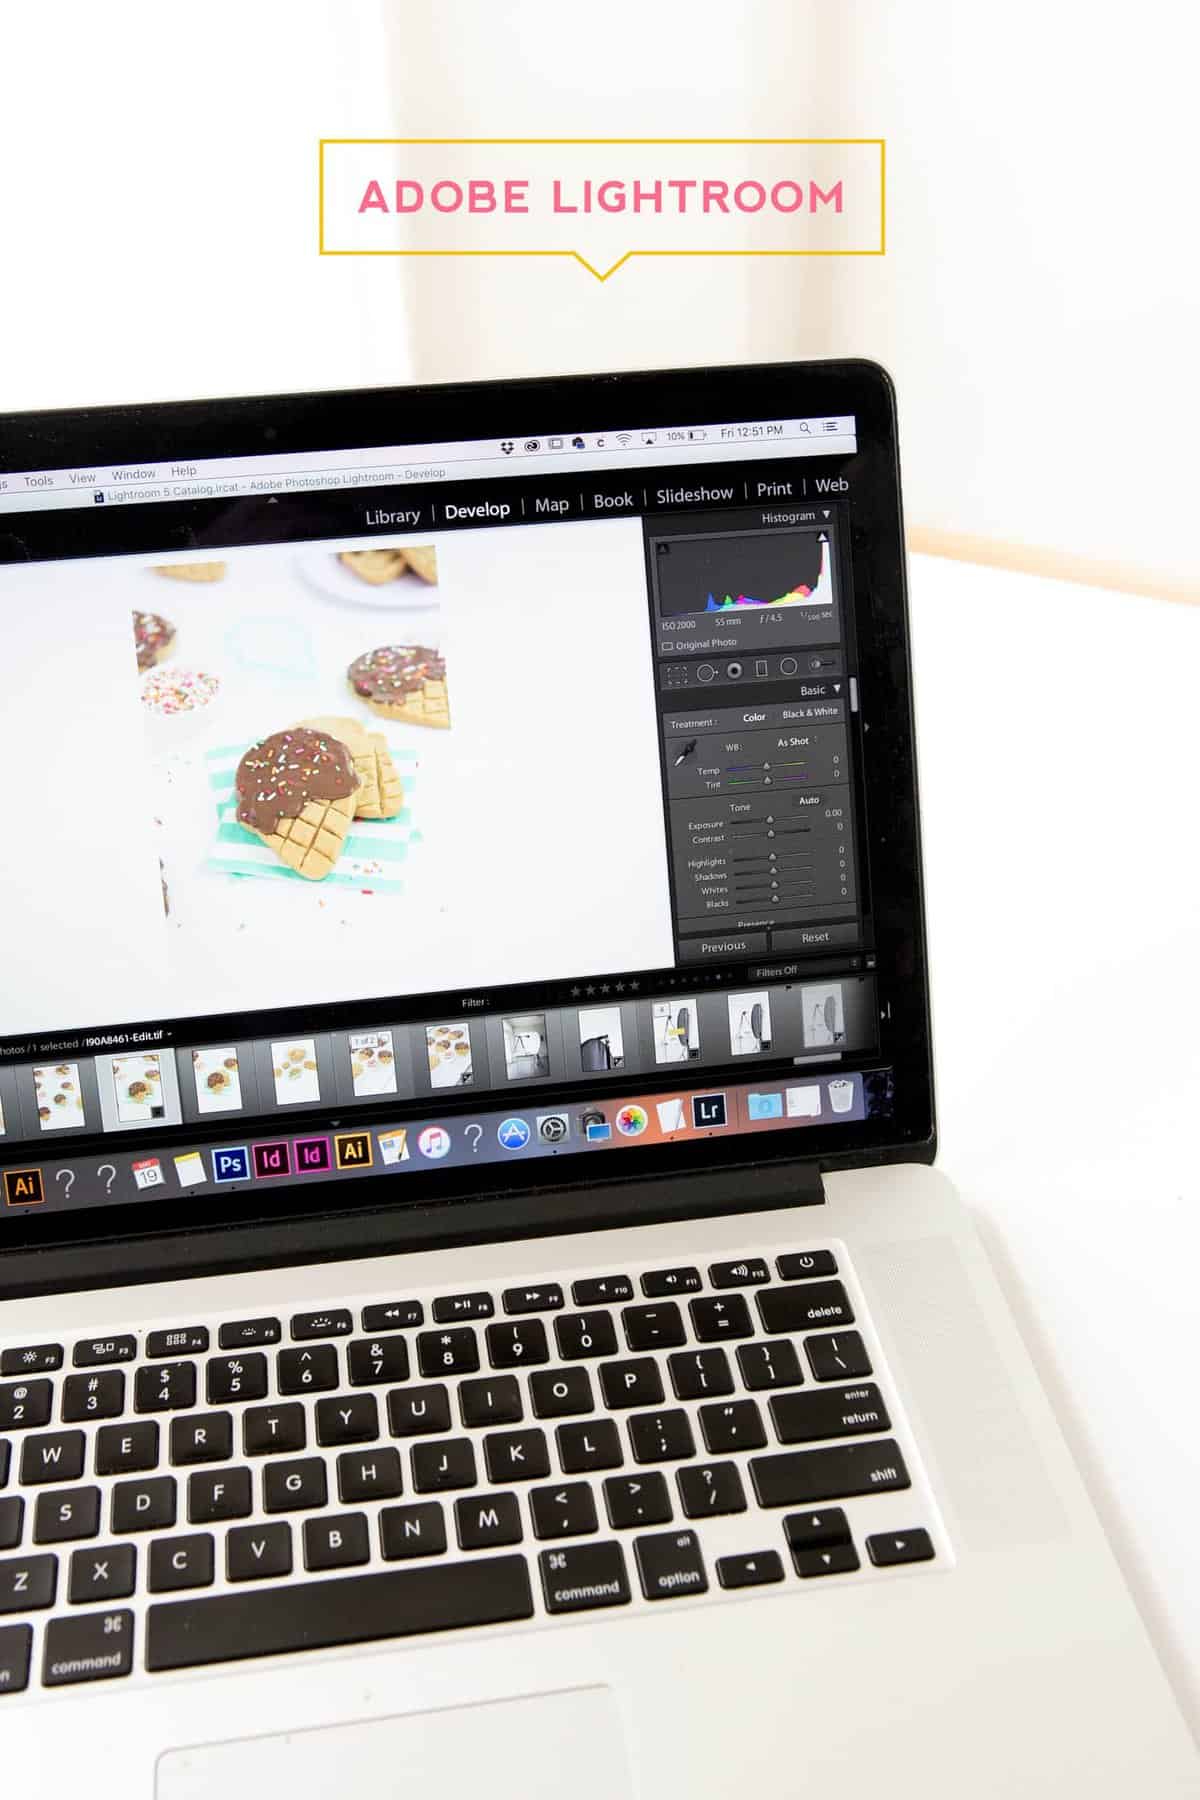
Lightroom also allows you to store all your images in one place so you’re not having to open a bunch of Photoshop windows when editing a large batch of photos. It allows you to easily "flag" images so you can easily narrow down the ones you want to move forward with editing. The other great thing about Lightroom is that you can set up presets to Export your final photos at web resolution, in the size you need for your blog, with your watermark included.
Tethering Cable
I still use my wireless remote control and tethering USB cable so I can see the images nice and big on the computer while I shoot.
Backdrops
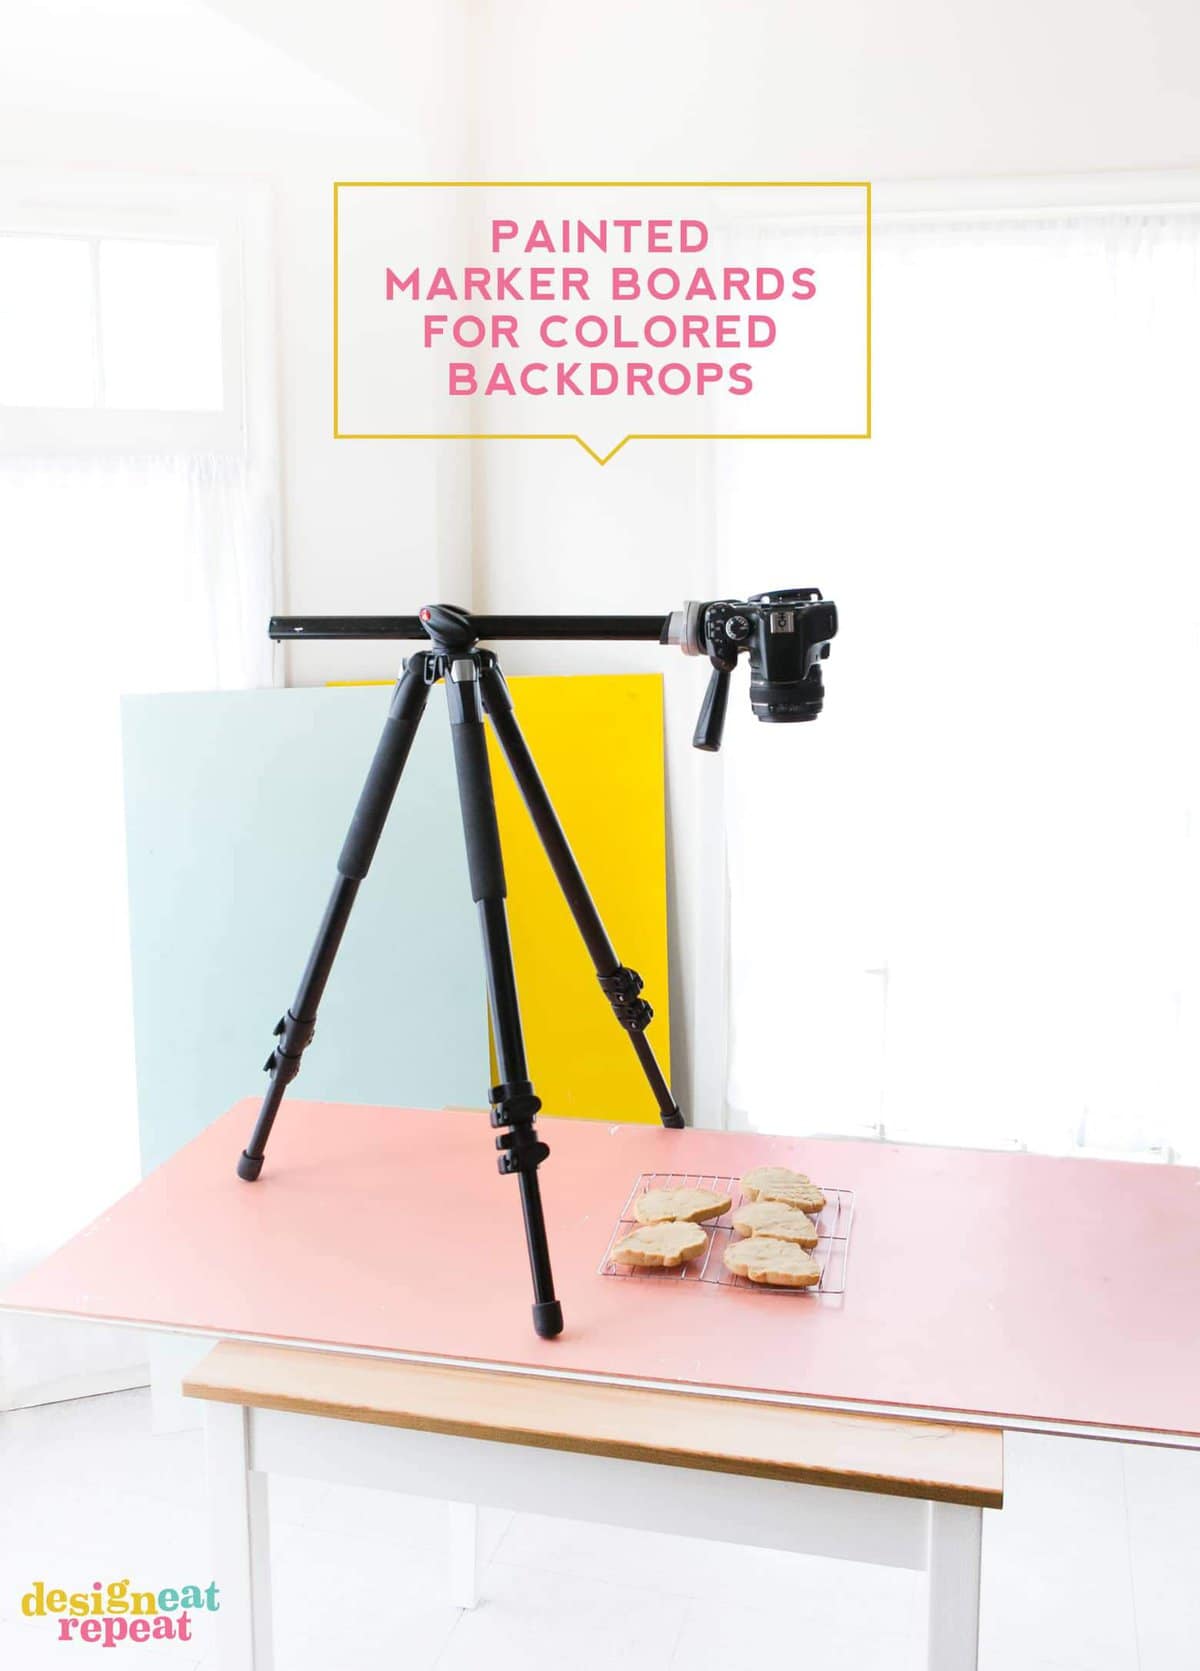
I still use white foam-core for most of my shots and although it's not a permanent solution, I watch for it to go on sale at Hobby Lobby and then go snag up a bunch to keep on hand for when they get spilled on too much. A few months ago, I also hit up Home Depot and picked up some white marker boards to try out. I left one white and painted the others in different colors using matte paint (the same kind you paint on walls).
The pro is that I could achieve custom colors but the con is that the paint easily scratches off, so even the slightest movement of a metal cake pan can cause it to scratch. I'm sure I could find some kind of sealant for it, but I haven't shot on them too much yet so I haven't bothered. The one thing to keep in mind with these is that because they are solid boards they are a bit heavy (in comparison to foam board, of course), so they're kind of a pain to switch out between shots. I'll probably regret them next time I have to move, but I'll cross that bridge when I get to it.
So there you have it! A behind-the-scenes peek inside my current food photography setup & the gear I use! I hope this post was helpful for you. If you have any questions, feel free to leave them in the comments!
*This post is not sponsored by any of the companies that make these products. The items listed above are products that I have personally invested in. That said, this post does contain affiliate links - which means that I may get a commissions if you decide to purchase one of these tools. I only recommend products & systems that I use and love myself.
Great Post, super info!
PS: Don't forget the extra batteries. :-)
I love these tips! Thank you for sharing!
We all use whatever tables we have available in our homes but in professional studios the "tables" we always used were two short saw horses with a piece of plywood on them. This way the items are closer to the ground. So when doing overhead shots it's easier to visualize what it will look like. So I use in my home studio a coffee table or side table which is lower to the ground. Makes those overhead shots so much simpler and no need to invest in a super expensive HUGE tripod. The higher you raise a tripod the more vibration it picks up from surrounding movements of any sort. Just thought i'd add my tips... hope no one takes offense :-)
This post is so helpful! I've also been searching for a good, sturdy tripod to do some overhead shots. My question is do you have to purchase the arm and head separately or do they already come with the tripod? The pictures they show always show the tripod with a camera and arm, so I always assumed it came with everything you need. But your post infers they need to be purchased separately. Do you know if they do?? Help! LOL! (I've also been eyeing the manfrotto, but it's spendy! Maybe Christmas wish list? :))
Hi Danielle! Good question! So with the one I currently shoot with (055XPROB) the arm comes with it. The only thing I added to it was a swivel head, but you could go without that.
With the other model that I'm thinking about upgrading to (028 Triman), I believe that one requires purchasing the arm separate. They definitely are spendy, so I'm putting off having to get a new one for as long as I can! LOL
This is SO freaking helpful! I am currently struggling to build my own at home mini "studio" for blogging and have been so frustrated because I don't even know where to start. Thank you!!