

Decorate cut out sugar cookies with this smooth, hard-drying royal icing! This recipe uses 5 simple ingredients including meringue powder, which eliminates the need to use raw egg whites and helps the icing dry quickly (making them able to be packaged or stacked!).

This easy royal icing for sugar cookies can be customized to any color, making it perfect for decorating Christmas cookies, birthday cookies, or occasion cookie gifts. Pair it with my cut out sugar cookies.
When would you use royal icing?
- When you want the cookies to dry-hard, making them suitable for stacking or gifting.
- When you want to ice the cookies ahead of time and freeze.
- When you want to do multi-color designs or designs with intricate details.
Planning to serve right away, don't need to freeze, and only plan to use one color? You may try my easy sugar cookie icing instead, as it's more of a simple glaze that doesn't require you to calculate consistencies.
For years, I avoided royal icing like the plague because it seemed too runny, too finicky, too sugary, and too messy to deal with.
I had taken a online class years ago with the goal of mastering the art, but quickly because frustrated when the icing ran right off the edges of the cookies.
It wasn't until I took a job designing for a sugar cookie brand that I realized that royal icing wasn't the problem - it was how I was making it. What was once a mystery, was slowly demystified after spending countless hours learning and soaking it all in from the best of the best.
And to my surprise, royal icing became just another tool in my baking tool belt - I was no longer terrified of the creamy, sugary substance. And thus, my saga for using royal icing for sugar cookies began.
3 Tips for Using Royal Icing
- Start with a flavorful sugar cookie: The #1 thing I realized is that you need a good, soft, thick cut out sugar cookie. Royal icing naturally has a super sugary taste to it and also dries hard. So if your cookie is overly sweet or dry, the royal icing isn't going to do you any favors. My favorite recipe to pair with royal icing is my cut out sugar cookie.
2. The Consistency: Royal icing for sugar cookies is all about consistency. To prevent the icing from running off the edges of the cookie, it needs to be a certain consistency. And because #guessing will only result in anguish, I'll be breaking down some easy ways for determining the perfect consistency.
3. The Taste: Let's be honest - the taste and texture of royal icing isn't for everyone. People who like soft, pillowy buttercream frosting are still probably going to prefer cookies with soft, pillowy frosting.
But by adding in some extracts and a little bit of salt, you can cut down the sweetness a bit to make the cookie more enjoyable.
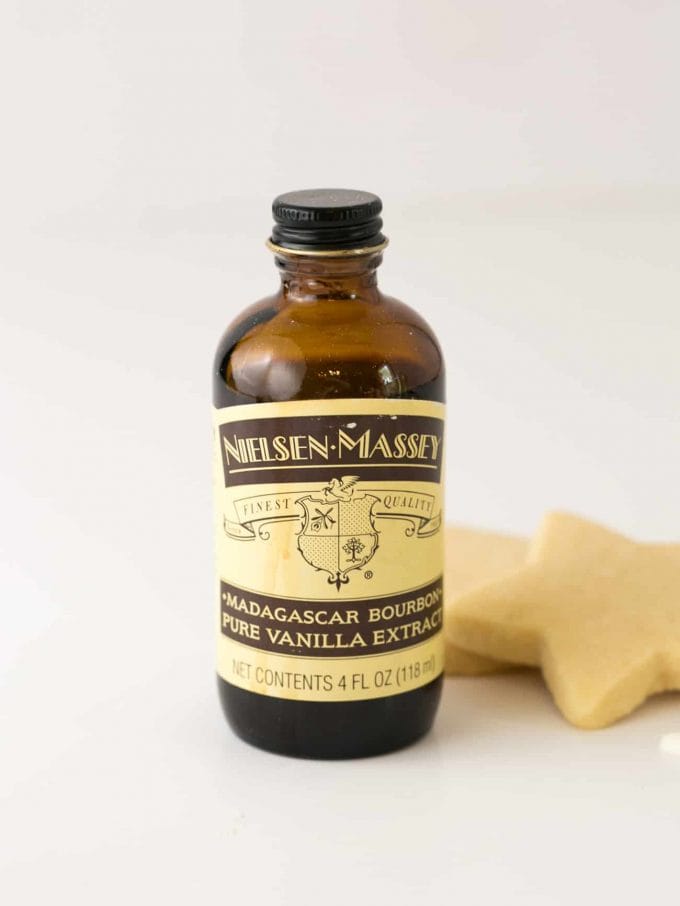
If you really want to take it up a notch, use a high quality vanilla like Nielsen-Massey. The key is to use extracts without added oils, as they can cause the royal icing to separate.
What You Need to Make Royal Icing for Sugar Cookies
- Powdered Sugar (don't go cheap here - name brand like C&H will result in better icing.)
- Meringue Powder
- Water
- Oil-Free Vanilla Extract & Almond Extract (clear colored if making white icing)
- Pinch of Salt
- Piping Bags
- Pairs well with: Cut Out Sugar Cookies
What is Meringue Powder?
Meringue powder is an egg white substitute made from pasteurized dried egg whites. A lot of traditional royal icing recipes will call for raw egg whites, so meringue powder eliminates the risk of salmonella and also helps the icing harden (which is crucial is you plan to stack, freeze, or gift your cookies). You can find meringue powder at crafts stores, most Walmarts, or Amazon.
Don't have meringue powder? Try my easy sugar cookie icing instead. This icing won't completely harden like royal icing and doesn't freeze as well (as the icing will crystallize), but will achieve a similar look if you're needing a simple design.
How to Make Royal Icing for Cookies
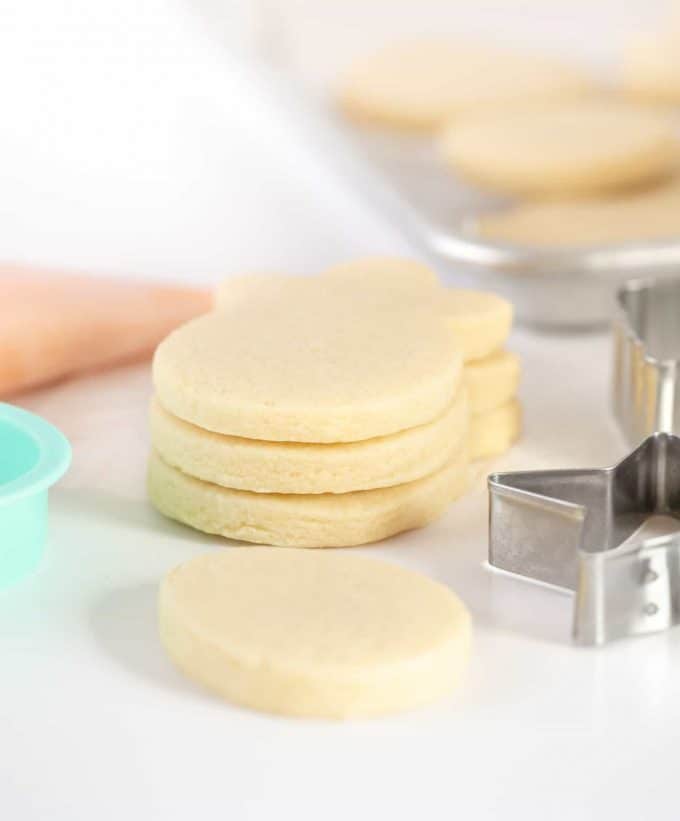
Step 1: Flip Over Cookies
Before applying royal icing, flip your cookies over on a paper towel and let them sit for about 1 hour. This is a trick I learned from Sweet Sugarbelle to help avoid excess oils from the cookie from causing your royal icing to separate.
Step 2: Mix Ingredients Together
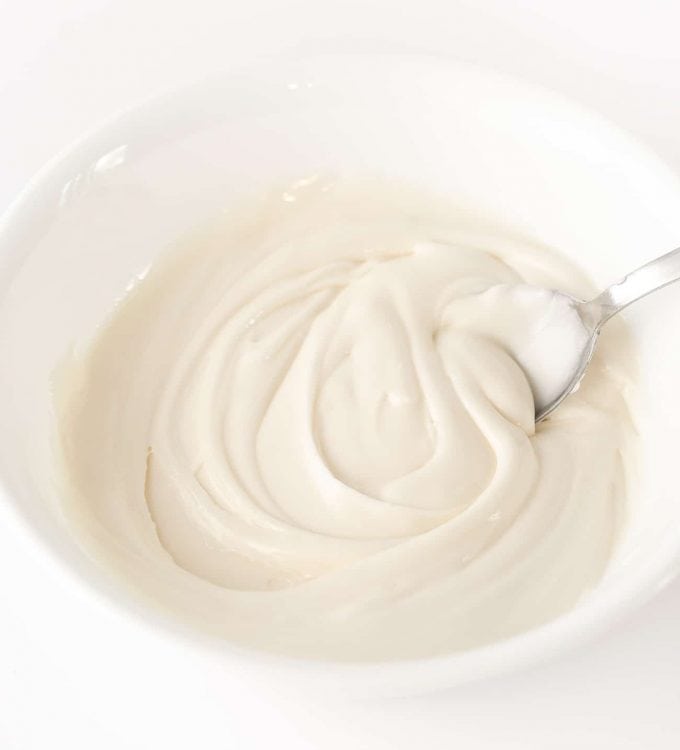
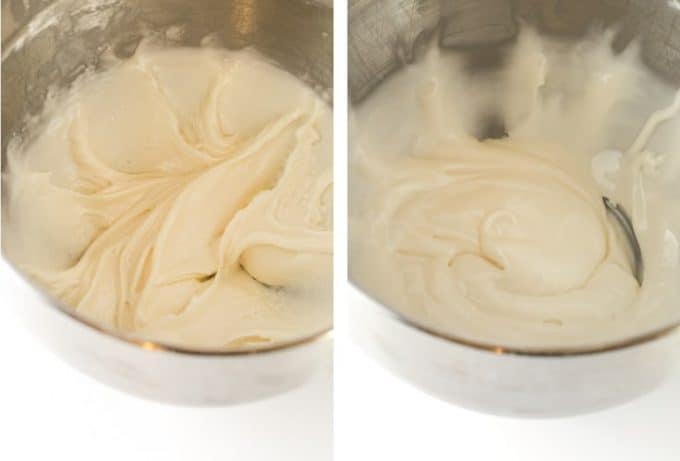
In a large bowl, add the powdered sugar and meringue powder and mix together. Using an electric mixer on low speed, add in the extracts and water (1 tablespoon at a time) and mix until smooth.
As you can see in the photos below where there's only 1 tablespoon of water difference, the icing will quickly go from thick to thin as you're adding the water.
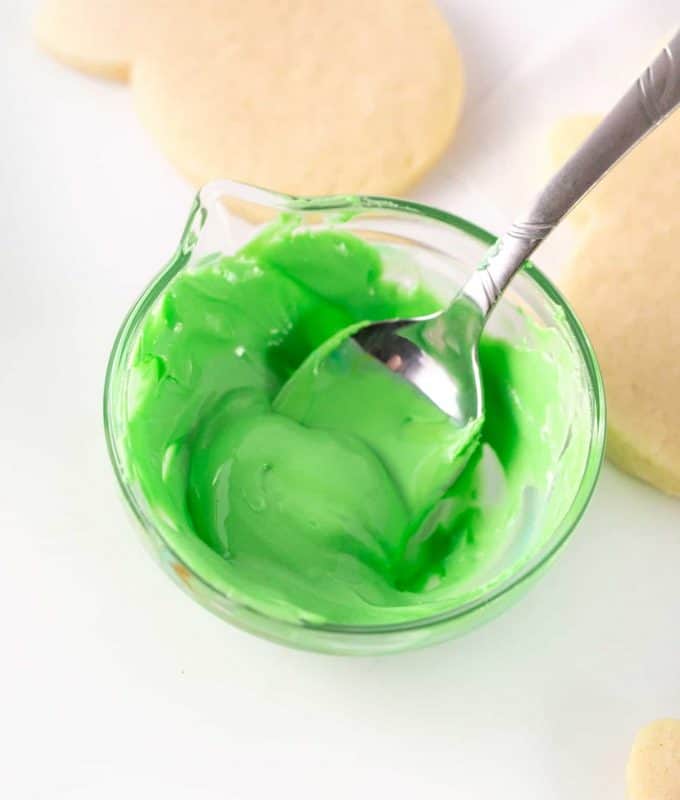
If you're planning to color the icing, this is the stage where you should mix that in. If making multiple colors, divide the icing into smaller bowls and place a damp paper towel over the bowls you don't plan to use first.
Step 3: Adjust Consistency
The goal with the royal icing is that it's thick enough that it won't run off the side of the cookie, but thin enough that it will meld together. So how do you know when that is?
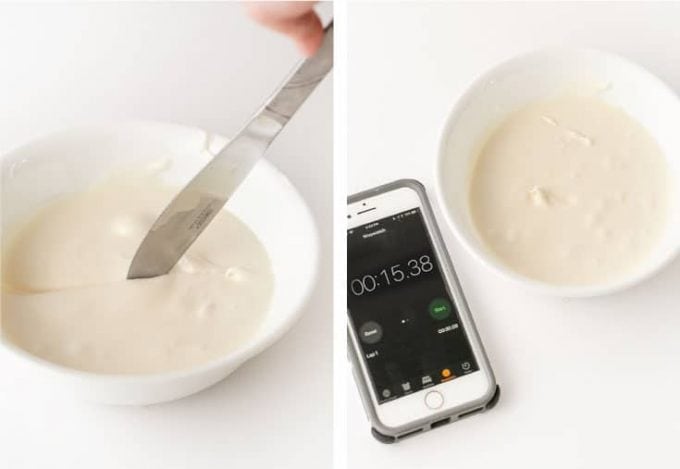
Well, you use a good ol' timer. In this tutorial, we're making what is called "15 second icing". This means that when you run a knife through the icing, the icing should go back to how it was within 15 seconds.
Because the goal here is to achieve the perfect consistency, this is why you want to add the food coloring before you start adjusting the thickness of the icing. Otherwise, if you add it afterwards, you risk watering it down and needing to readjust.
If the line doesn't disappear within 15 seconds, don't worry! Making royal icing is all about adjustments and just because it isn't perfect on your first knife test, doesn't mean it has failed.
In fact, most of the times I make royal icing it DOES need an adjustment based on the weather or how accurately I measured the powdered sugar.
If it takes longer than 15 seconds = Too Thick = You Need To Add More Water
The TINIEST amount of water can take your icing from being too thick to the perfect consistency. Because of this, you don't want to use a teaspoon scoop to add the water. Instead, fill a cup with room temp water.
Dip the spoon you are using to mix the icing into the cup of water, then stir it into the icing. This essentially adds just a few drops of water to the icing, which is what you want. Re-test with your timer and continue adding "dips" of water until you reach the 15 second mark.
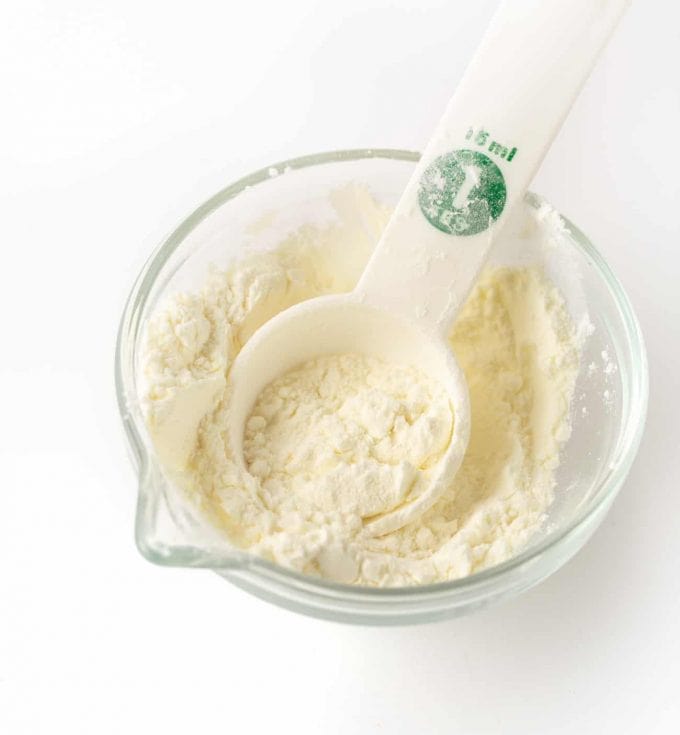
If it takes shorter than 15 seconds = Too Thin = You Need To Add More Powdered Sugar
Just like the water, the tiniest amount of powdered sugar can take your icing from being too thin to the perfect consistency. Use a ½ teaspoon scoop and stir in ½ teaspoon of powdered sugar into the icing.
Re-test with your timer and continue adding ½ teaspoon of powdered sugar until it reaches the 15 second mark. If you find that it's now taking longer than 15 seconds, simply add a couple drops of water.
How to Pipe Royal Icing
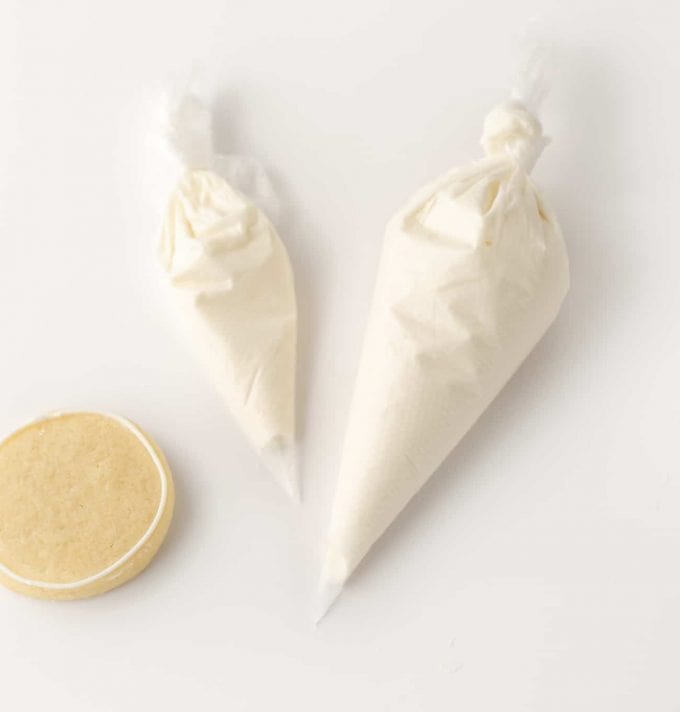
Once you have achieved the perfect consistency, it's time to decorate! First and foremost, be sure to cover any bowls of royal icing with a damp paper towel that you don't plan to use right away. Next, add royal icing to piping bags.
I prefer using tipless piping bags so that I don't have to mess with metal piping tips. Unlike a plastic ziploc bag with the corner cut off, tipless piping bags will give you a nice "round" pipe rather than a skinny, "pinched" pipe.
If you have metal piping tips or bags, the #2 size often works best for outlining and flooding sugar cookies.
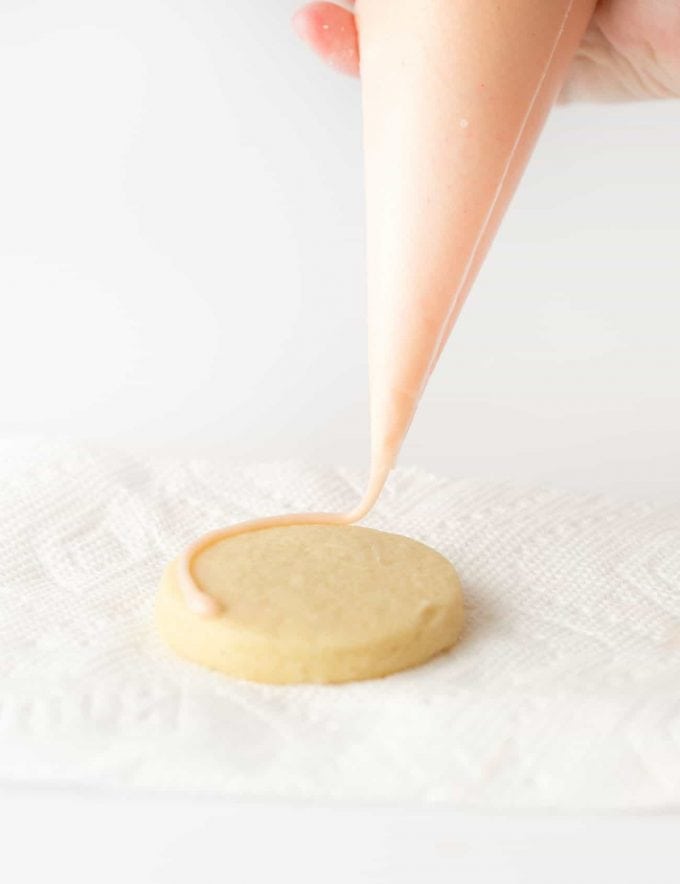
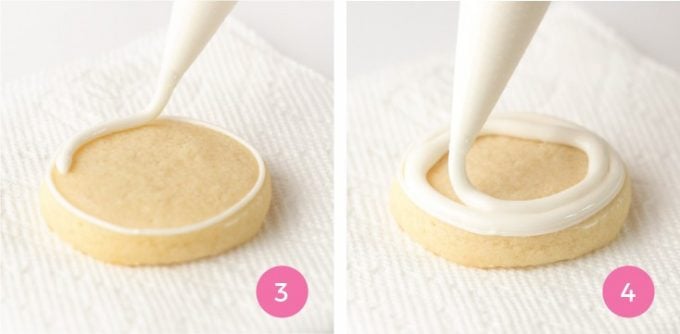
Step 1 & 2: Outline Cookie
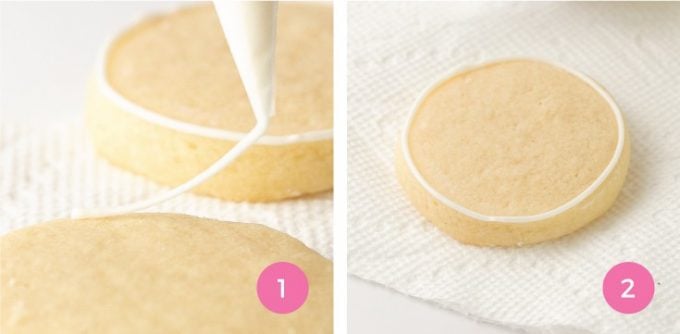
The goal here is to create a "dam" that will prevent the icing from flowing over the sides. To do this, touch down the tip of the bag to the cookie then lift up and guide the icing around the edge of the cookie.
As you can see in image #1 below, I'm not actually dragging the tip of bag on the cookie, as that will cause smudging. You want to apply even pressure to the bag as you're guiding the icing around the outside.
If you're using multi-colors or creating a more intricate design, scroll down for a pineapple cookie example.
Step 3 & 4: Fill In the Center
Once you have outlined the cookie, work your way from the outside in to fill in the center of the cookie.
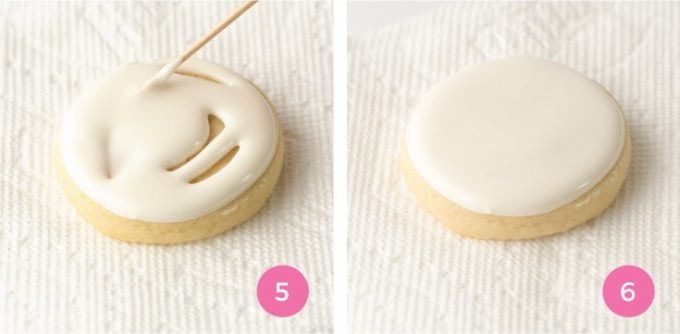
Step 5 & 6: Smooth With Toothpick
Once the surface is mostly covered with icing, use a toothpick to fill in the extra gaps, smooth out the icing, and pop any air bubbles. One important thing to note is that you don't want the toothpick to poke or touch the actual cookie, as this will bring crumbs to the surface. Instead, try to keep the toothpick near the top of the icing.
If you're planning to add sprinkles or sanding sugar, this is the time to do it. If you wait more than 1-2 minutes after icing, a crust will have already started forming and sprinkles won't stick.
Step 7: Let Icing Harden
Place decorated cookies on a baking tray and let dry (uncovered) for 4-8 hours. I typically like to leave them out overnight for the royal icing to completely harden. To speed up the process, you can direct a fan on the cookies.
Once hardened, use food pens to draw or write words or package in treat bags or boxes. (I recommend wrapping in plastic wrap before placing in treat bag or box.)

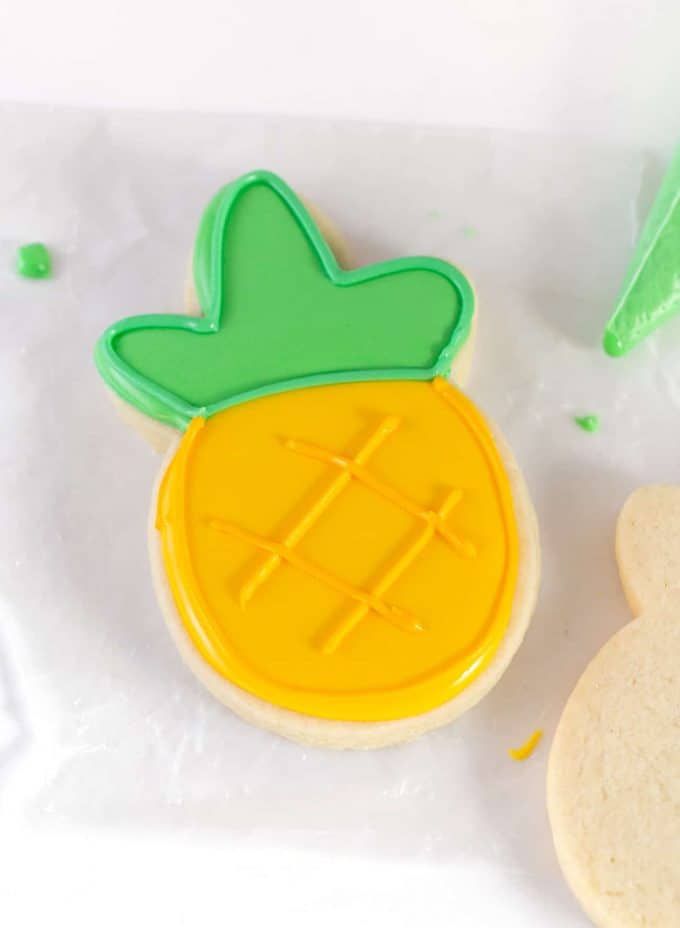
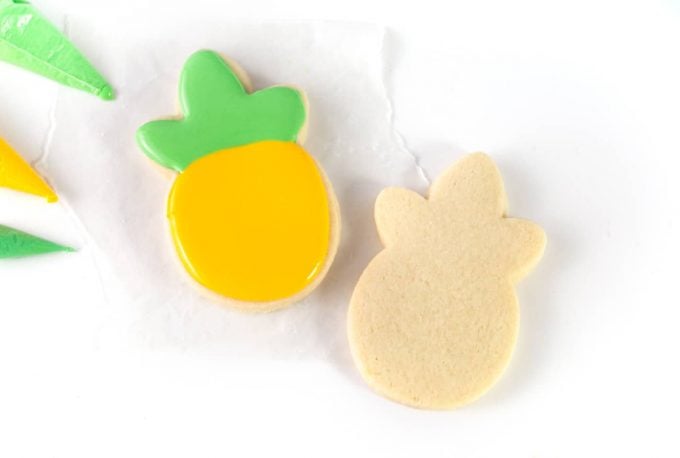
How to Pipe Multi-Colored Designs
Following the same principles as before, you will outline and flood your cookies the same way despite how many colors. In this pineapple example below, you will see that I first outlined the two areas, filled them in, and then smoothed them with a toothpick.
When using multi-colors, I recommend flooding the lightest color first (so in this case it was the yellow). I then waited about 15-20 minutes for that to develop a crust before flooding the green. This will help lessen the chances of the colors from bleeding into each other.
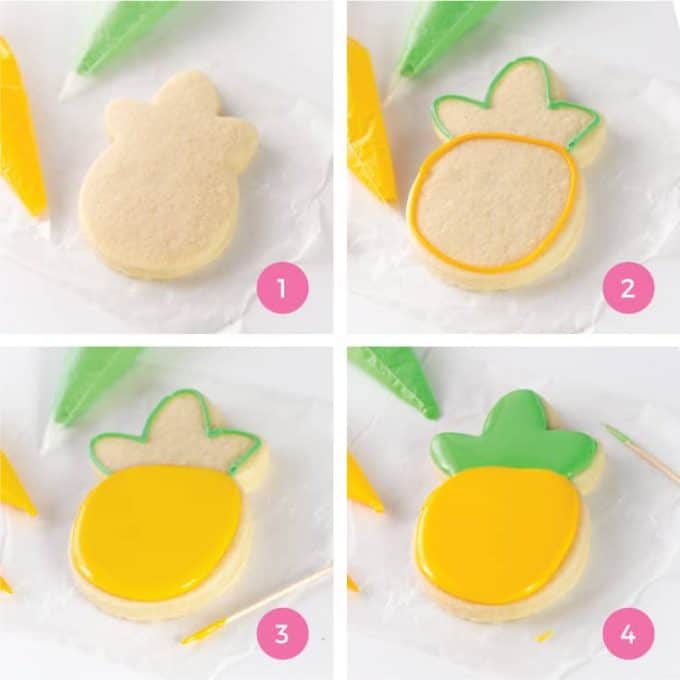
If adding any top details or final outlines (like below), wait about 30-60 minutes after flooding to pipe these on.

Royal Icing for Sugar Cookies
Ingredients
⭐️ Before you begin! If you make this, will you do me a huge favor afterwards and leave a review and rating letting me know how you liked this recipe? This helps my small business thrive so I can continue providing free recipes and high-quality content for you.
Instructions
- In a large bowl, add the 4 cups powdered sugar and 4 tablespoons meringue powder and mix together. Using an electric mixer on low speed, add in the 2 teaspoons vanilla extract, 1 teaspoon almond extract, ¼ teaspoon salt, and water 1 tablespoon at a time (4 tablespoons water total) and mix until smooth.
- If you're planning to color the icing, this is the stage where you should mix that in. If making multiple colors, divide the icing into smaller bowls and place a damp paper towel over the bowls you don't plan to use first.
- The goal with the royal icing is that it's thick enough that it won't run off the side of the cookie, but thin enough that it will meld together. So how do you know when that is? Well, you use a timer. In this tutorial, we're making what is called "15 second icing". This means that when you run a knife through the icing, the icing should go back to how it was within 15 seconds (see photos above in post).* Because the goal here is to achieve the perfect consistency, this is why you want to add the food coloring before you start adjusting the thickness of the icing. Otherwise, if you add it afterwards, you risk watering it down and needing to readjust.
- If the line doesn't disappear within 15 seconds, don't worry! Making royal icing is all about adjustments and just because it isn't perfect on your first knife test, doesn't mean it has failed. In fact, most of the times I make royal icing it DOES need an adjustment based on the weather or how accurately I measured the powdered sugar
- If it takes longer than 15 seconds = Too Thick = You Need To Add More WaterThe TINIEST amount of water can take your icing from being too thick to the perfect consistency. Because of this, you don't want to use a teaspoon scoop to add the water. Instead, fill a cup with room temp water. Dip the spoon you are using to mix the icing into the cup of water, then stir it into the icing. This essentially adds just a few drops of water to the icing, which is what you want. Re-test with your timer and continue adding "dips" of water until you reach the 15 second mark.
- If it takes shorter than 15 seconds = Too Thin = You Need To Add More Powdered SugarJust like the water, the tiniest amount of powdered sugar can take your icing from being too thin to the perfect consistency. Use a ½ teaspoon scoop and stir in ½ teaspoon of powdered sugar into the icing. Re-test with your timer and continue adding ½ teaspoon of powdered sugar until it reaches the 15 second mark. If you find that it's now taking longer than 15 seconds, simply add a couple drops of water..
- Once you have achieved the perfect consistency, it's time to decorate! First and foremost, be sure to cover any bowls of royal icing with a damp paper towel that you don't plan to use right away. Next, add royal icing to piping bags.For more detailed instructions on how to pipe, follow photo tutorial above in post.
- Once iced, allow cookies to dry (uncovered) for at least 6-8 hours (I typically leave them out overnight). Drying time will vary depending on the temperature and humidity in your home. For quicker drying & for a shinier finish, place a fan 4-6 feet away from the cookies (you just don't want a strong, direct wind on the cookies).
This recipe is awesome! If I wanted to slightly reduce the amount of sugar could I use 2-3 cups of powdered sugar instead of 4?
I wouldn't recommend reducing the sugar if you want it to firm up. But you definitely can if you're fine with it being softer and a more tacky frosting!
Hi! Just a question for the recipe, is there a way to make this without the powder, Thanks!
It won't firm up as well without the meringue powder but you could also make this recipe instead: https://www.designeatrepeat.com/powdered-sugar-icing/
The cookies and icing both turned out great. This was my first time making a thicker sugar cookie. I was trying to make something professional looking for my daughter's graduation party. I definitely have work to do in perfecting my decorating skills, but this was a great start. Thank you!
Thank you so much for leaving a review, Kim!
The cookies turned out amazing!
I'm so glad the Royal Icing for Sugar Cookies worked well for you, Terri! Thanks so much for leaving a review. I appreciate it!
The cookie recipe was good and the royal icing recipe worked and looked very pretty on my snowflake cookies!
I'm so glad you enjoyed the royal icing recipe, Christa! Thanks so much for leaving a review. I appreciate it!
Hi Melissa. Can this recipe be made in advance for children to decorate their own cookies.
Hi Margaret! Yes, you can do make it ahead but you'll just need to restir it before using. So, if you're adding it to a piping bag, you'll want to wait to do that until you're ready to use.
I think either the amount of water or powdered sugar is way off in the ingredients list. I'm not sure how much water I used (because I was adding it in 1/4, 1/2 and 1 teaspoon increments), but it was at least 1/2 C, not the 1/4 C called for. BUT, the finished frosting was very tasty!
Glad it turned out tasty!
The amount of water will vary based on how much you packed the powdered sugar and if you are making it into the outline or folding consistency. It’s a hard number to list exact without people making it too thin, which is where the adjusting step comes in.
I've been using this recipe with your cut out sugar cookies for a few years now and it is perfect! The directions and your tips helped me to finally make beautifully decorated sugar cookies!
So glad you love this recipe so much, Trish! Thank you so much for taking the time to leave a review, I really appreciate it!
I love the consistency of this icing, just like royal icing but this icing recipe is too sweet for my taste buds. The powdered sugar has an overpowering taste. Maybe adjusting the measurement would work.
You may try adding a bit more salt to tone down the sweetness. Royal icing is naturally sweet so there's not a ton you can do other than use it on a cookie that isn't overly sweet itself. I appreciate your feedback!
Thank you for taking the time to explain what we need to do for the perfect frosting.
Can I use salted butter and Domino's powdered sugar, and McCormick pure vanilla for cutout sugar cookies
Debbie
Yes you can, just omit the added salt!