
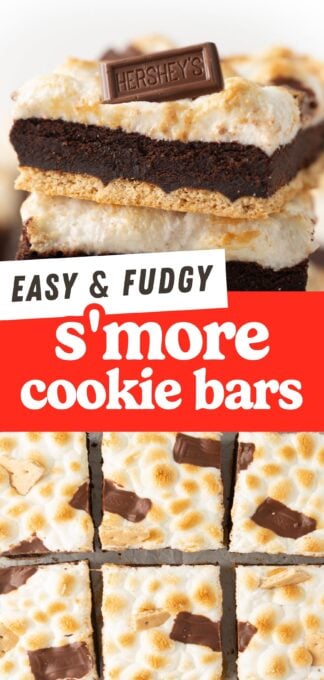
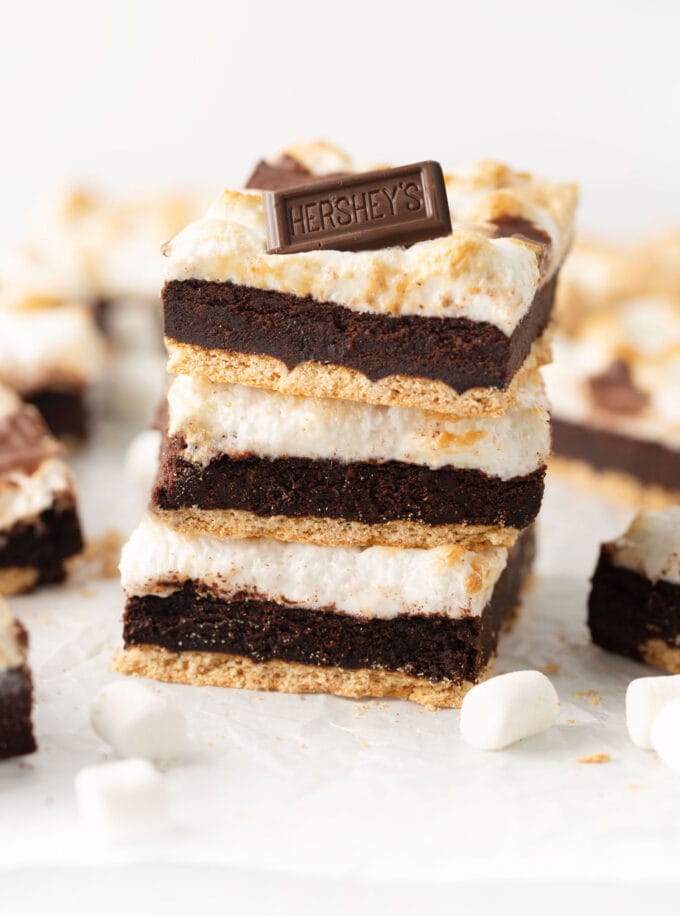
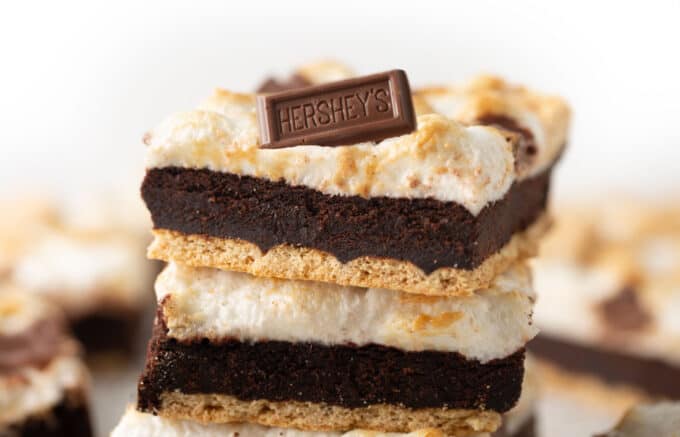
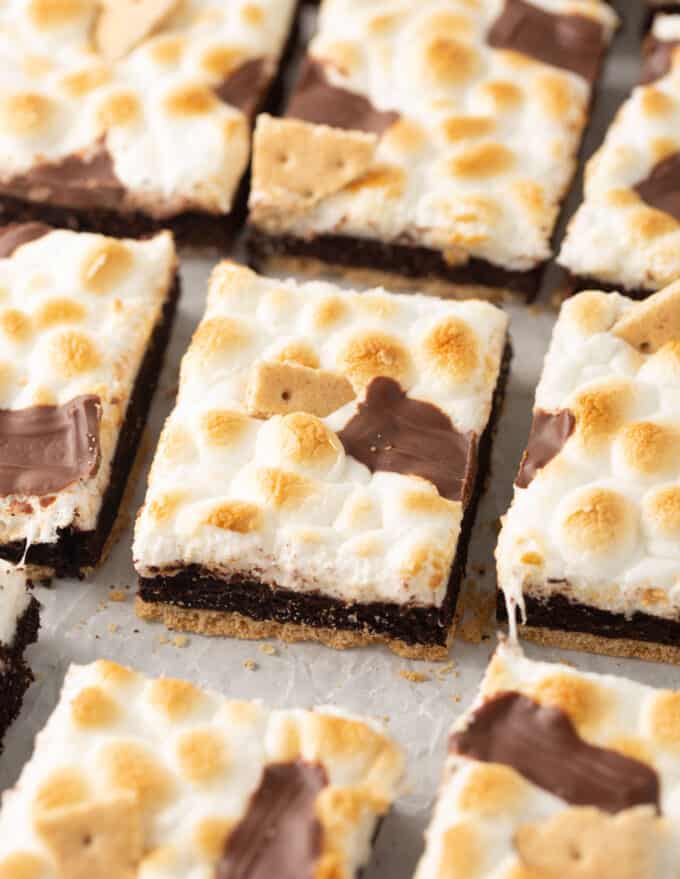
These thick, fudgy, gooey s'more cookie bars can be made in under an hour... without the campfire! With a graham cracker base, fudgy chocolate cookie dough, and golden marshmallows, these are sure to be your new favorite s'mores dessert!
Why I Love These Fudgy S'more Cookie Bars
After my regular s'more cookie bars recipe went viral, I knew I had to create a chocolate version! Here's just a few reasons I love them:
- Thick & Fudgy: I love a good thick cookie bar since it holds up better when cutting and doesn't crumble or break as easily. As opposed to brownies that are a little crumbly, this cookie dough is firm and cuts more cleanly.
- Soft & crunchy textures! It doesn't get any better than crunchy graham crackers, fudgy cookie dough, and gooey marshmallows. This recipe uses same base dough as my fudgy cosmic brownie cookies, which has the perfect fudgy texture.
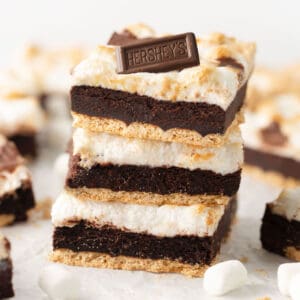
- Gorgeous layers: A good defined layered dessert makes my heart happy.
- Easy to make! I know layered treats like this can look intimidating but it's literally as easy as lining the pan with graham crackers, pressing in cookie dough and sprinkling on marshmallows.
Ingredient Notes
This is just an overview, jump down to the full recipe card for the recipe amounts and condensed recipe instructions.
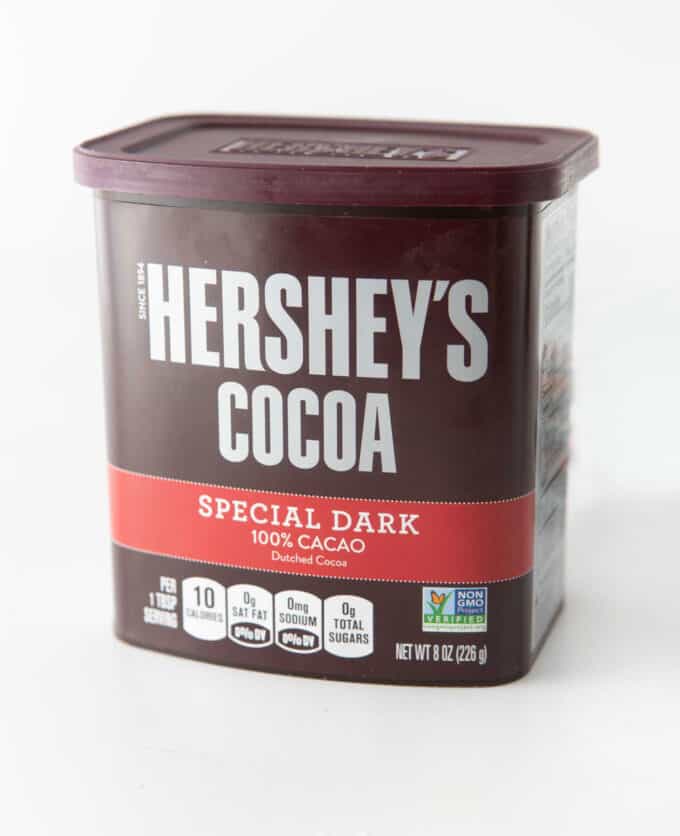
- Cocoa Powder: I use and recommend Hershey's Special Dark Cocoa powder to give them a moist, rich flavor. You can substitute for regular unsweetened cocoa powder, just note that your cookies will have a puffier texture and won't have the iconic brownie taste.
- Light corn syrup: We're using a small amount of corn syrup to create a chewy, dense, fudgy cookie. Omitting it will not result in the ideal texture, so I highly recommend using it (p.s. light corn syrup is not the same as high fructose corn syrup!). You can find this in the baking aisle (Karo or generic brand works). If you can't find it where you live or don't want to use it, you can use thick honey to achieve a similar texture.
- Graham crackers: I prefer Honey Maid brand for the most iconic s'more flavor but you can of course use generic. You'll need around 16 squares (so you'll need at least two sleeves).
- Mini marshmallows: You'll need (1) 10-ounce bag for these!
Make it gluten-free! Use your favorite gluten-free flour and graham crackers to make these GF! My favorite brand is Bob's Red Mill Gluten Free 1-to-1 Baking Flour and many who have made the cosmic brownie cookies (a very similar base dough) have used it with success. Be sure to check your other ingredients to ensure they are gluten-free.
How to Make S'more Cookie Bars:
NEW! For this month's baking challenge, I've created a cool interactive slideshow with video tips on how to make these! Be sure to watch this for tips to cut the bars really cleanly!
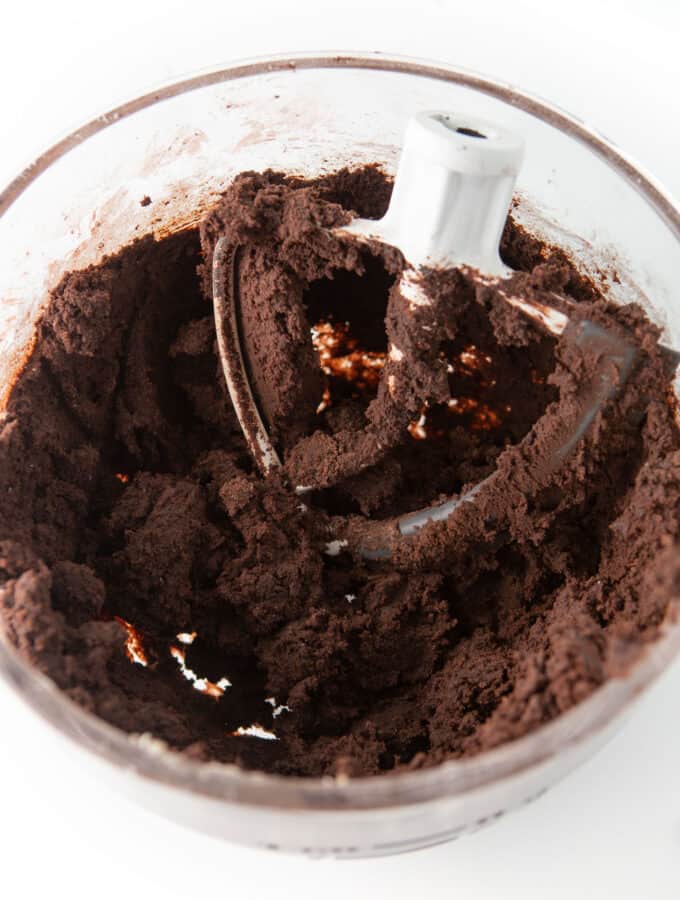
Step 1: Make Dough
- In a large bowl, use an electric mixer on medium-high speed to cream softened unsalted butter (¾ cup, 1 ½ sticks), light brown sugar (¾ cup), and granulated sugar (¾ cup) for 2 minutes until light and fluffy.
- Add the eggs (2 large), vanilla extract (2 teaspoons), and light corn syrup (3 tablespoons) and mix on low speed until combined. Scrape down the sides of the bowl so everything can combine.
- Add in baking powder (1 teaspoon) and salt (½ teaspoon) and mix for another 5-10 seconds until combined.
- Lastly, add dark cocoa powder (¾ cup) and all-purpose flour (2 ¼ cups) and mix on medium until combined.
Tip: This is a thicker dough that is easiest to make with a stand mixer. If you only have a handheld mixer, you may just need to use a spatula to help mix the flour in.
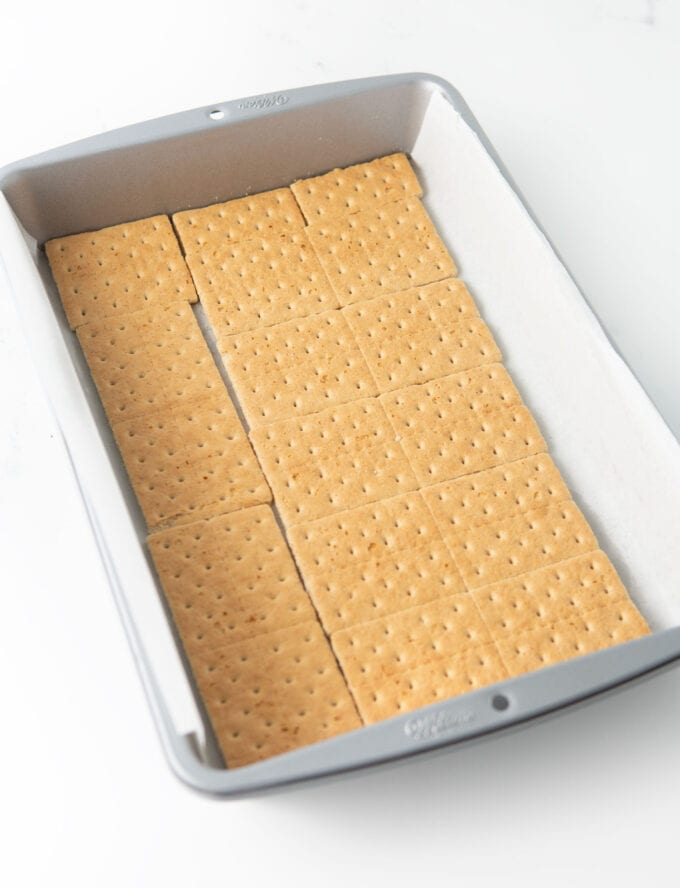
Step 2: Line Pan & Press in Dough
- Spray a light-colored metal 9×13 pan with cooking spray, then line pan with two pieces of parchment paper, leaving a 2-inch overhang on each long side so that you will be able to lift the bars out of the pan.
- Line the bottom of the pan with graham crackers (roughly 16 squares).
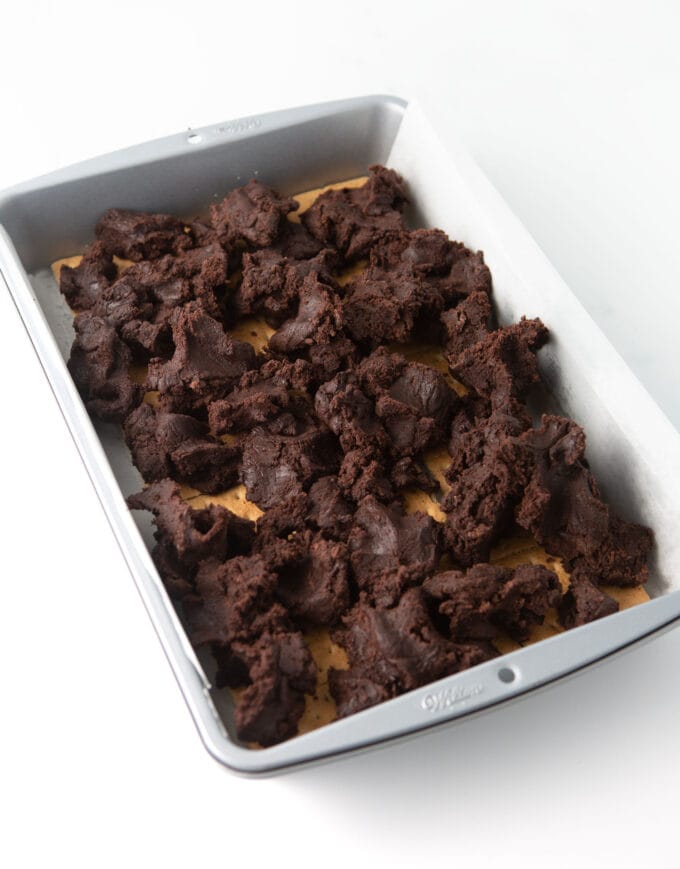
- Drop the dough into small chunks in the pan. This will help disperse everything so that you can easily smooth it out. Once all dough has been added, use a spatula or your hands to press down the dough into a smooth layer (being sure to get all the corners). Be careful not to shift around the graham crackers too much.
Tip: If your dough is sticky, I recommend spraying your hands with cookie spray or use place another piece of parchment paper on top and continue pressing down.
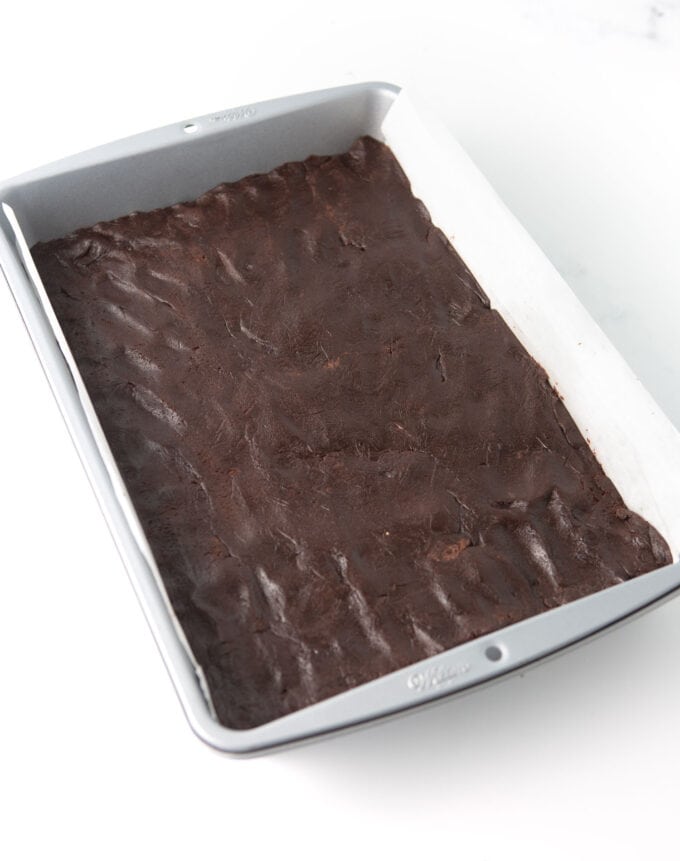
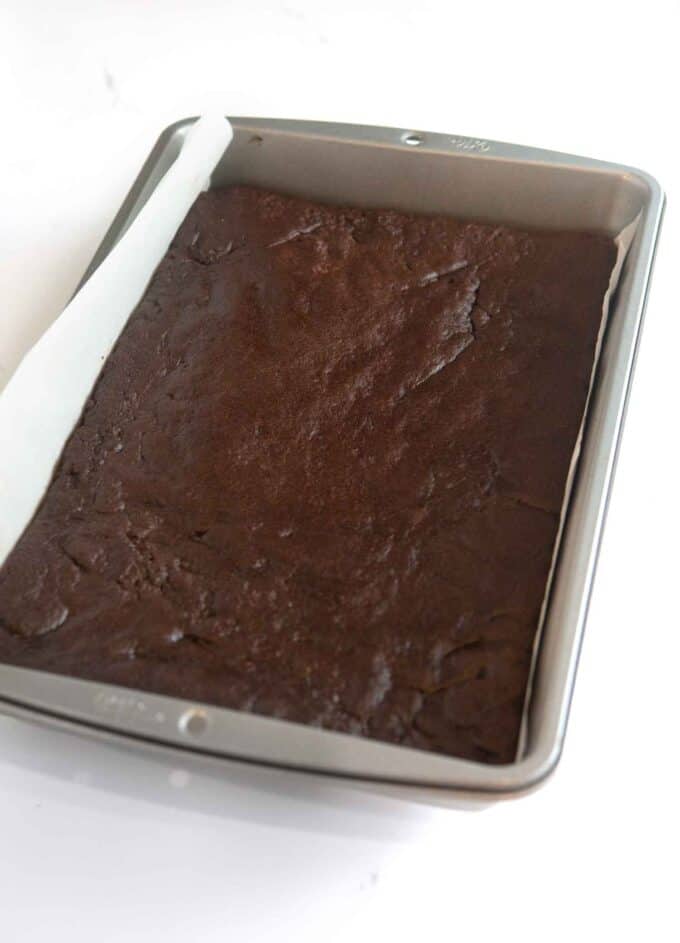
Step 3: Bake
- Bake bars at 350°F for 18-22 minutes, or until the center no longer looks wet. The center may look a tiny bit underdone but the bars will continue to bake in the hot pan when cooling.
- Immediately proceed to next step.
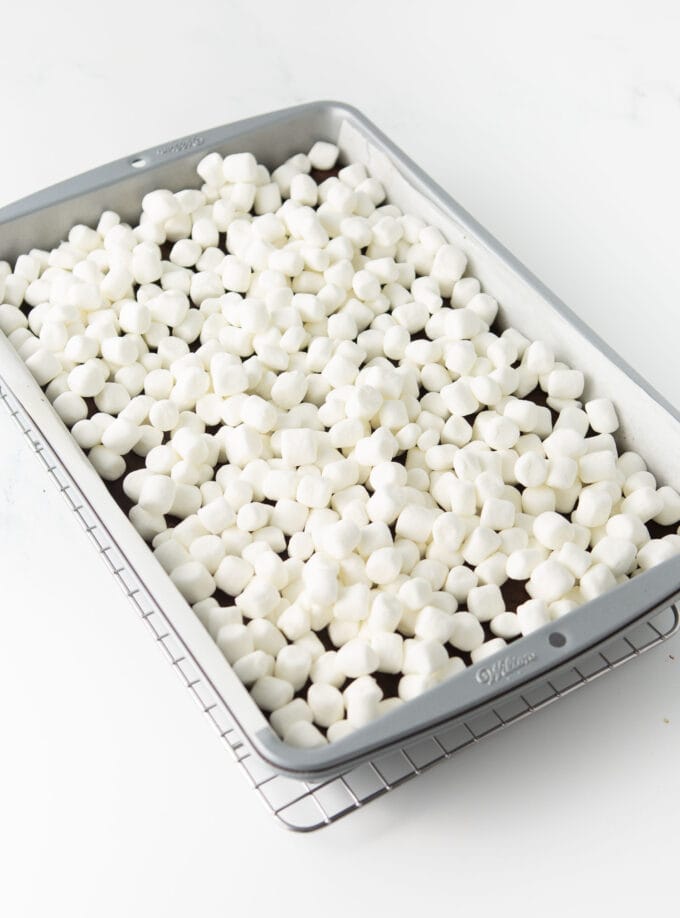
Step 4: Top with Marshmallows & Broil
- Right after your bars come out of the oven, top with marshmallows.
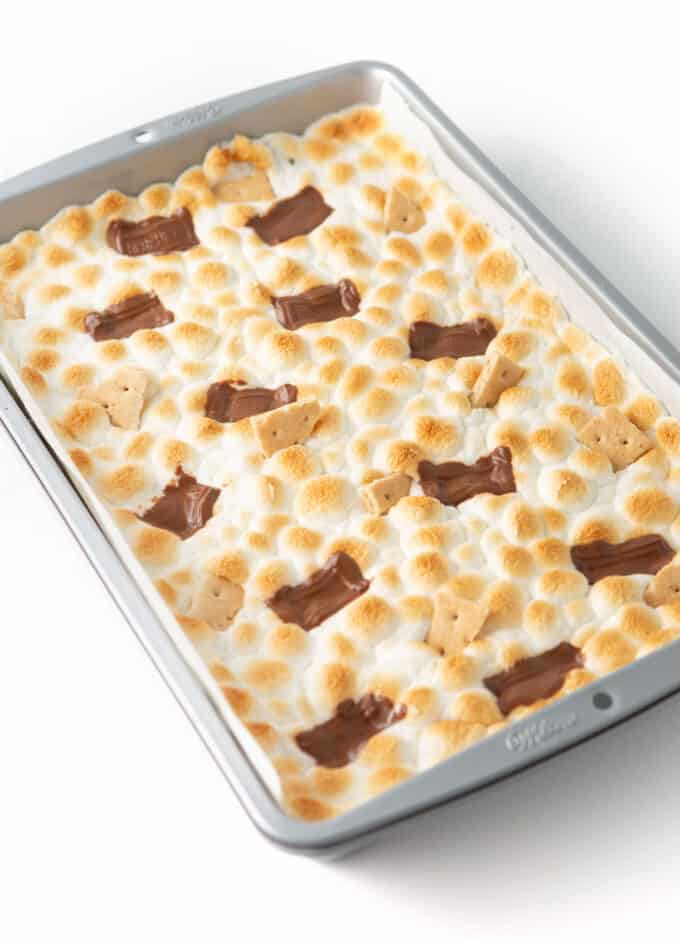
- Turn on the "BROIL" function on your oven and place the pan on the bottom or middle rack. Stand by the oven and watch it very closely - do not walk away! When you start to notice a light brown, rotate the pan to avoid any hot spots. Remove from the oven when the marshmallows are golden brown.

Step 5: Add optional toppings!
If desired, press Hershey bar and graham cracker pieces into the top. I highly recommend adding 1-2 Hershey bars (I did one in the photos but would honestly do 2 next time), as the chocolate on top really helps balance out all the flavors and gives it that s'mores taste! You could also top with some milk chocolate chips.
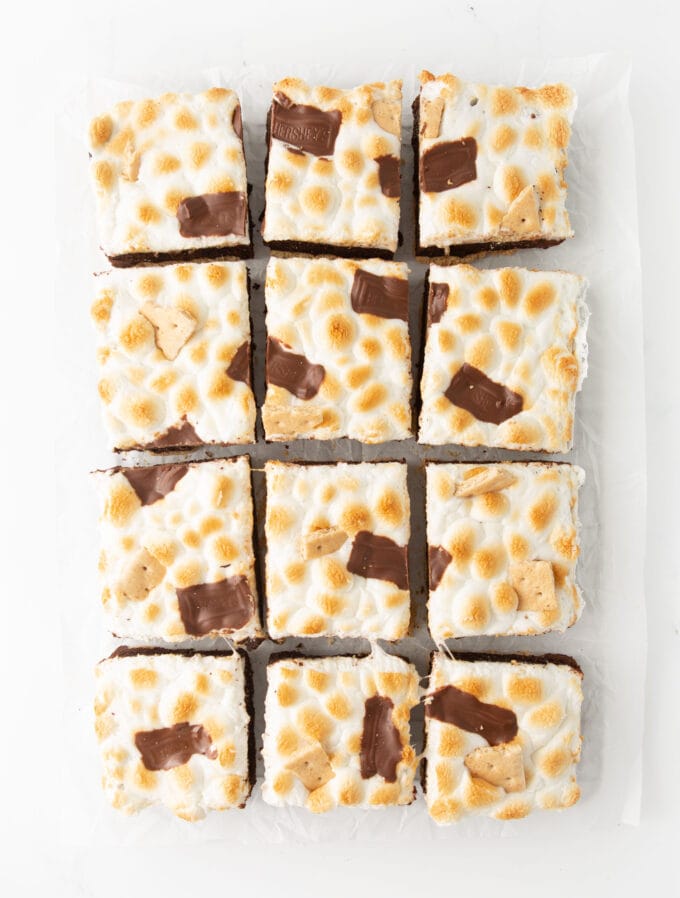
Step 6: Cut into 12-24 squares
Before cutting, allow the pan to fully cool, then refrigerate for 30-60 minutes to help firm up the chocolate and marshmallows. This will give you the cleanest cuts.
Want to get super clean cuts? For this month's baking challenge, I've created a cool interactive slideshow with video tips on how to make these! Be sure to watch this for tips to cut the bars really cleanly!
Tips & Variations
- Switch up the toppings! Top with chocolate chips, Hershey bars, or graham cracker crumbs, or any other candy (Reeses?!).
- Use chocolate graham crackers: While I think original graham crackers are best here, you could get crazy and use chocolate graham crackers!
- Add peanut butter: For a super rich flavor, you could pour melted peanut butter on top of the baked bars before you add the marshmallows. If doing this, I would let the bars cool for about 20 minutes before pouring it on so that it doesn't soak through the bars. Then proceed to adding and broiling the marshmallows.
Frequently Asked Questions:
I use and recommend Hershey's Special Dark Cocoa powder to give them a moist, rich flavor. That said, you can substitute for regular unsweetened cocoa powder, just note that your cookies will have a puffier texture and won't have the iconic brownie taste.
I find that Hershey's Special Dark tastes more chocolatey than regular without being overpowering. It also gives cookie dough a moister texture, whereas unsweetened cocoa powder tends to result in drier cookies.
Turn on the "BROIL" function on your oven and place the pan on the bottom or middle rack. Stand by the oven and watch it very closely - do not walk away! When you start to notice a light brown, rotate the pan to avoid any hot spots. Remove from the oven when the marshmallows are golden brown.
Storage & Freezing:
- Storage: Store in an airtight container or cover the pan with plastic wrap. If your kitchen is warm or you plan to serve these outdoors, keep refrigerated until time to serve to help slow down the marshmallows and chocolate from getting too warm.
- Freezing: You can freeze them but the graham crackers may get soft & the marshmallows can get sticky after freezing. If you need to make ahead, I would recommend waiting to add/broil the marshmallows until after you thaw the bars.
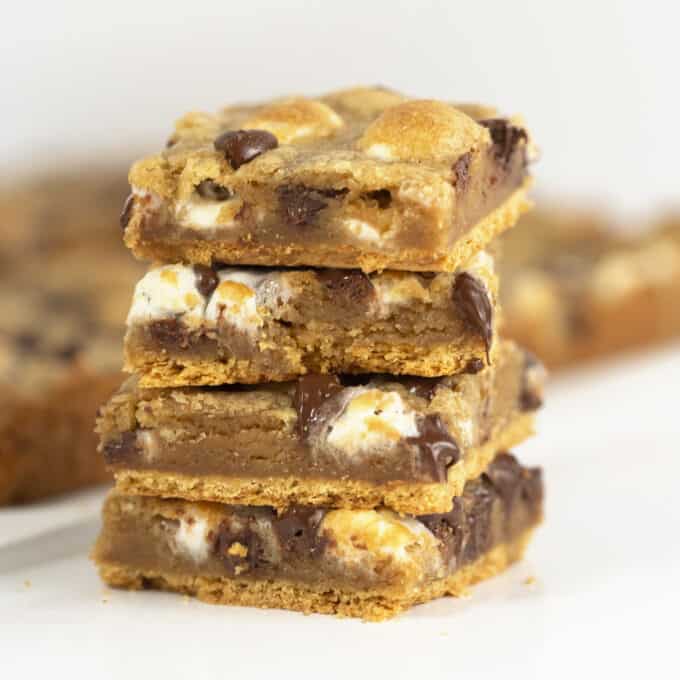
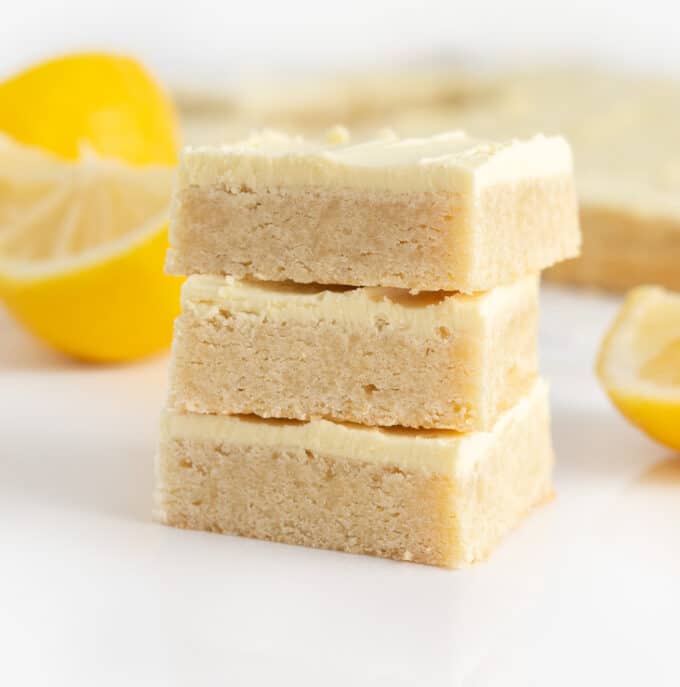
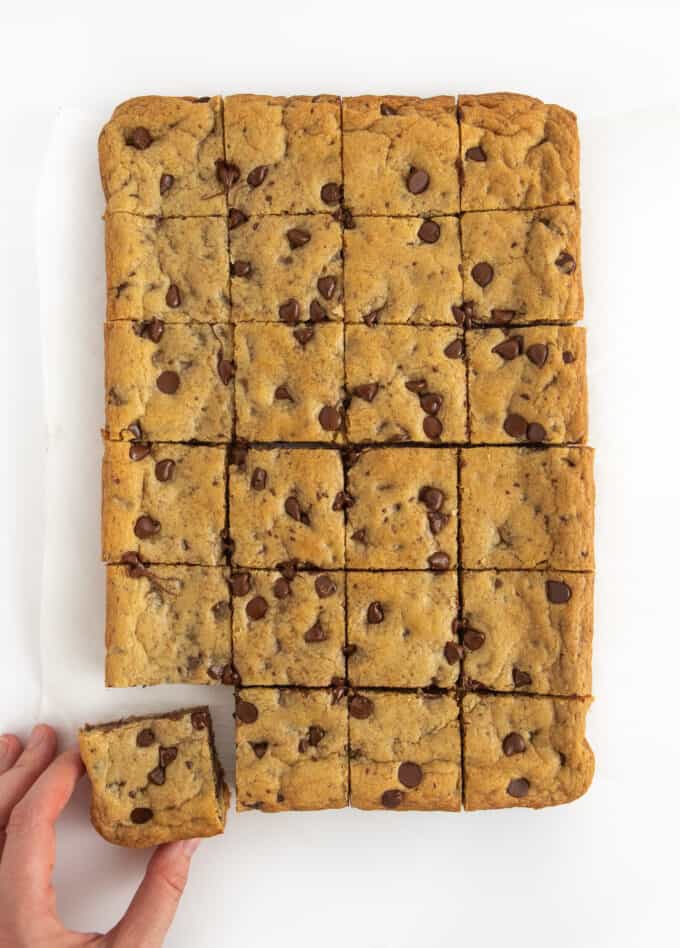
Looking for more easy cookie bars?
I'm a sucker for a good, easy cookie bar that you can bake up in a 9x13 pan. Here are a few of my other favorites!
Did you make this recipe? If so, will you do me a huge favor and leave a review and rating letting me know how you liked this recipe? This helps my small business thrive so I can continue providing free recipes and high-quality content for you.
Chocolate S'more Cookie Bars
Ingredients
⭐️ Before you begin! If you make this, will you do me a huge favor afterwards and leave a review and rating letting me know how you liked this recipe? This helps my small business thrive so I can continue providing free recipes and high-quality content for you.
Instructions
- Preheat oven to 350°F.
- Two notes before starting! (1) Note that this is a thicker dough that is easiest to make with a stand mixer. If you only have a handheld mixer, you may just need to use a spatula to help mix the flour in. (2) I created an interactive slideshow of me talking through all my tips & tricks to make these - I recommend tapping through this before you make them!
- In a large bowl, use an electric mixer on medium-high speed to cream softened ¾ cup unsalted butter (i.e. 1 ½ sticks), ¾ cup light brown sugar, and ¾ cup granulated sugar for 2 minutes until light and fluffy.
- Add the 2 large eggs, 2 teaspoons vanilla extract, and 3 tablespoons light corn syrup and mix on low speed until combined. Scrape down the sides of the bowl so everything can combine.
- Add in 1 teaspoon baking powder and ½ teaspoon salt and mix for another 5-10 seconds until combined.
- Lastly, add ¾ cup dark cocoa powder and 2 ¼ cup all-purpose flour and mix on medium until combined.
- Spray a light-colored metal 9×13 pan with cooking spray, then line pan with two pieces of parchment paper, leaving a 2-inch overhang on each long side so that you will be able to lift the bars out of the pan.
- Line the bottom of the pan with graham crackers.
- Drop the dough into small chunks in the pan. This will help disperse everything so that you can easily smooth it out. I highly recommend this method rather than trying to spread out a large chunk. Once all dough has been added, use a spatula or your hands to press down the dough into a smooth layer (being sure to get all the corners). Be careful not to shift around the graham crackers too much.Tip: This dough is a little sticky, so to help spread, I recommend spraying your hands with cookie spray or use place another piece of parchment paper on top and continue pressing down.
- Bake bars at 350°F for 18-22 minutes, or until the center no longer looks wet. The center may look a tiny bit underdone but the bars will continue to bake in the hot pan when cooling.Immediately proceed to next step.
- Right after your bars come out of the oven, top with the full 10-ounce bag of marshmallows. Turn on the "BROIL" function on your oven and place the pan on the bottom or middle rack.Stand by the oven and watch it very closely - do not walk away! When you start to notice a light brown, rotate the pan to avoid any hot spots. Remove from the oven when the marshmallows are golden brown.
- If desired, press Hershey bar and graham cracker pieces into the top.
- Before cutting, allow the pan to fully cool, then refrigerate for 30-60 minutes to help firm up the chocolate and marshmallows. This will give you the most clean cuts. Want to get super clean cuts? For this month's baking challenge, I've created a cool interactive slideshow with video tips on how to make these! Be sure to watch this for tips to cut the bars really cleanly!
- Store in an airtight container or cover the pan with plastic wrap. If your kitchen is warm or you plan to serve these outdoors, keep referigerated until time to serve to help slow down the marshmallows and chocolate from getting too warm.
Notes from Melissa
- Cocoa Powder: I use and recommend Hershey's Special Dark Cocoa powder to give them a moist, rich flavor. You can substitute for regular unsweetened cocoa powder, just note that your cookies will have a puffier texture and won't have the iconic brownie taste.
- Storage: Store in an airtight container or cover the pan with plastic wrap. If your kitchen is warm or you plan to serve these outdoors, keep refrigerated until time to serve to help slow down the marshmallows and chocolate from getting too warm.
- Freezing: You can freeze them but the graham crackers may get soft & the marshmallows can get sticky after freezing. If you need to make ahead, I would recommend waiting to add/broil the marshmallows until after you thaw the bars.
Literally amazing! I have brought this dessert to two or three different functions, and each time I am asked for the recipe. Such an easy dessert to make!
Yay, so glad you love this recipe, Kaitlyn! Thank you so much for taking the time to leave a review!