
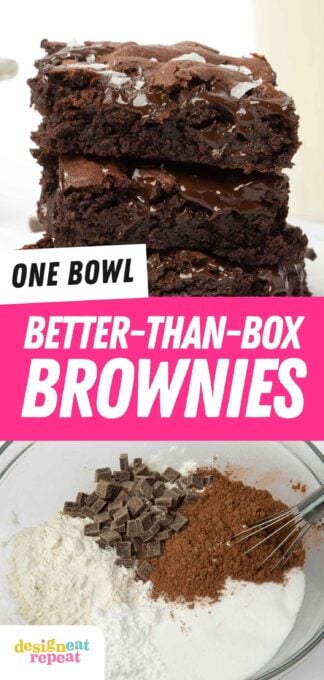
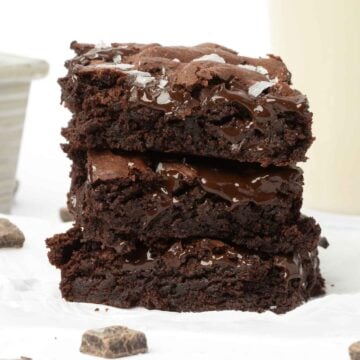
Thick, chewy, fudgy brownies made in ONE bowl, no mixer required! Just as easy as boxed mix, but better!
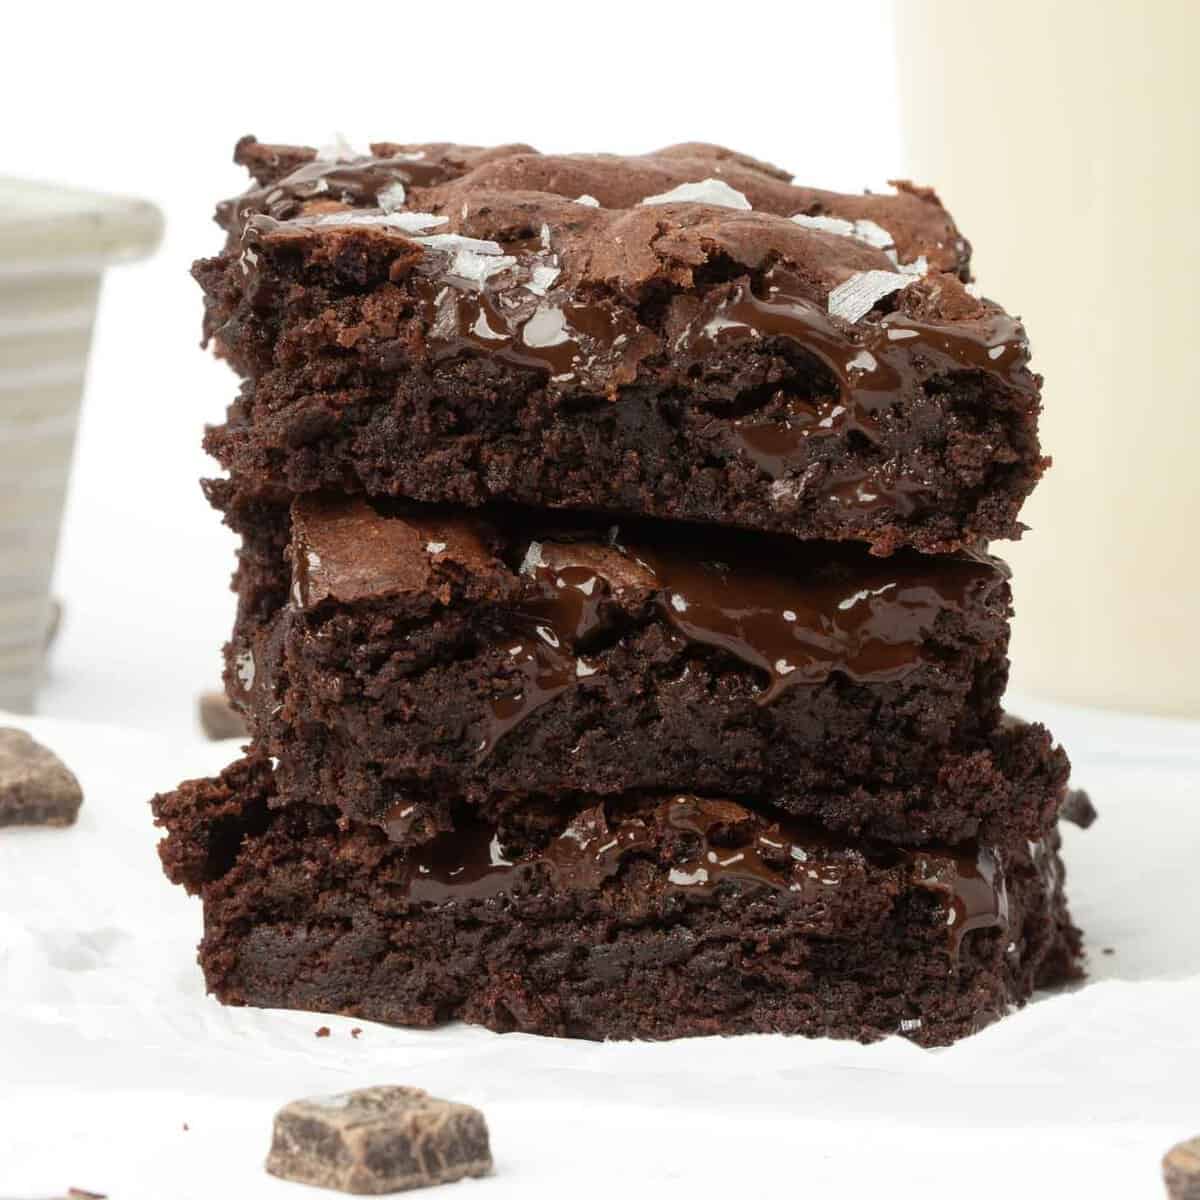
Why this is the BEST homemade fudgy brownie recipe
This recipe took me so long to perfect because I had very specific criteria & high standards for what I wanted them to be:
- One bowl, no mixer
- Thick & fudgy with chewy edges
- As easy as boxed mix: The recipe had to "work" just like a box mix, without any mixers or special techniques.
- No heating the sugar & fat together that most brownie recipes require to get a shiny crust (ain't got time for that)
- Taste as good or better than the Ghirardelli boxed mix (my fave) because that stuff is good.
Ingredient Notes & Substitutions
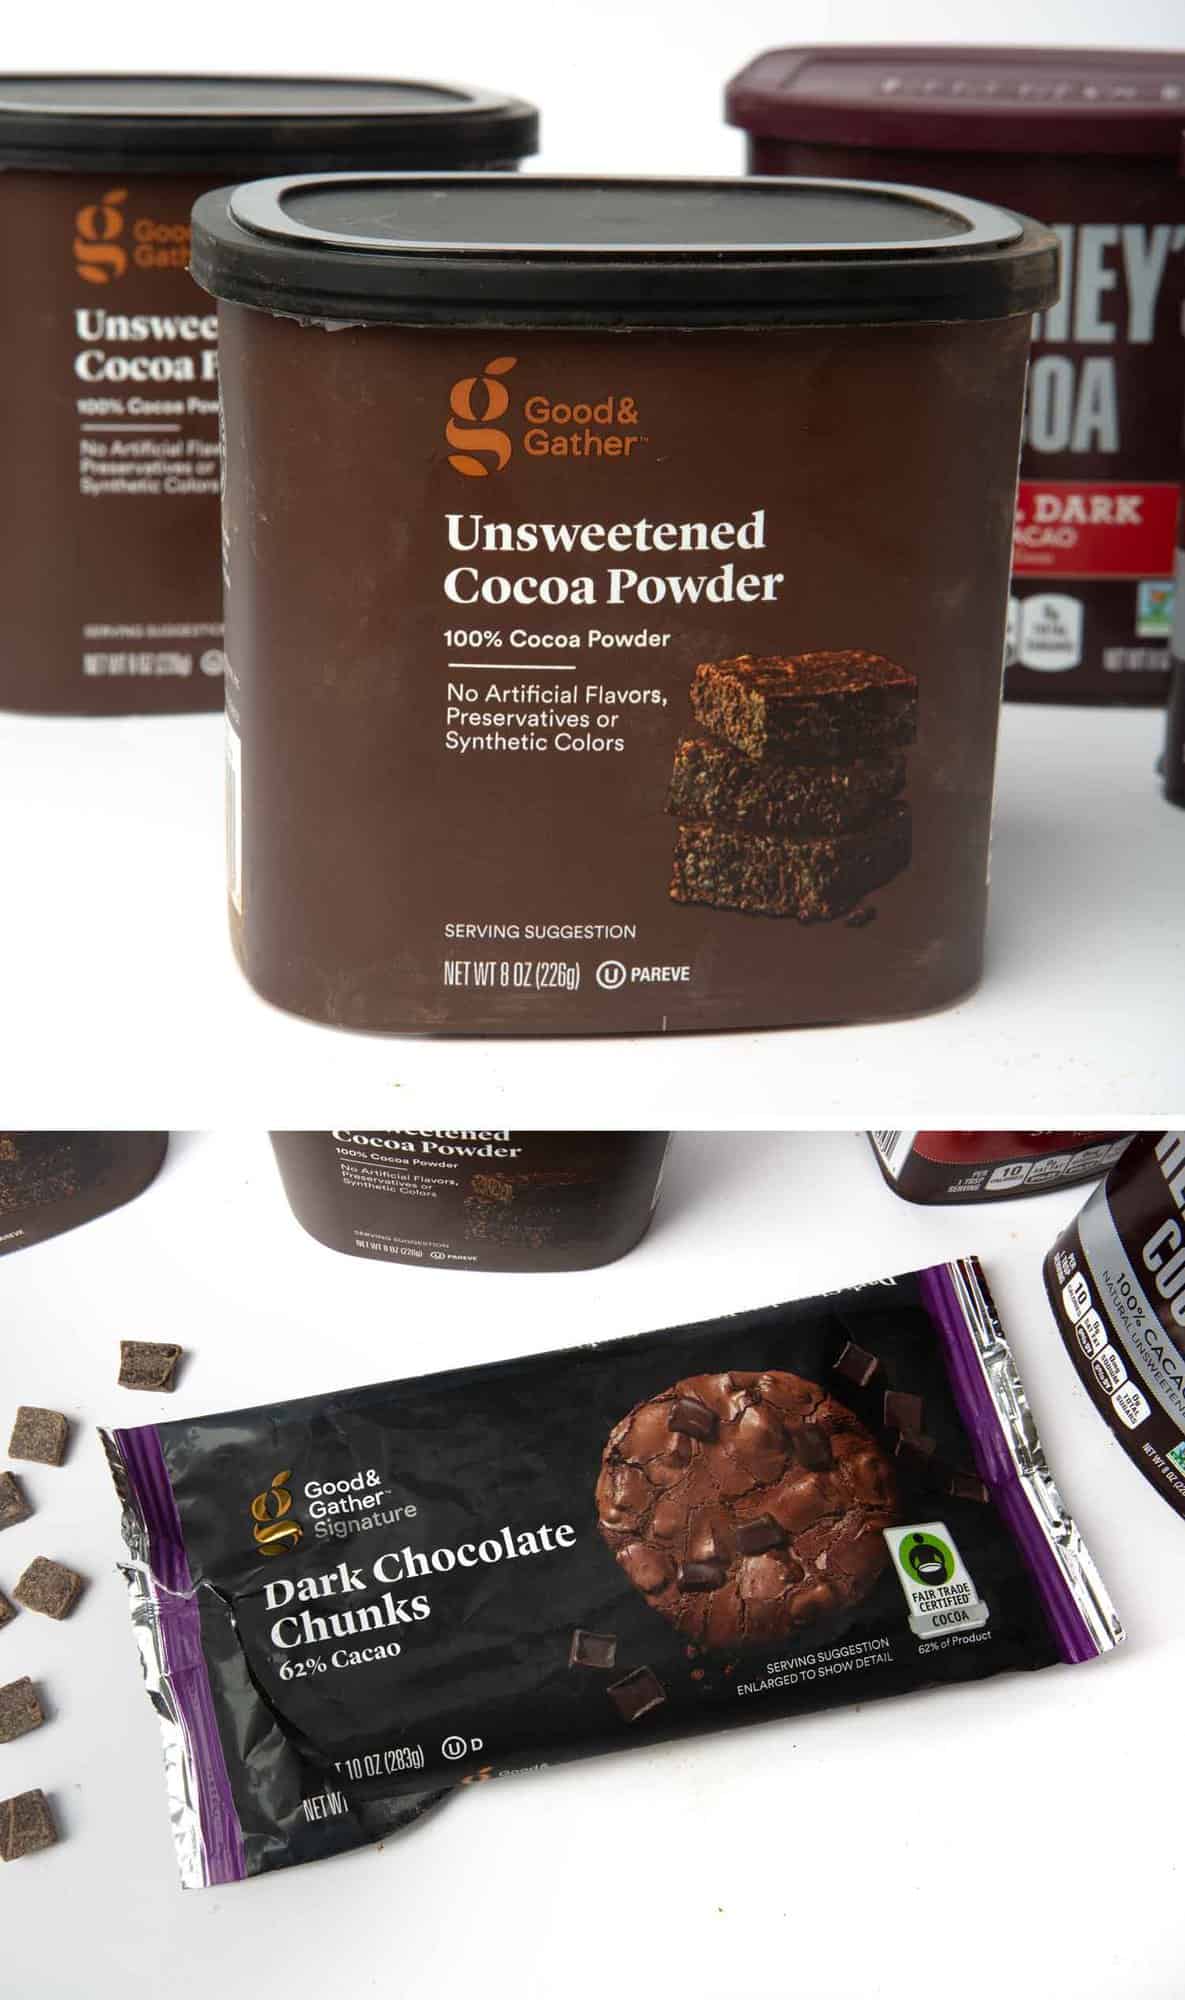
- Unsweetened Cocoa Powder: You can use your favorite unsweetened cocoa powder. I tested these with Hershey's, Scharffen Berger, and Target's Good & Gather (which I love, and it's a good price!).
- Granulated Sugar: Don't cut back on the sugar, as it is crucial for the correct texture and balanced flavor.
- Powdered Sugar: Don't skip this, either! Adding powdered sugar is essential to getting a shiny boxed-mix crust.
- Cornstarch: This adds an extra chewy texture.
- Chocolate chips: Other than adding flavor and texture, the chocolate chips in the batter actually help give them a shiny crust. I don't recommend skipping them! You can make these with any chocolate chips, but I've been liking them with dark chocolate chunks.
How to Make Homemade Brownies:
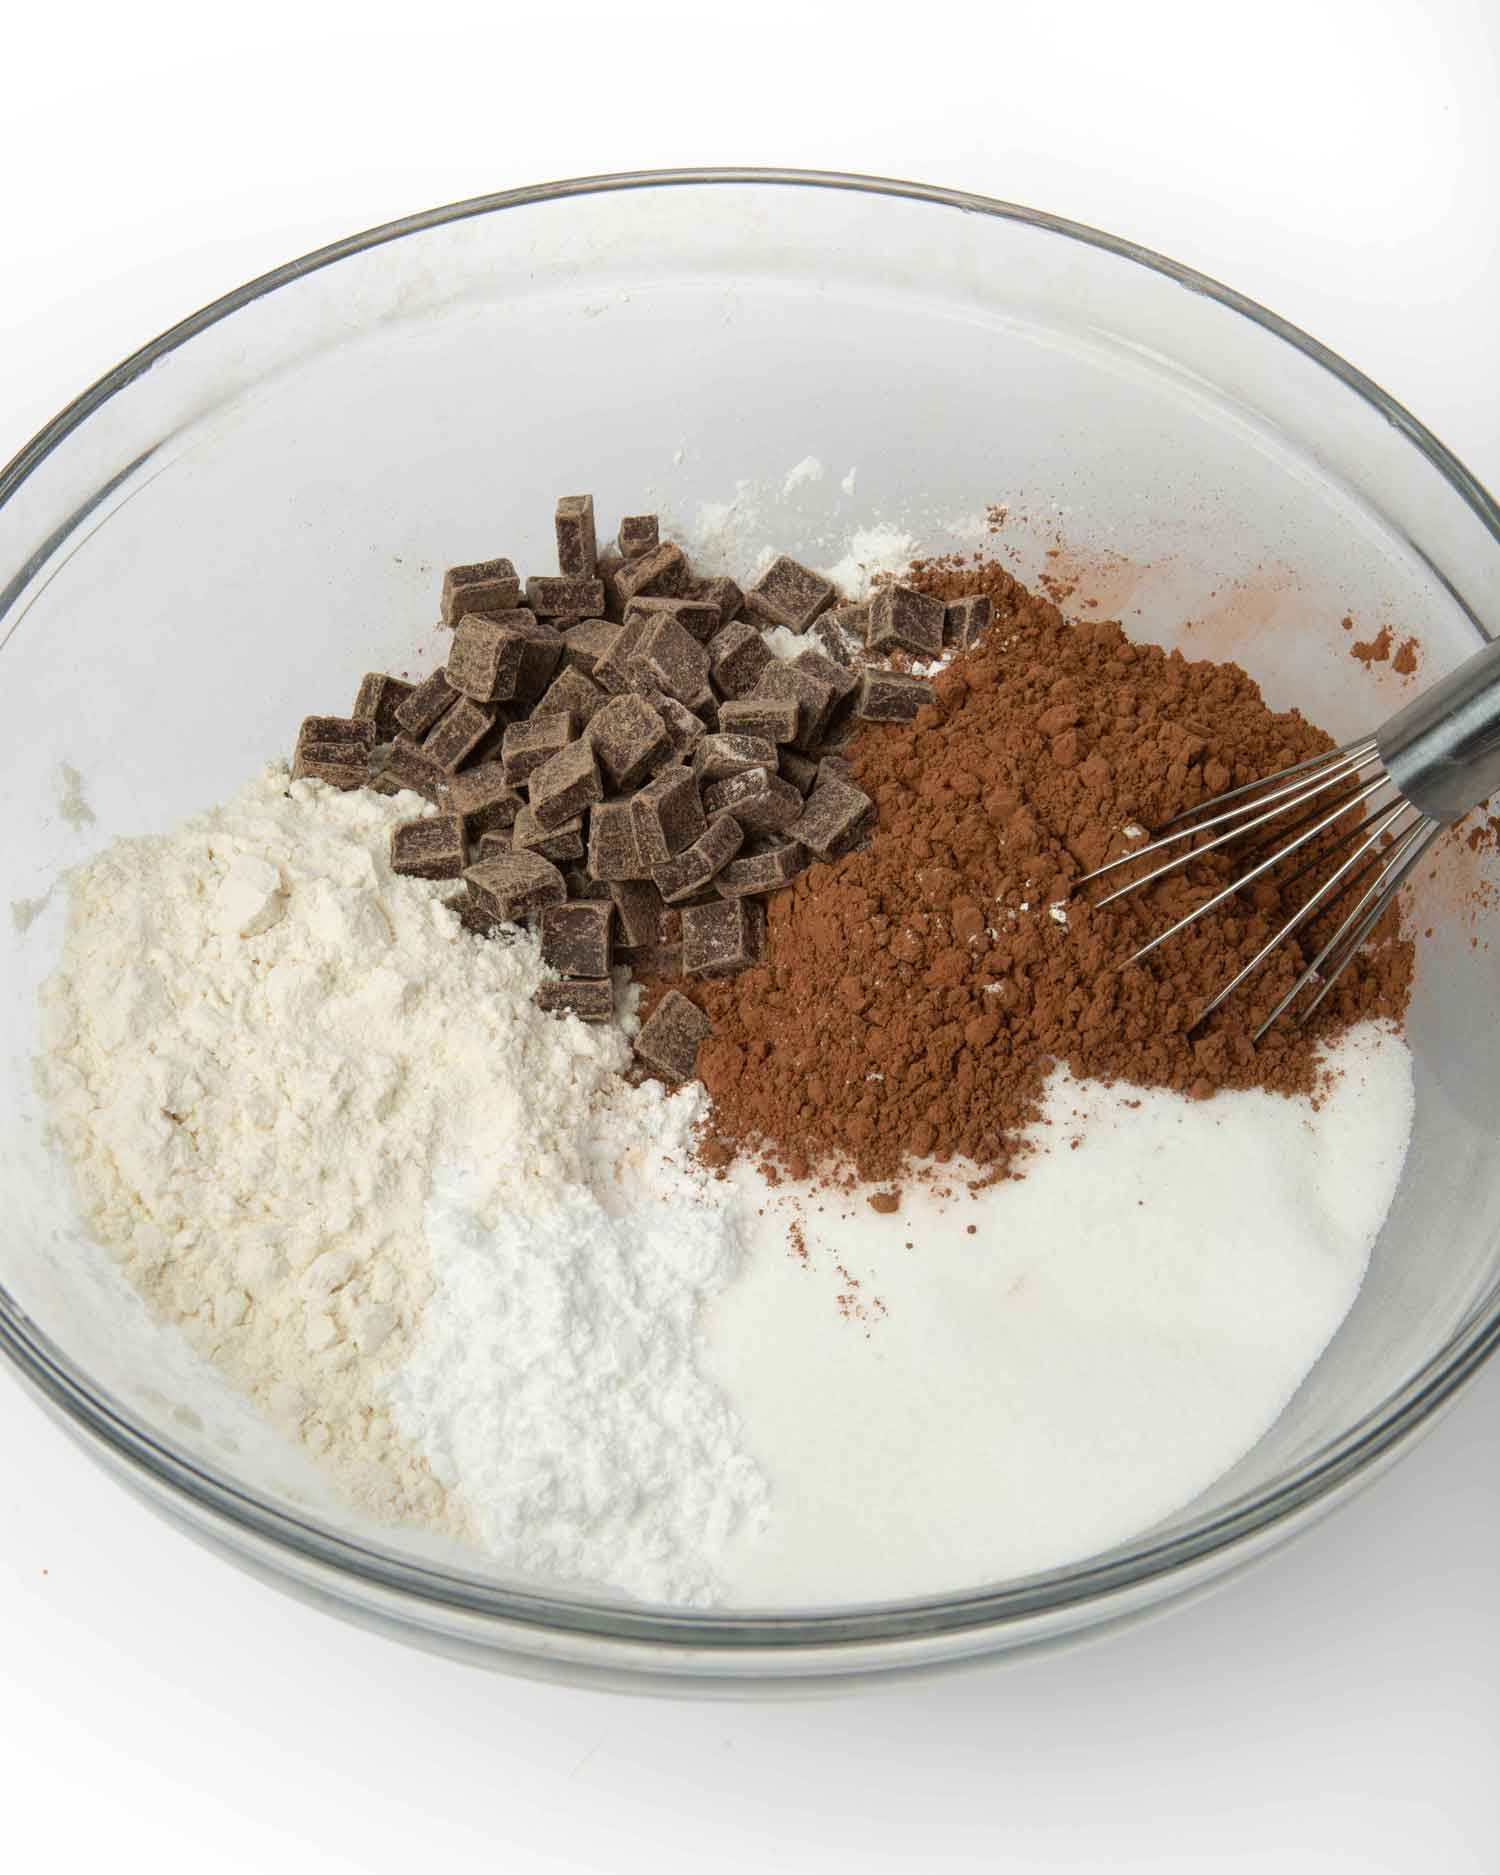
Step 1: Mix Dry Ingredients
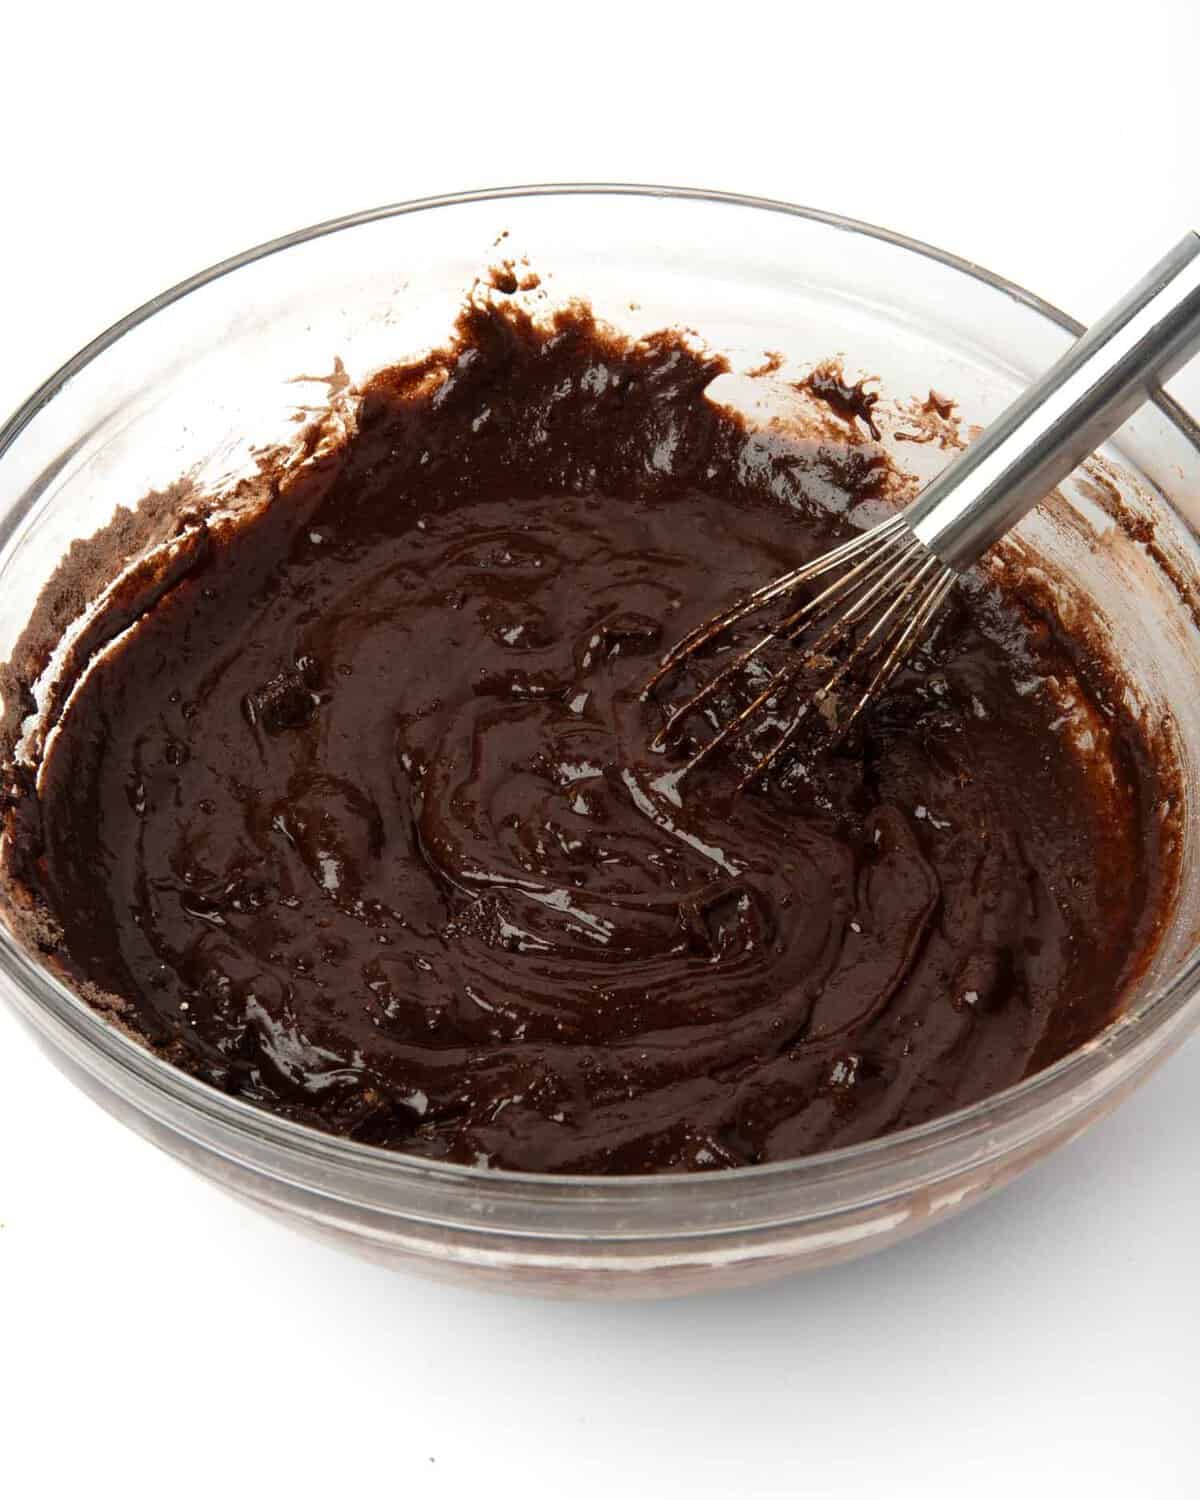
Whisk together dry ingredients in large bowl.
Tip: While not required, adding 1 teaspoon of espresso powder to the batter gives them a deeper flavor!
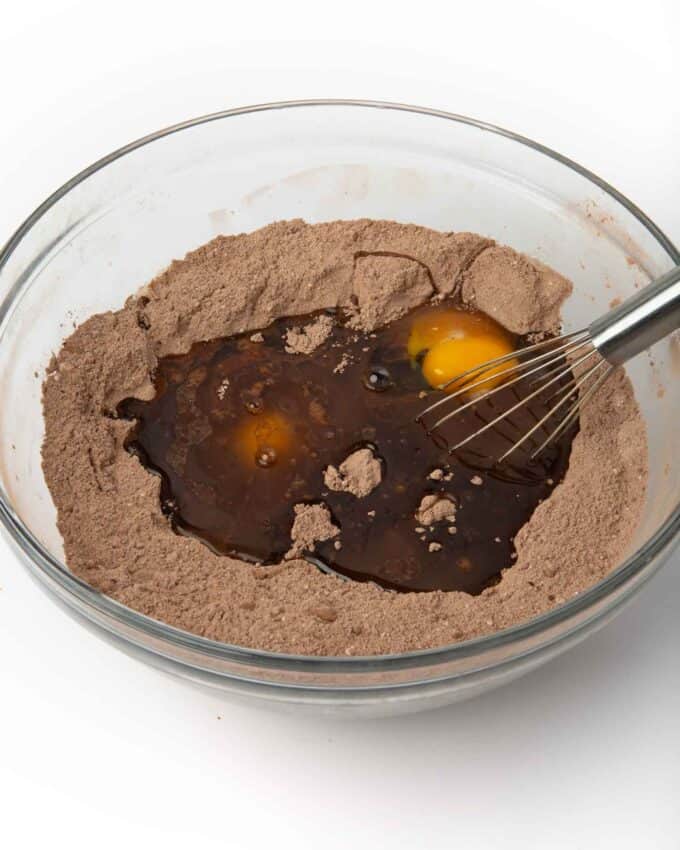
Step 2: Add Wet Ingredients
Add wet ingredients and mix with the whisk until just incorporated; batter will be thick.

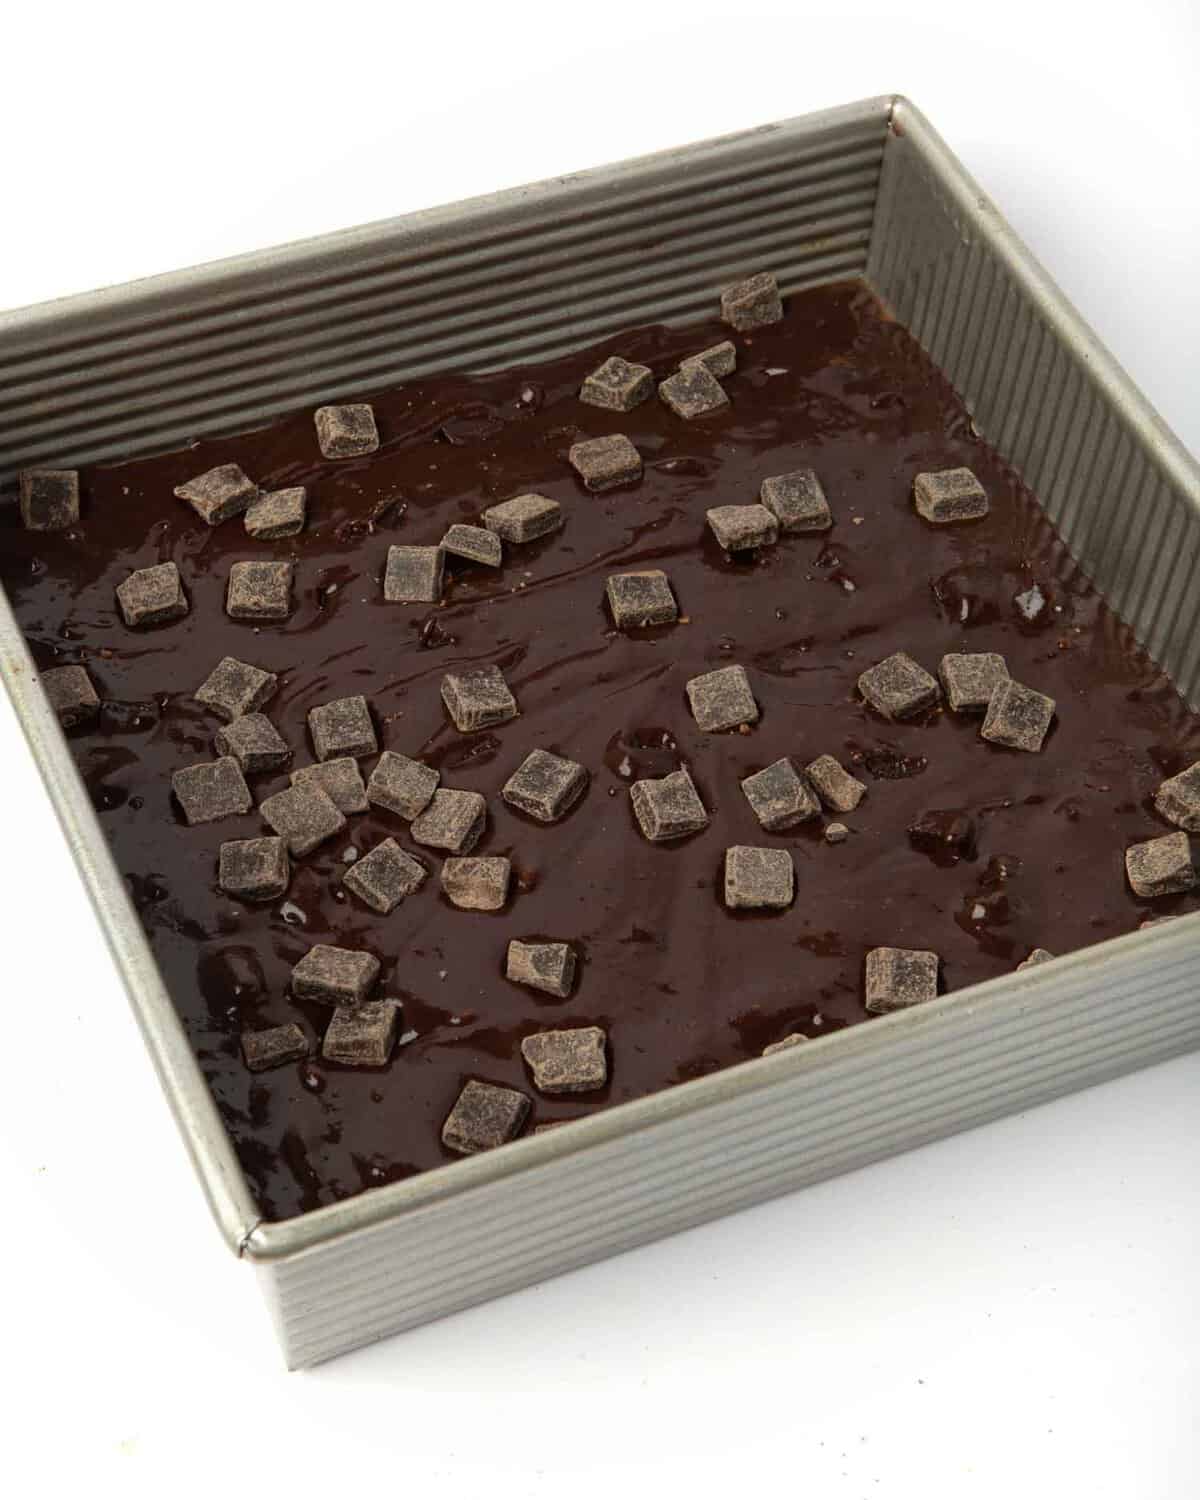
Step 3: Pour Into Pan & Bake
Pour into a greased 9x9" light-colored aluminum metal pan, then top with the remaining ¼ chocolate chips. Bake at 325℉ for:
- 9x9": Bake for 32-36 minutes
- 9x13": Bake for 20-24 minutes
Tip: If you're going for presentation, line the pan with parchment paper so that you can lift the brownies out of the pan to get clean cuts.
Step 4: Cut & Serve
Let the brownies cool completely for clean cuts. If you are making these a day ahead, I suggest waiting until the next day to cut, as they firm up beautifully and will cut much easier!
Tip: Top with flaky sea salt for extra deliciousness!

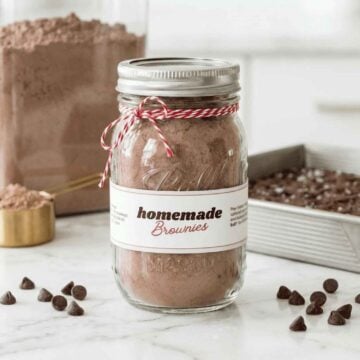
How to Make DIY Brownie Mixes - 2 ways!
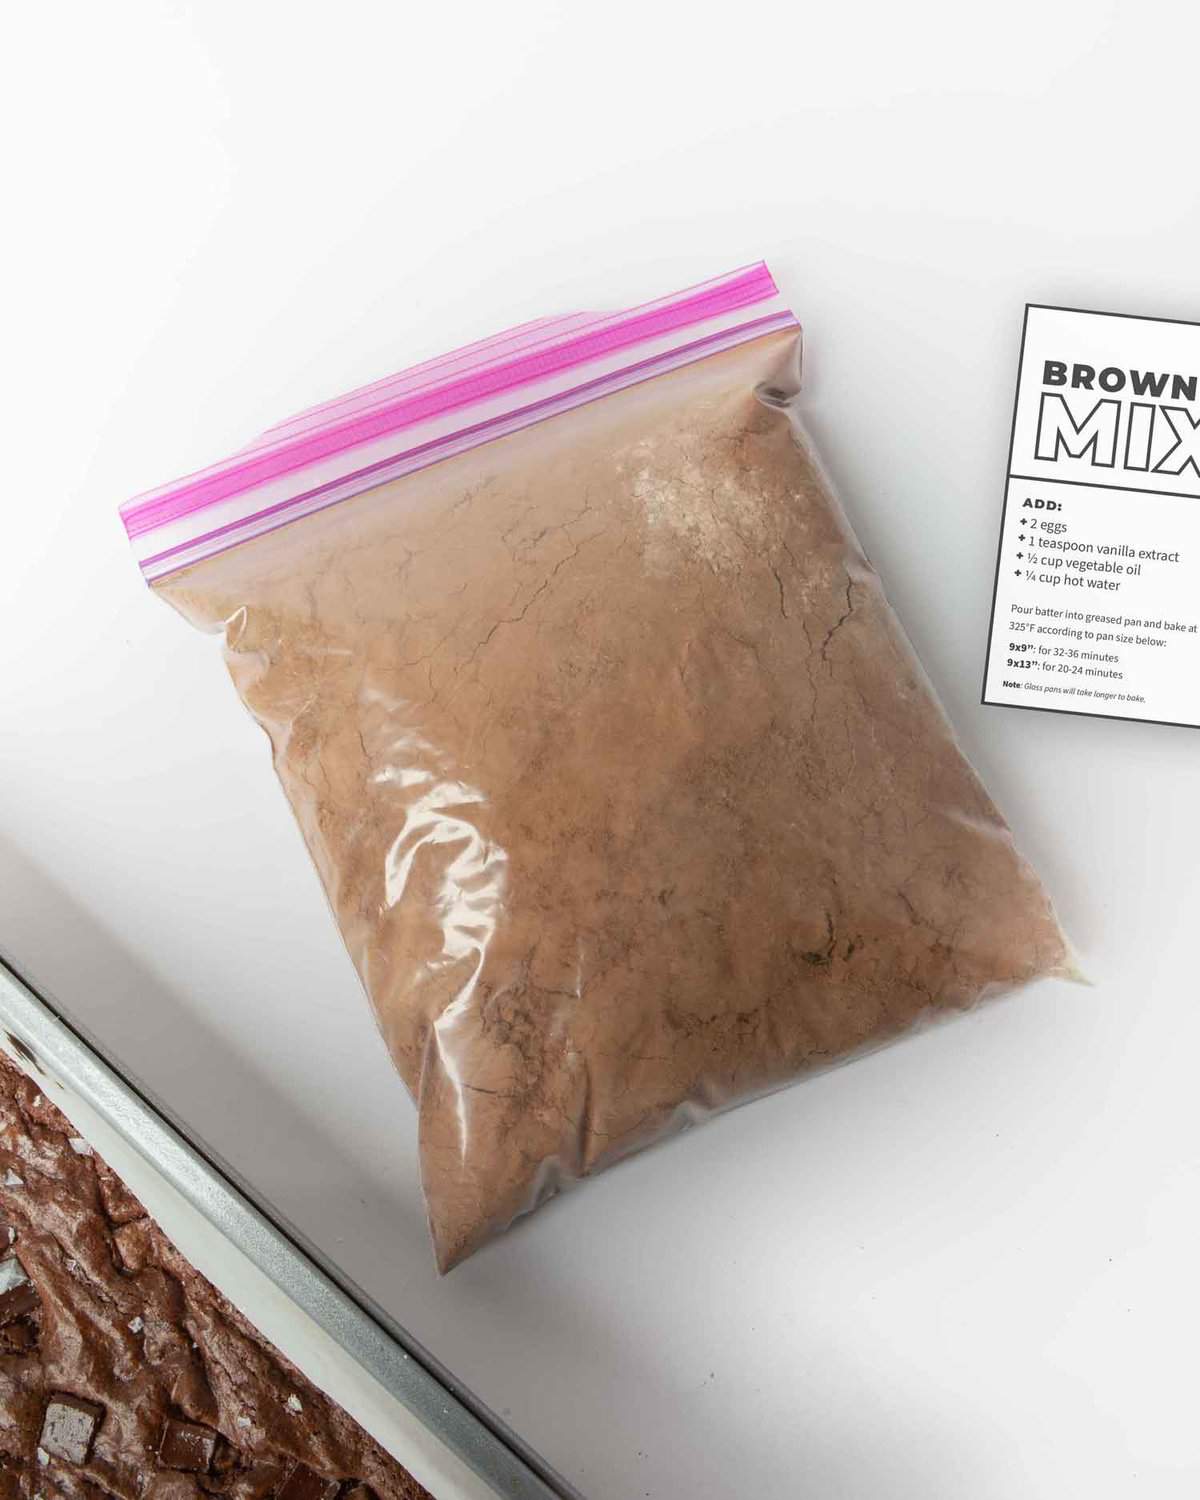
Option 1: Pre-Measured Bags
What you need:
- Quart-sized ziploc bags
- Printable tags or a sharpie marker
- On the bag, attach printable tag or write:
"Add: 2 eggs, 1 teaspoon vanilla extract, ½ cup vegetable oil, and ¼ cup water. Pour batter into greased light-colored metal aluminum pan, top with an optional extra ¼ chocolate chips, and bake at 325°F according to pan size below:
- 9x9": for 32-36 minutes
- 9x13": for 20-24 minutes
- Note: Glass pans will take longer to bake - Measure out dry ingredients in each bag. For easy filling, fold the top of the bag down a few inches, then add the sugars first as they it hold down the bag. Close and shake bag to combine.
- 1 ¼ cups granulated sugar
- ½ cup powdered sugar
- ¾ cups all-purpose flour
- ¾ cups unsweetened cocoa powder
- 1 teaspoon kosher salt
- ½ tsp baking powder (not baking soda!)
- 1 tablespoon cornstarch
- ¾ cup semi-sweet chocolate chips or chunks
- 1 teaspoon espresso powder (totally optional!)
Option 2: Large Container
What you need:
- (2) Gallon-Sized Ziploc Bags or Large Container
- Printable tags or a sharpie marker
- On the container, attach printable tag or write:
"Add: 3½ cups brownie mix, 2 eggs, 1 teaspoon vanilla extract, ½ cup vegetable oil, and ¼ cup water. Pour batter into greased light-colored metal aluminum pan, top with an optional extra ¼ chocolate chips, and bake at 325°F according to pan size below:
- 9x9": for 32-36 minutes
- 9x13": for 20-24 minutes
- Thick 9x13": Double ingredients and bake for 32-36 minutes.
- Note: Glass pans will take longer to bake - Measure out dry ingredients into container (this makes a 7x batch, so that you can use two full containers of cocoa). Close and shake bag or container to combine. If measuring directly into the storage container, leave 3-4" on top of extra space so that you can shake it to combine.
- 8 ¾ cups granulated sugar
- 3 ½ cup powdered sugar
- 5 ¼ cups all-purpose flour
- 5 ¼ cups unsweetened cocoa powder (two 8-ounce containers)
- 7 teaspoons kosher salt
- 3 ½ teaspoon baking powder (not baking soda!)
- 7 tablespoons cornstarch
- 5 ¼ cup semi-sweet chocolate chips or chunks
- 7 teaspoons espresso powder (totally optional!)
Download the Printable Brownie Mix Tags!
Check your email for the link to download!
Tips & Variations
- Add espresso powder: If you're using a more subtle cocoa powder, adding 1 teaspoon of espresso powder helps enhance the chocolatey flavor! I love adding this when using the Target brand Good & Gather, as it adds an extra punch.
- Don't skip the chocolate chips: In addition to making these extra delicious, the chocolate inside the battera actually helps give it a shinier crust.
- Use a light-colored metal pan: I tested these in metal and glass pans and much prefer the metal pans, as they bake up quicker and fudgier, whereas the glass pans get too crispy on the edges and seem to be fluffier.
Looking for more easy DIY mixes?

Did you make this recipe? If so, will you do me a huge favor and leave a review and rating letting me know how you liked this recipe? This helps my small business thrive so I can continue providing free recipes and high-quality content for you.
Better-Than-Boxed Fudgy Brownies
Ingredients
⭐️ Before you begin! If you make this, will you do me a huge favor afterwards and leave a review and rating letting me know how you liked this recipe? This helps my small business thrive so I can continue providing free recipes and high-quality content for you.
Instructions
- Whisk together dry ingredients in large bowl. Add wet ingredients and mix with the whisk until just incorporated; batter will be thick.
- Spread in a greased pan and sprinkle the remaining ¼ cup of chocolate chips on top. Bake at 325℉ based on the pan size below. I recommend using a light-colored aluminum metal pan for these; glass pans will require more baking time and will result in a fluffier brownie.9x9": Bake for 32-36 minutes9x13": Bake for 20-24 minutes
- Let the brownies cool completely for clean cuts. If you are making these a day ahead, I suggest waiting until the next day to cut, as they firm up beautifully and will cut much easier!Store for 3-4 days covered with plastic wrap or inside an airtight container, or freeze for 1-2 months.

This is absolutely amazing!
Thank you so much for leaving a review, Winnie!
Not sure what I did wrong, but I’ll definitely be trying again! I baked for almost 10 mins over the recommended amount and they were still pretty raw when I cut into them. I made these for the baking challenge, and the crust puffed up pretty fast, but the centers were still raw, though delicious. I’ll be giving them another shot soon to see if I can sort it out!
Hi Shelby! Happy to help troubleshoot! Did you use a glass or dark colored metal pan by chance? Glass will take longer and will typically cause the edges to puff up.
If you didn't use glass, do you use an internal oven thermometer? Most ovens aren't preheated when they say they are, so the $5 thermometer can help with issues like this!
First I rarely bake, with not much of experience in baking, but this recipe is spot on. The brownies came out perfect. I was so happy because usually I fail in recreating any recipe but this was easy. I would prefer a little bit less sugar, it was so sweet, but I will not mess up the recipe I'll just do it again as it is next time
These are great for our busy family and they are delicious!!
Thank you so much for leaving a review, Halianna!
Hi Melissa,
I made these brownies with Great Value Gluten Free All Purpose Flour from Wal-Mart as well as Great Value unsweetened Cocoa and Dark Chocolate Chips. They turned out fudgy sweet- but not too sweet ooey-gooey and d-e-l-i-c-i-o-u-s. The only problem I had with the recipe and I am suspecting it is because of the nature of the gluten free flour is that the brownies did not rise like my usual box brand does. I probably need to adjust the amount of baking powder the next time I bake them, but that did not affect the taste or the texture. They were still absolutely delicious and have a place in my recipe box from now on!
Hi Leighanne! Thanks for leaving your detailed notes on the gluten-free flour! I haven't tested these with GF flour, so that's helpful info for others to read. I do think it would be worth bumping up the baking powder to 1 teaspoon and seeing what happens, as GF flour is much more dense. Report back if you do!
Amazing! They didn't even last a day in my house, kids loved them! I will never buy boxed brownies again. THANK YOU!
So happy to hear that, Ashley! Thank you so much for leaving a review!
I was hesitant to try this month's baking challenge as I was convinced I had already found my "better-than-boxed" brownie recipe in 2021. However, I've loved everything I've tried on your website, plus your brownie recipe was easier than my go to, so I made it today. Let me tell you, IT DID NOT DISAPPOINT! Deliciously fudgy as promised AND easy to make. What's not to love? My new favorite! Thank you!
YAY I am so happy to hear that, Jill! Thank you so much for giving it a try and for leaving a review! I really appreciate it!
These are soo delicious! The perfect fudge brownie!
I had my son help me, so I really appreciate that an electric mixer wasn’t needed- he was able to help with every step.
I am so happy to hear you and the fam enjoyed this recipe! Thank you so much for leaving a review!
I made the brownies last weekend and they were the best I’ve ever made. My family loved them. Thank you so much for the recipe. Next, I’m going to try using the cookie recipe.
That makes me so happy to hear, Kim! Thank you so much for leaving a review, I really appreciate it!
These were delicious, but I got too impatient to make them and realized I didn’t have eggs so I had to add applesauce but they still turned out good!!! I made these cuz I haven’t done a baking challenge in awhile had to do Aprils!!
I am so happy you tried this recipe out and enjoyed it, Camille! Thank you so much for leaving a review and for participating in the baking challenge!
These were amazing. Thanks for the recipe.
Thank you so much for leaving a review, Dana!
What would you suggest as an egg substitute? I usually do a flax egg but wondering if you have any tried and tested ideas?
I haven't tested it myself, so I can't say for sure, but I believe someone commented on instagram saying they used flax egg and it worked. But if you test it, be sure to report back!
Best brownies ever and so easy to make! I baked a batch and they didn't last one hour! I am baking more today because I am craving brownies with vanilla ice cream.
So happy to hear you enjoyed this recipe, Laura! Thank you so much for leaving a review!
I didn’t even use then recipe with the chocolate chips and it was still good, I’d make again
Thank you so much for leaving a review, Ty!
I made these at home and they were a hit! My son's friend rated it a 9 out of 10. Not bad for a mommy baker like me. Hehehe :) Thank you for sharing your recipe. I have a feeling this will become a staple in our home.
So glad you and the fam enjoyed this recipe! Thank you so much for leaving a review, Trina!
Soooooooo yummy! Literally couldn’t stop eating them. They’re gone and I’m sad now…already dreaming about making another batch!
This is the best brownie recipe I’ve ever used!! So easy and so delicious.
So glad you loved it, Marisa! Thank you so much for leaving a review!