

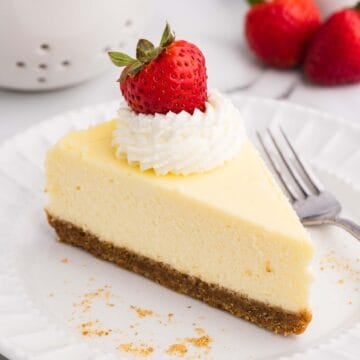
We tested this recipe over 15 times to get the PERFECT, bakery-smooth, crack-free cheesecake baked in a loaf pan. No springform, no fuss, and clean-cut slices every single time.
Reader review ★★★★★
"My husband said it was the best cheesecake he's ever had. I've never made in a loaf pan before. Just in a springform pan! I'm converted. So delicious and creamy!!!!"

Truly the perfect cheesecake...
A few months ago, I asked my recipe assistant Rachel (a trained pastry chef!) to work on the perfect cheesecake in a loaf pan. My criteria was simple (yet surprisingly challenging!):
- Thick & tall in a loaf pan
- Firm, yet creamy (think Cheesecake Factory)
- Slices perfectly (no slumping, no sad middle)
I wanted it to look like it came from a bakery, but without dragging out a giant springform pan that always seems to sink in the center on me. So she got to work, and a BUNCH of tests later, we nailed it.

Here's why you'll this recipe:
- No springform pan needed: Just a regular 8.5 x 4.5"-inch" loaf pan that you probably already have.
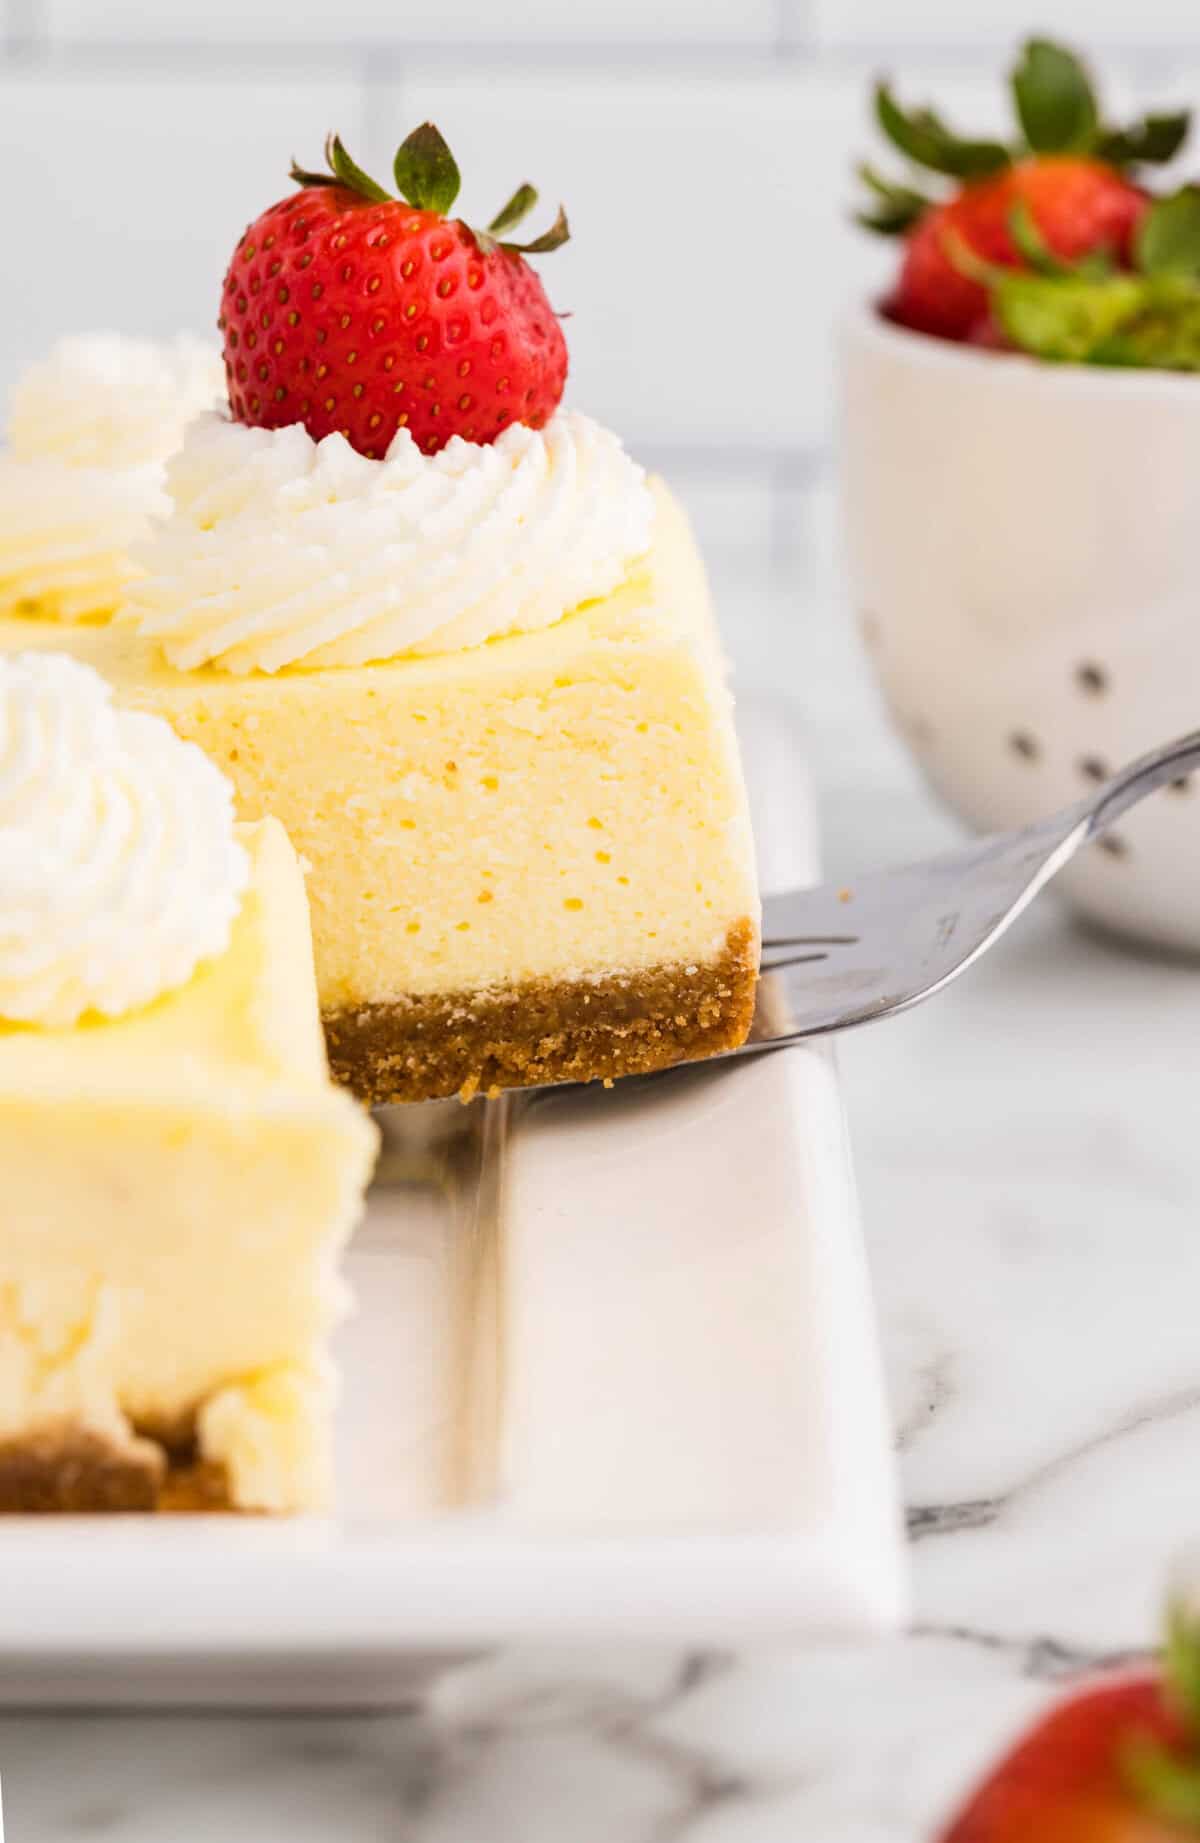
- Bakes up pale & pretty: No golden top, no cracked surface. Just that signature bakery-style ivory finish.
- Slices like a dream: The texture is creamy but sturdy, so every piece is picture-perfect.
- Perfect portion size: A loaf is the ideal amount for small gatherings (or sneaking a slice every night of the week...).
- Foolproof water bath method: I'll walk you through our fail-safe setup so you get that crack-free top every time.
what you need
Ingredient Notes & Substitutions
Room-temperature everything: Cream cheese, sour cream, heavy cream, AND eggs all need to come to room temp (I know it's annoying, but it's necessary here!). Cold ingredients = lumpy batter = sad cheesecake.
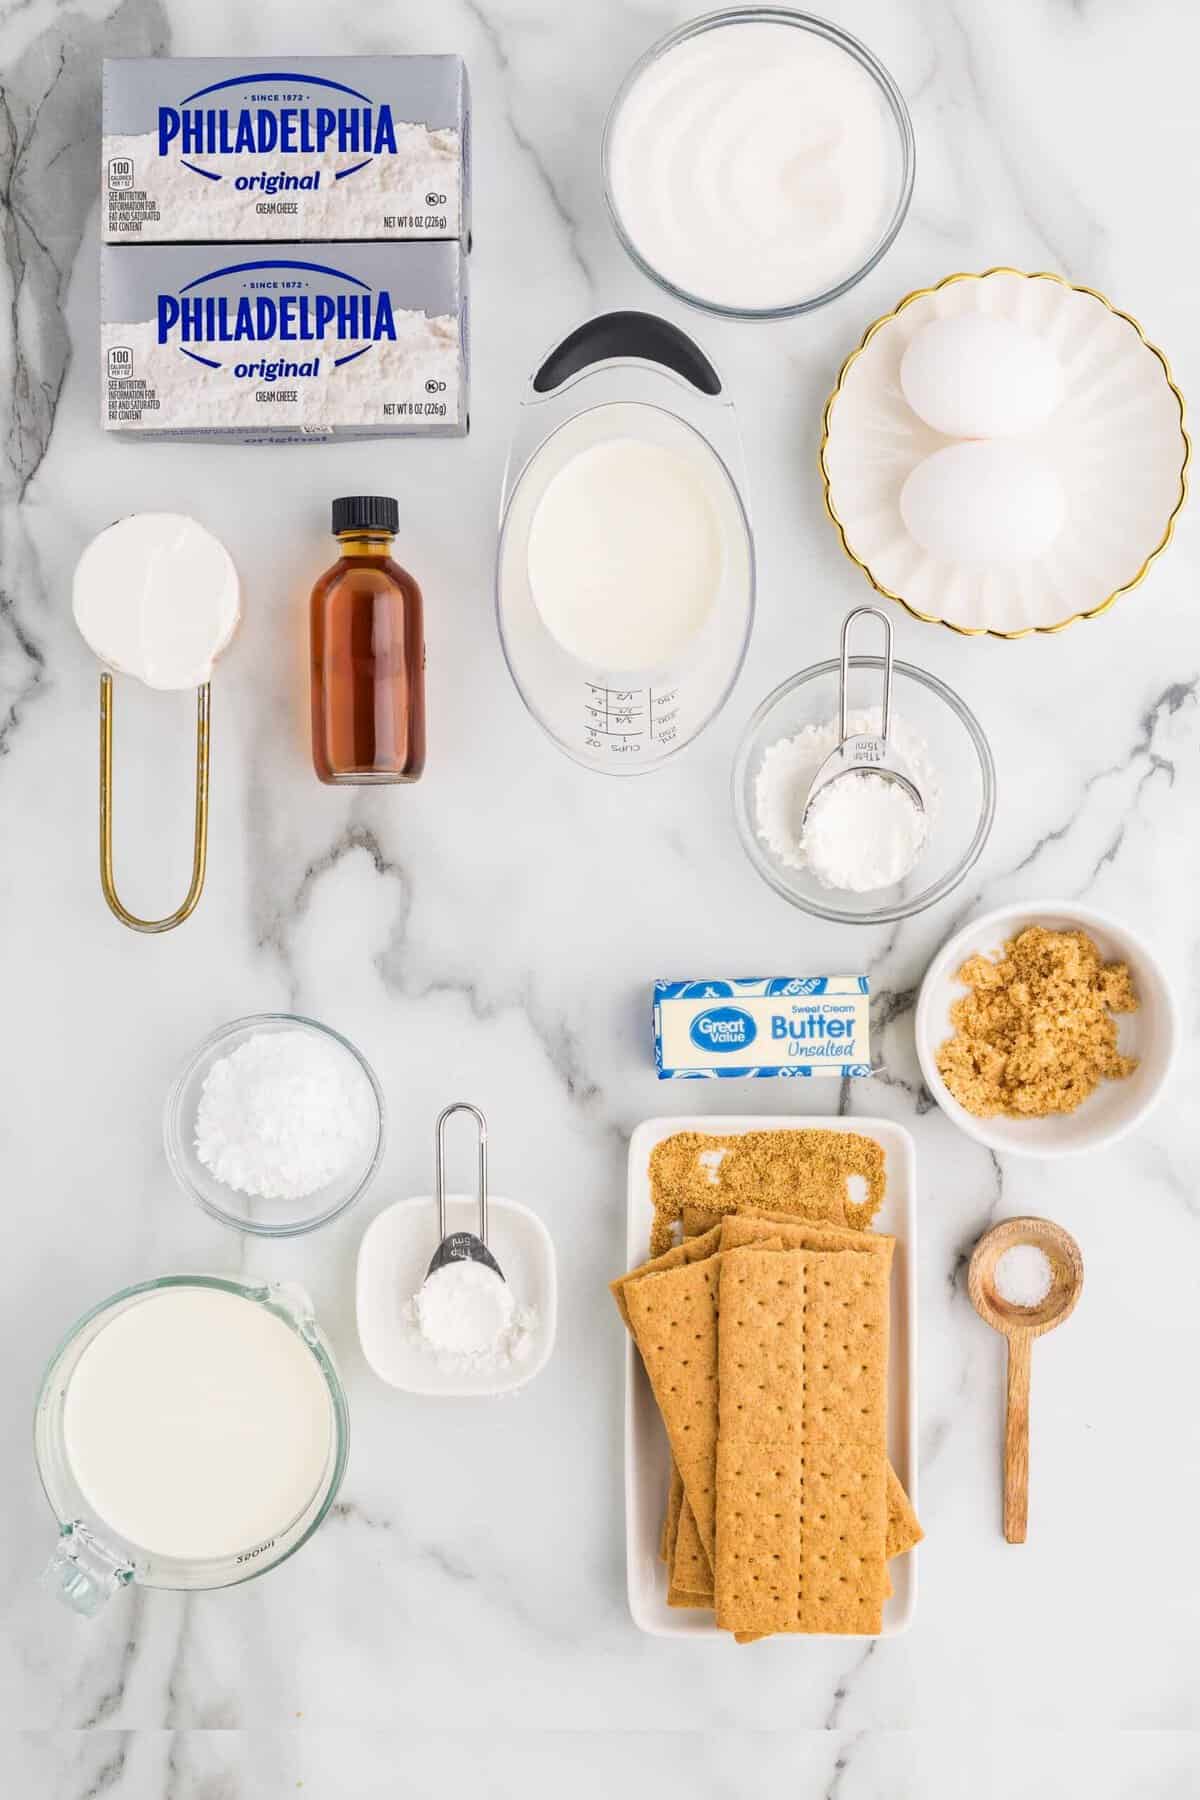
- Full-fat cream cheese: Be sure to use the brick-style full-fat kind (not the tub!) and soften it to room temperature.
- Cornstarch: Our secret weapon! A tablespoon in the filling stabilizes the cheesecake so it slices clean, and a teaspoon in the whipped cream keeps it pipeable for hours.
- Graham crackers: About 7 full rectangles (or 14 squares) crushed into fine crumbs. A food processor makes it easy, but a zip-top bag and a rolling pin works too.
- Sour cream + heavy cream: This combo is what gives the filling that silky, creamy texture without making it too dense.
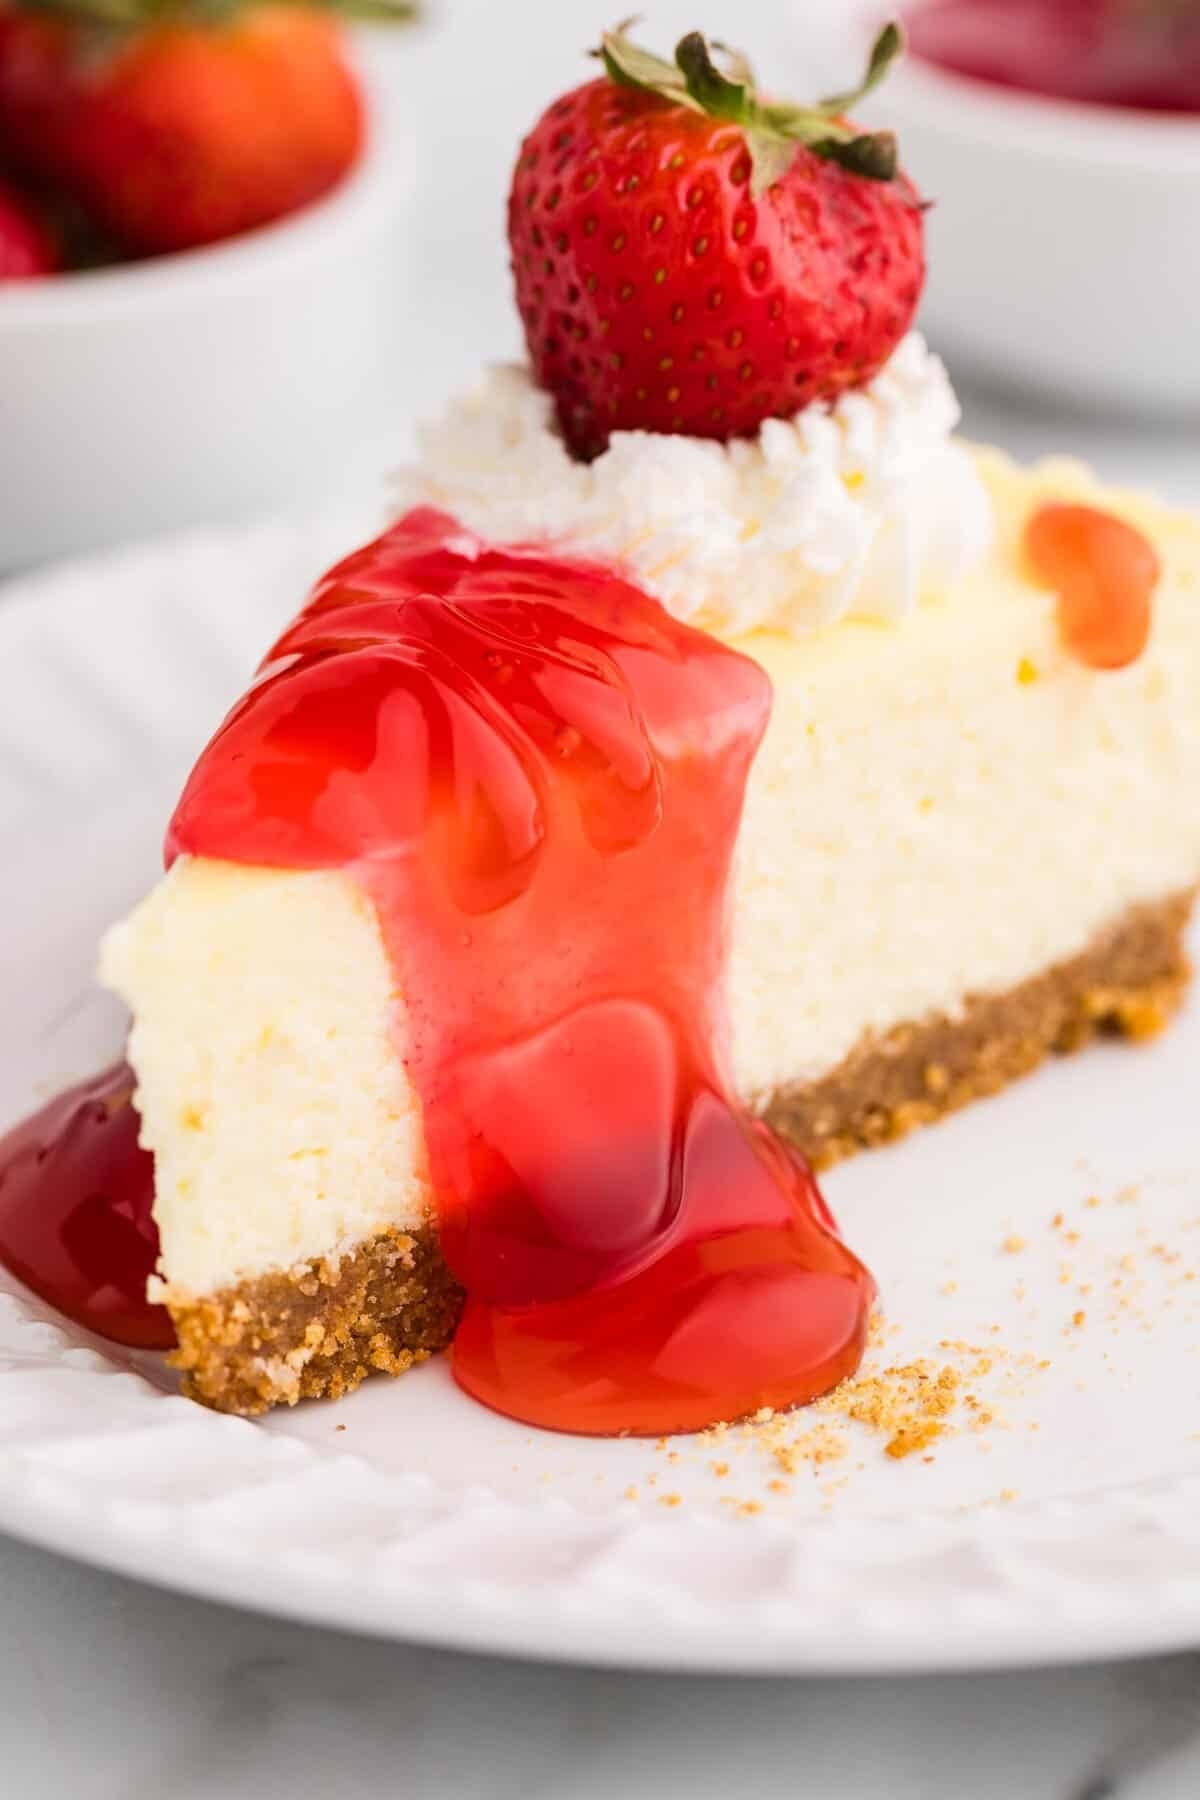
- Fresh strawberries + strawberry glaze: For the hero topping! You can use jarred glaze or make a quick homemade one by simmering strawberries with a little sugar and cornstarch. Or just keep them raw and slice!
How to Make Loaf Pan Cheesecake
Prep Pan & Crust
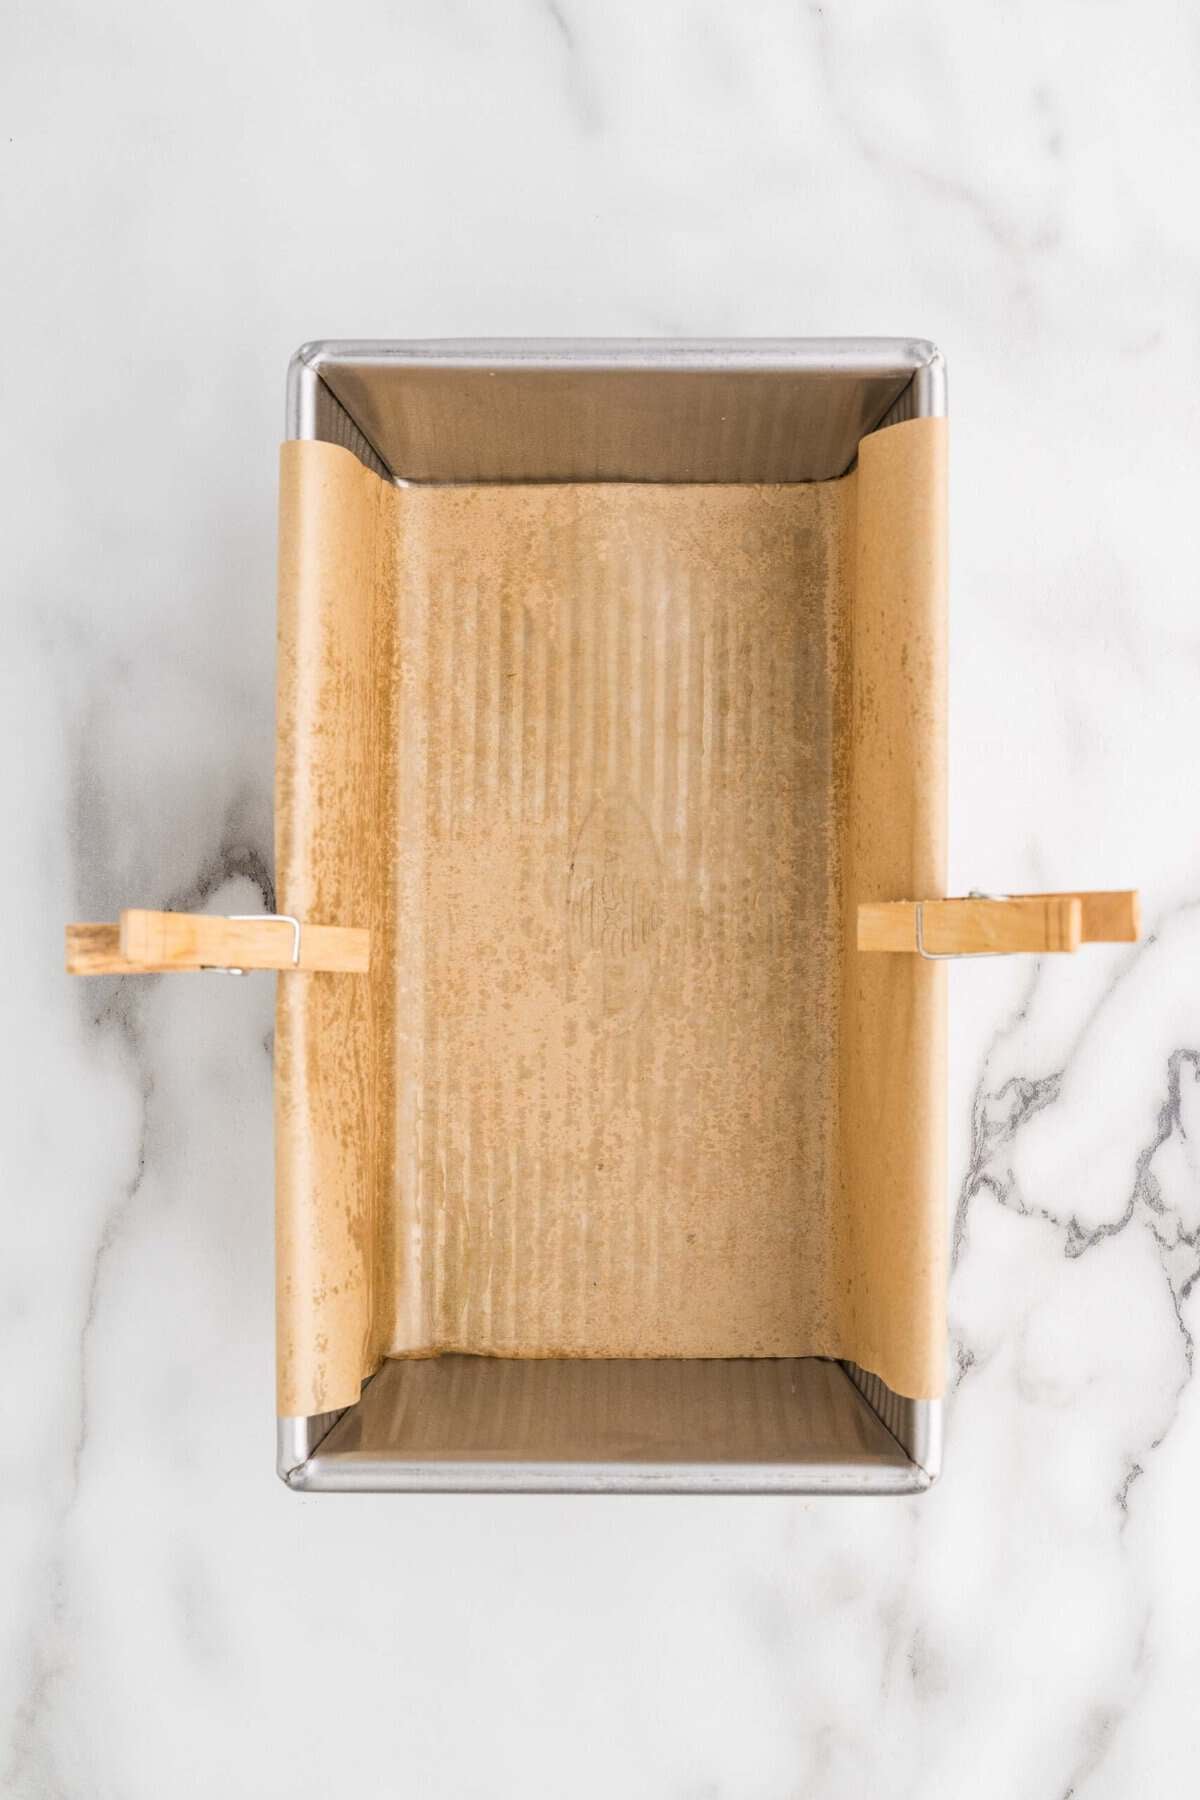
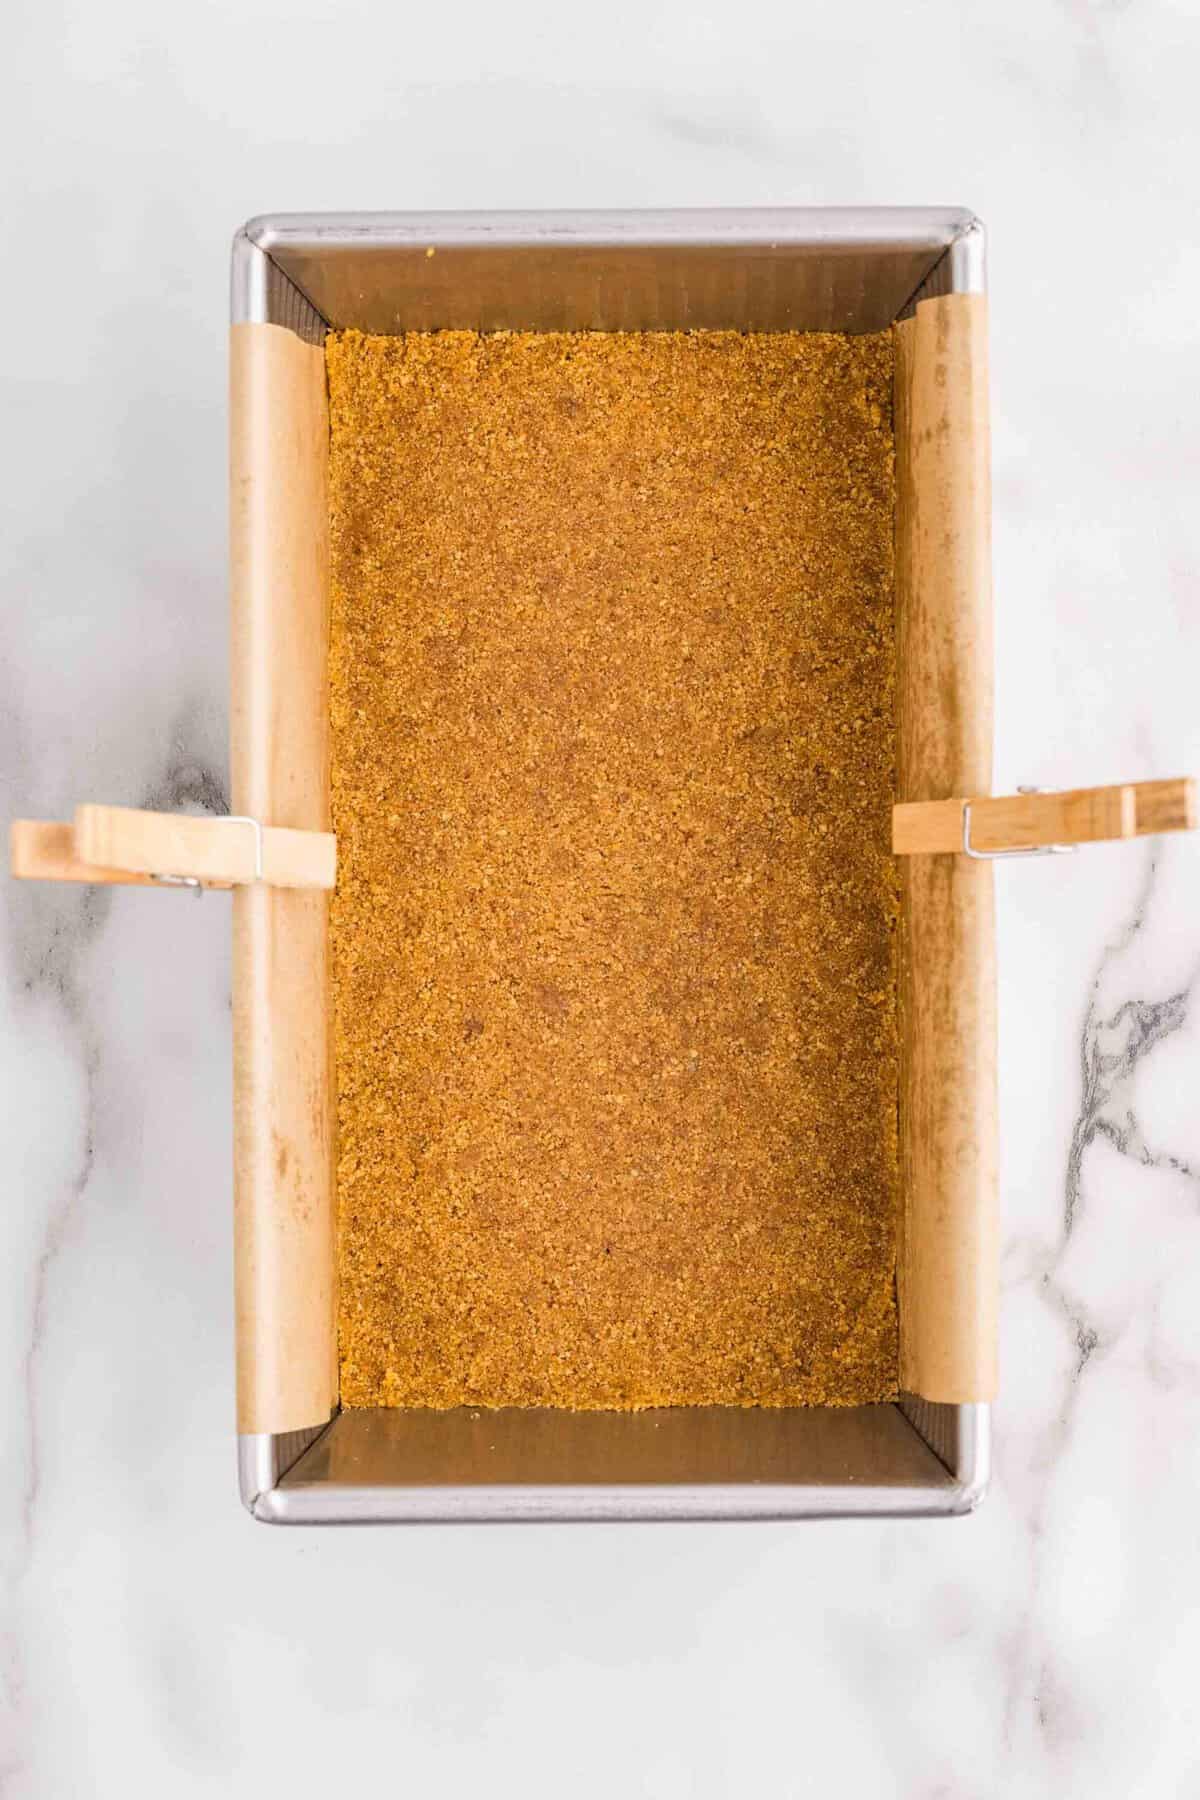
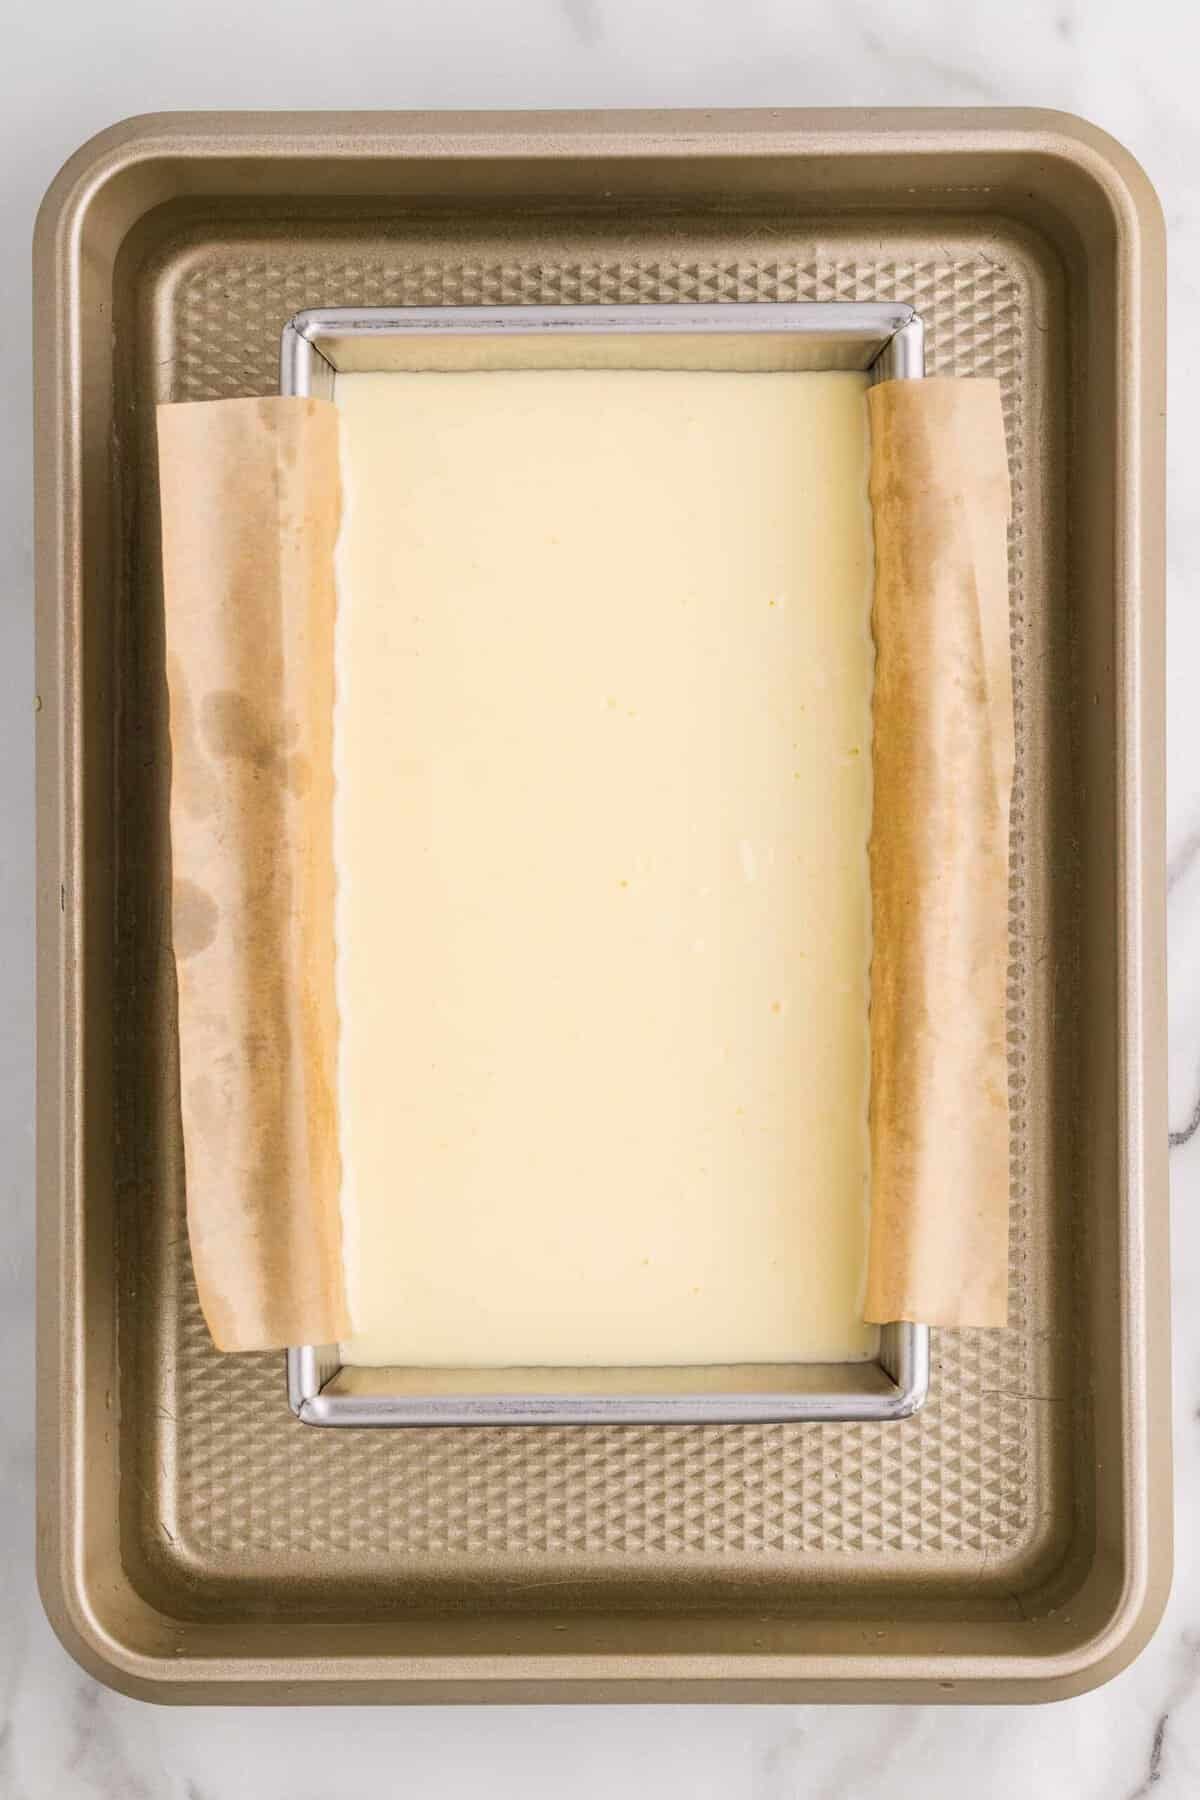
Grease and line an 8.5 x 4.5" loaf pan with parchment, leaving an overhang on the long sides so you can lift the cheesecake out later.
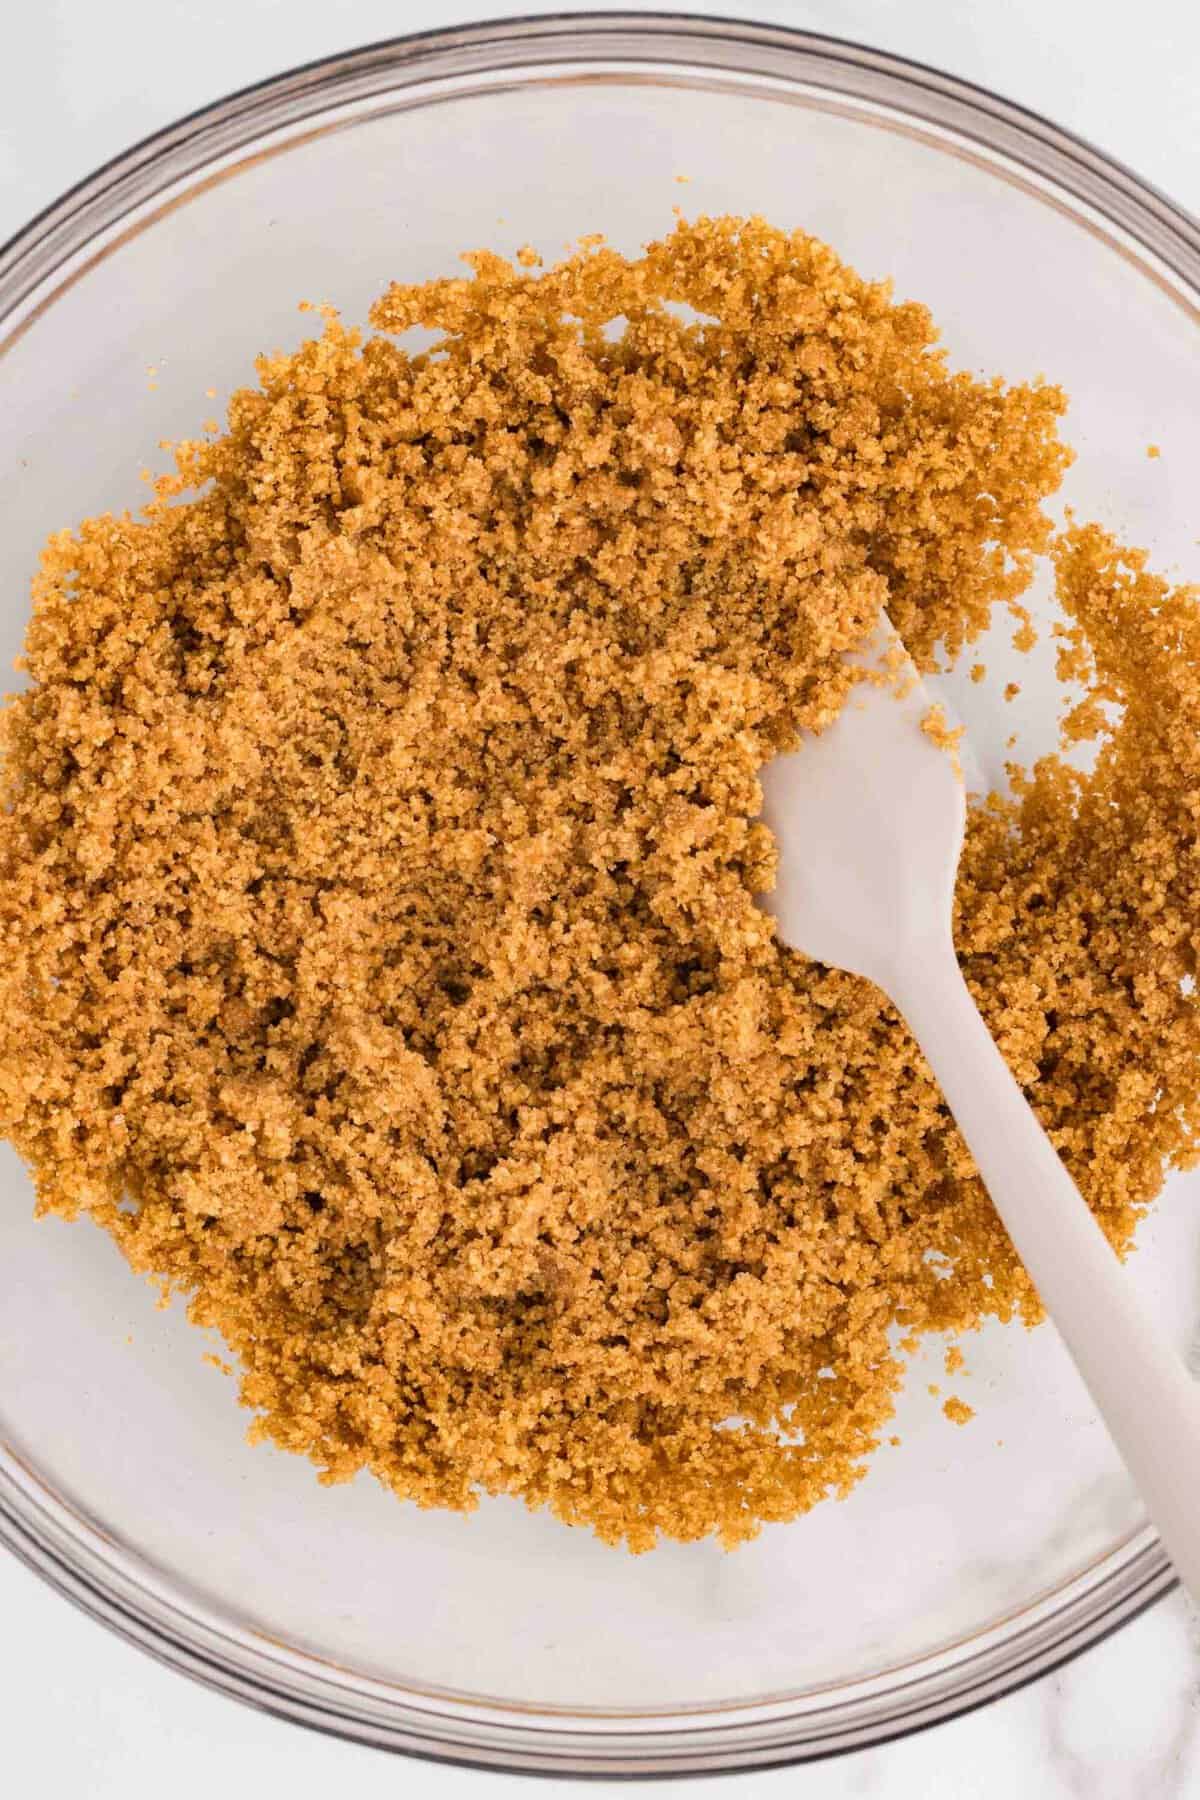
Stir together the crushed graham crackers, melted butter, brown sugar, and a pinch of salt. Press firmly into the bottom of the pan. Bake at 325°F for 12-14 minutes, until set and lightly golden.
Mix Filling
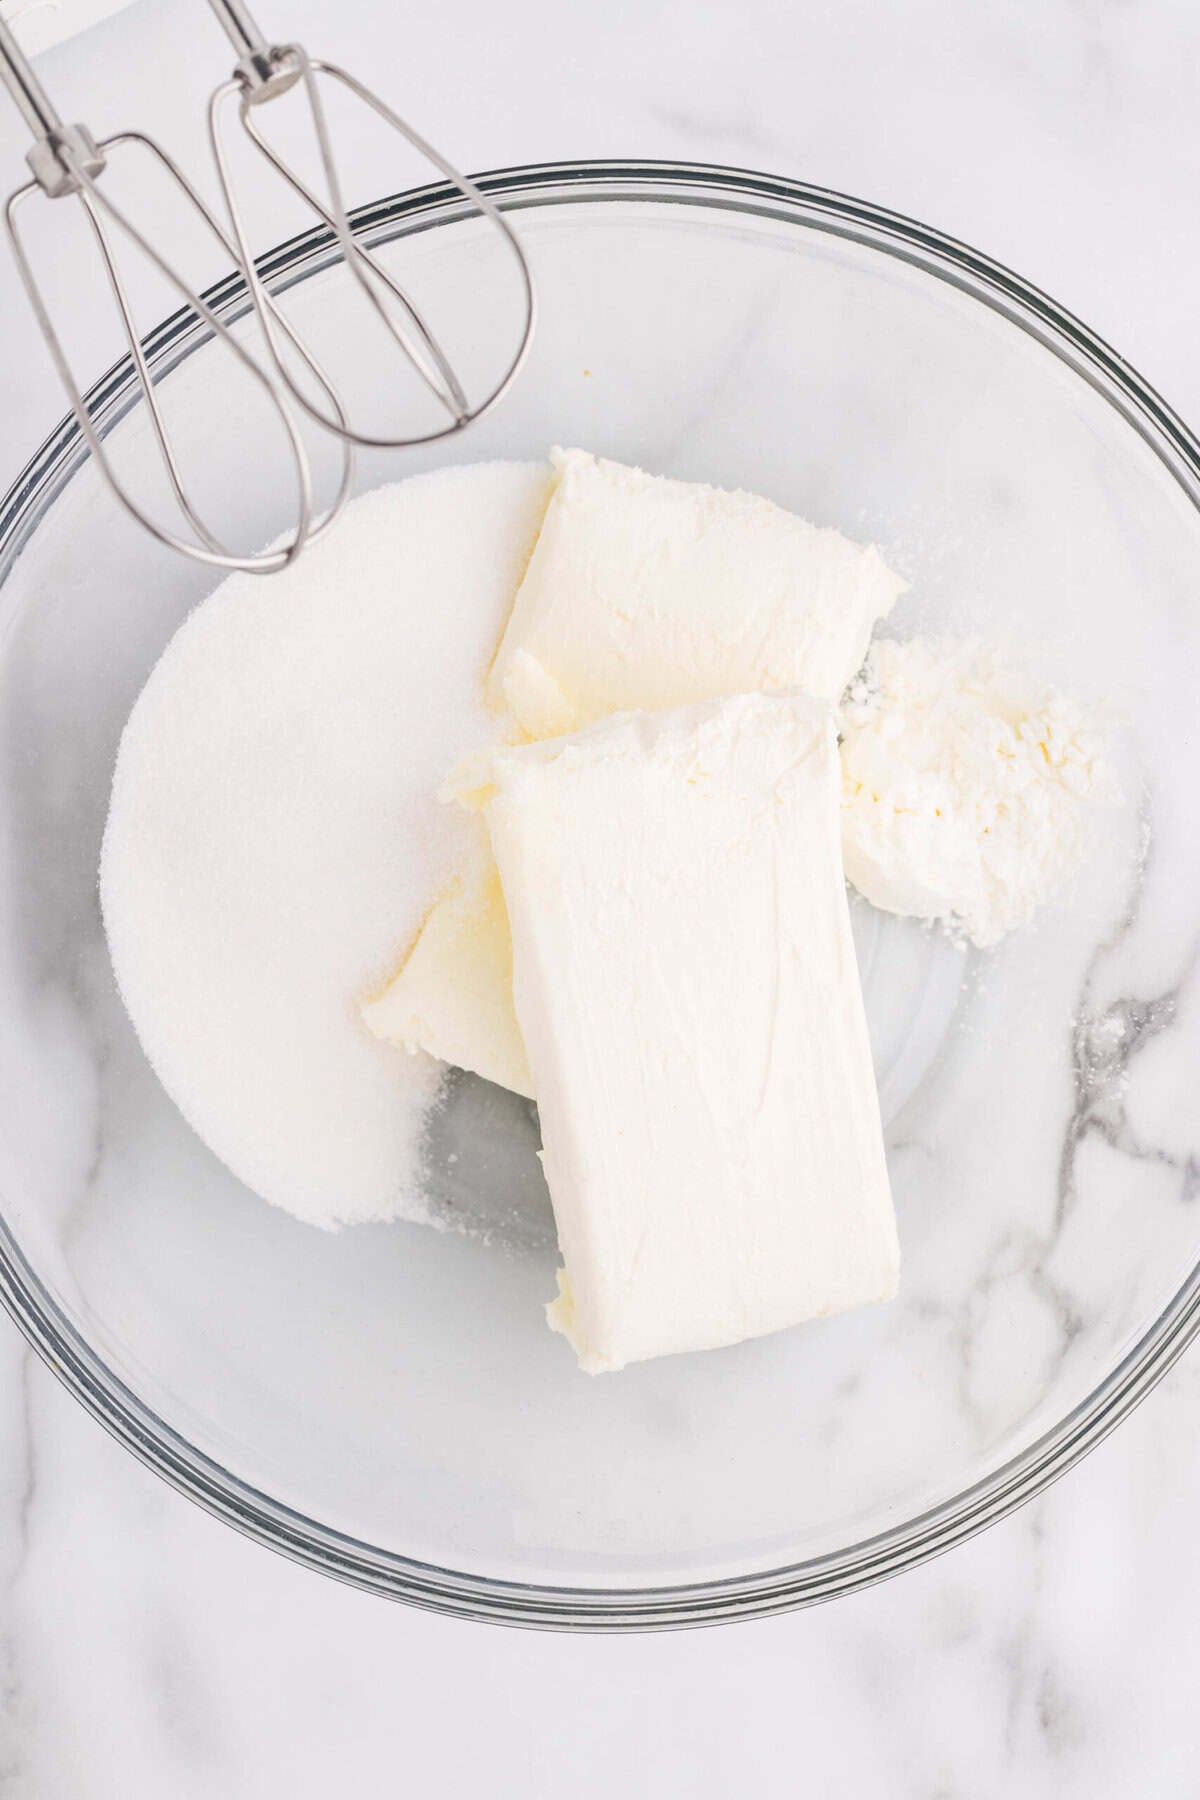
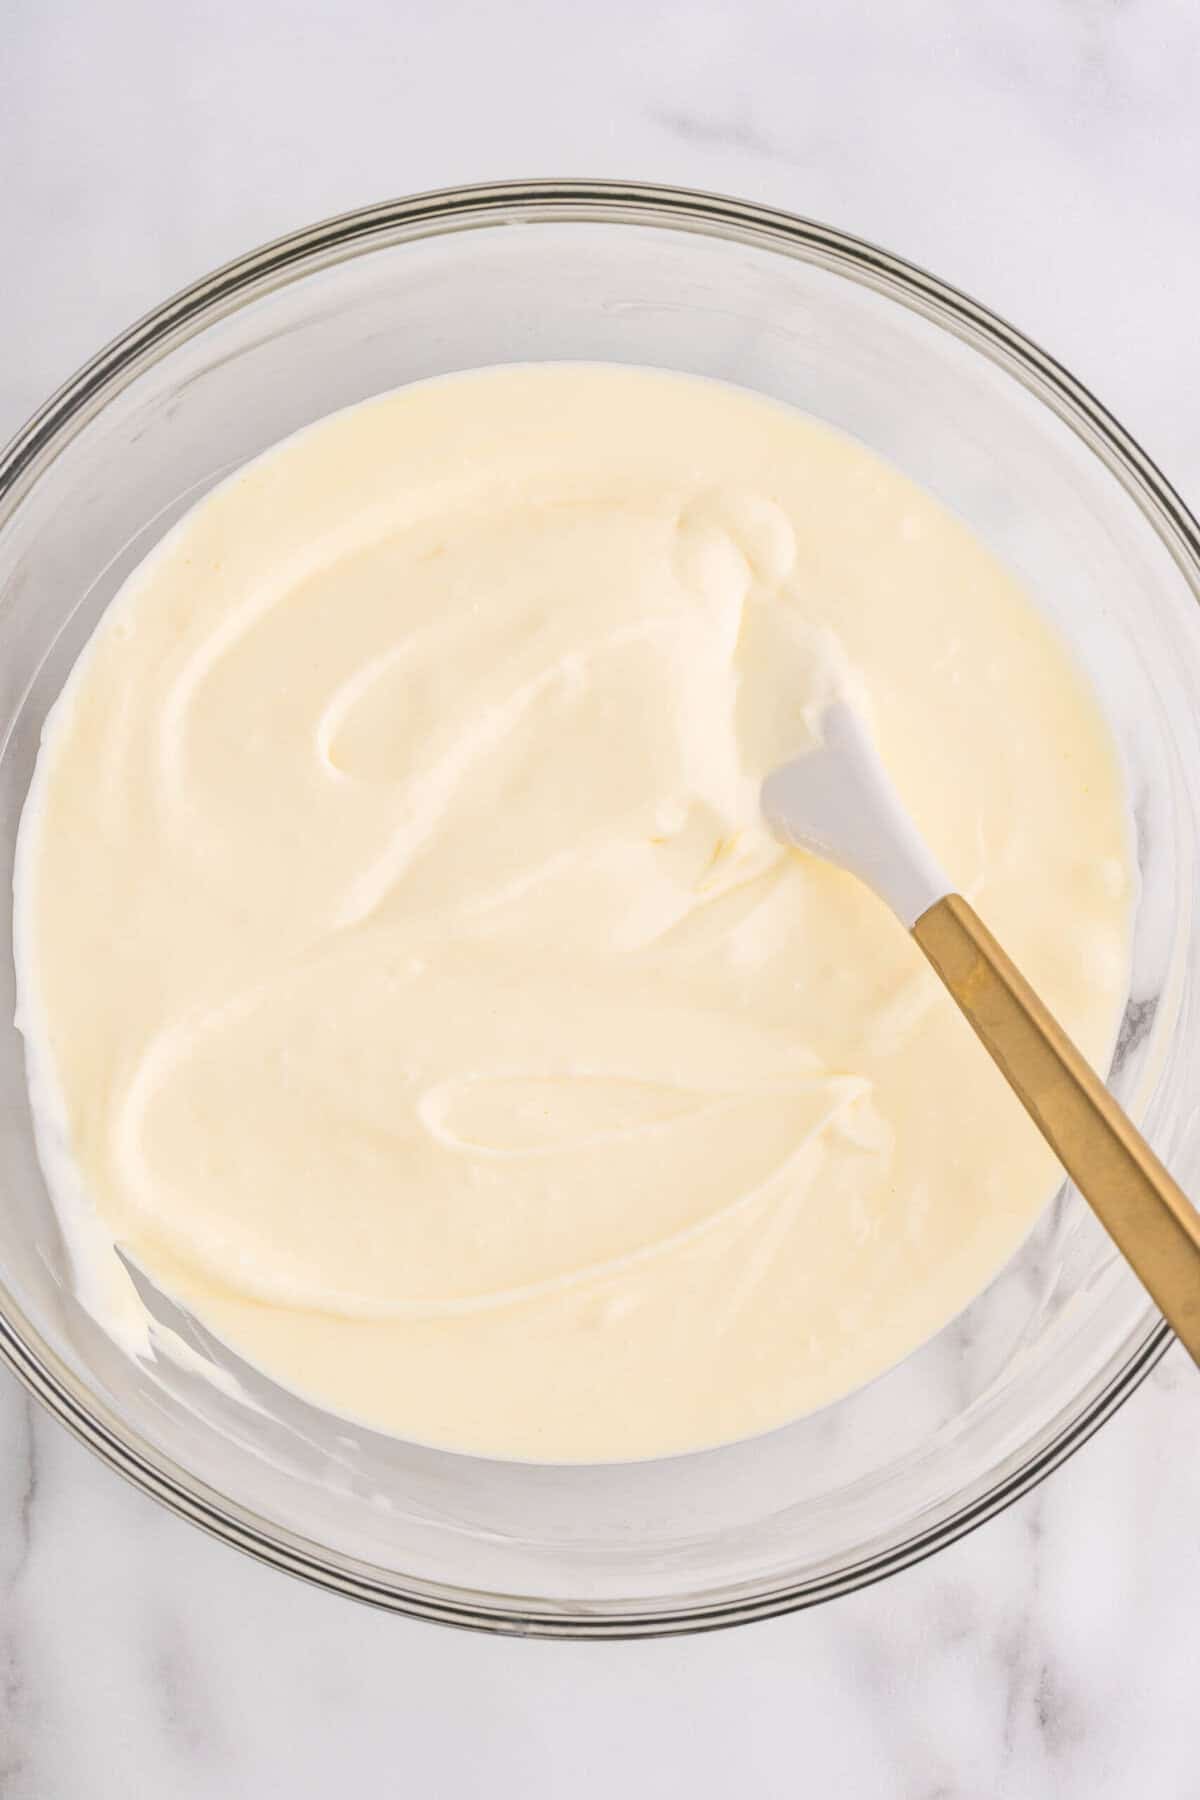
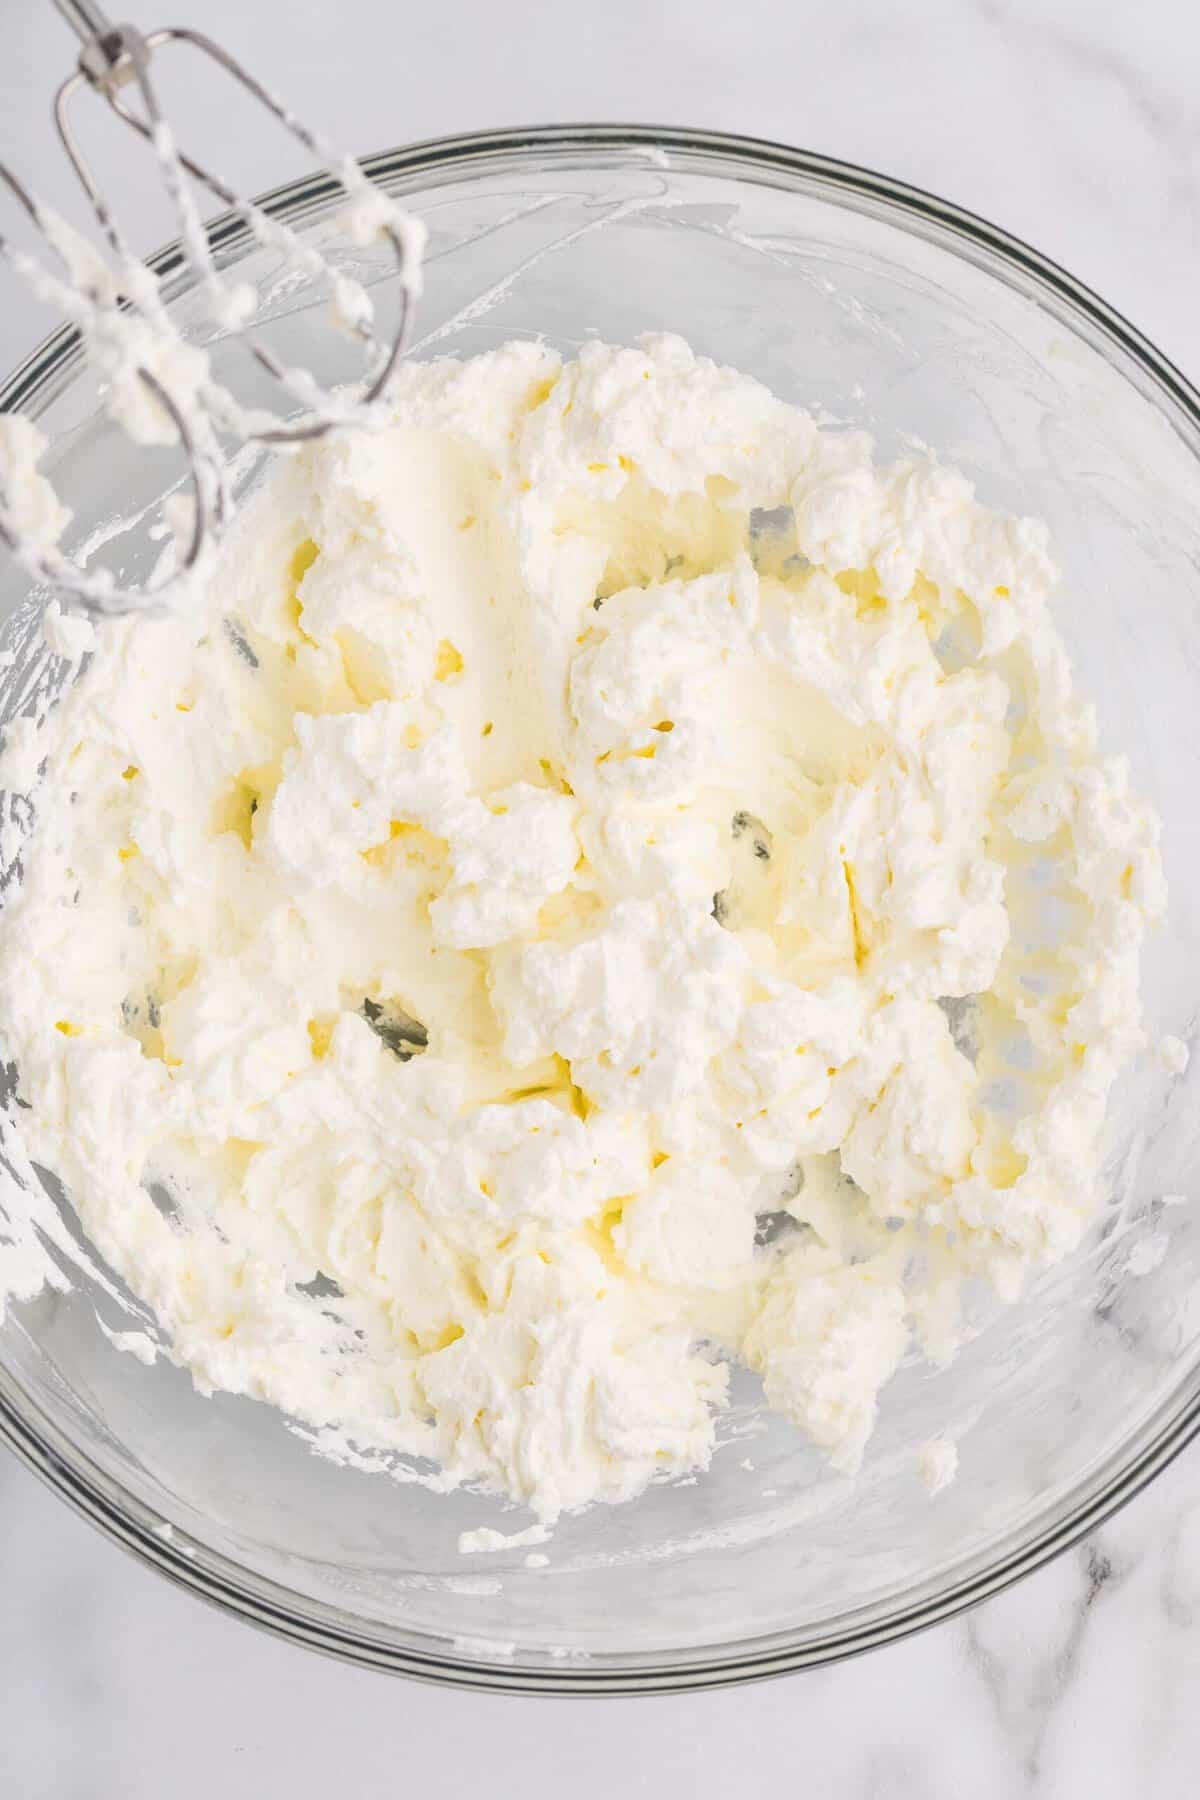
On LOW speed, beat the cream cheese, sugar, and cornstarch until smooth (about 1 minute). Scrape the bowl. Add sour cream, heavy cream, and vanilla and mix until just combined. Add the beaten eggs in two additions, scraping in between.
Low and slow is the name of the game. Overmixing adds air, and air = cracks.
Water Bath
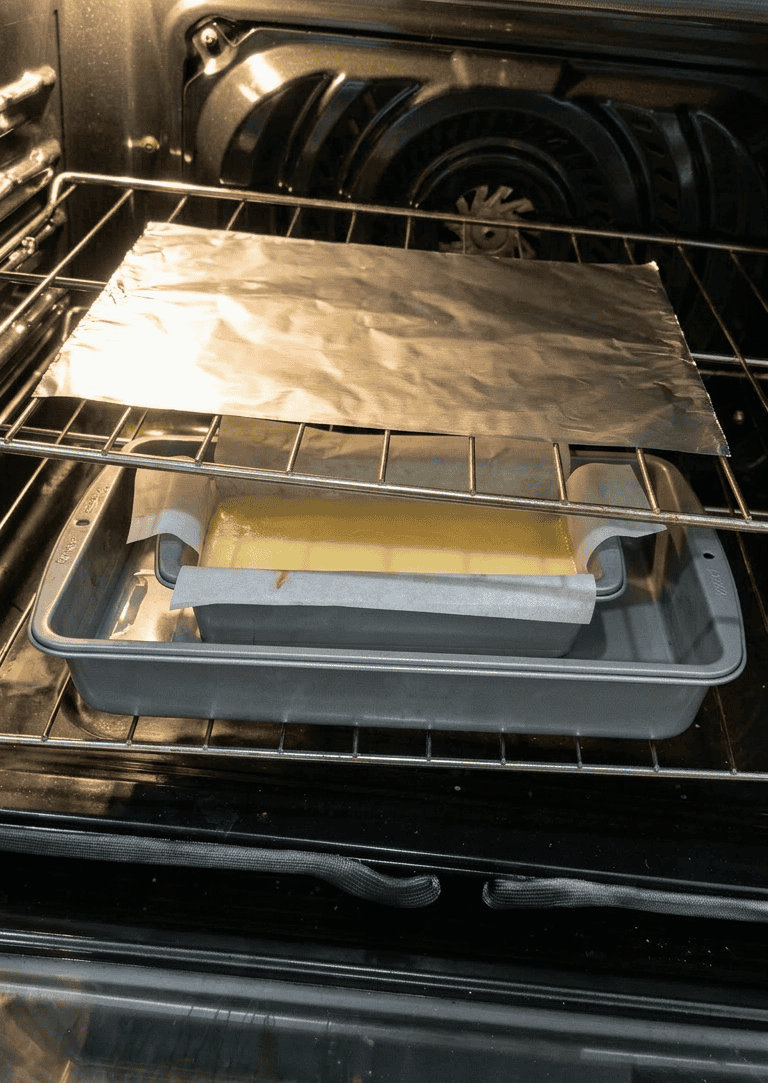
Pour the filling over the crust and smooth the top. Tap the pan on the counter a few times to release air bubbles. Place the loaf pan inside a rimmed 9x13 pan and fill the outer pan halfway with HOT water.
Bake (with the foil trick!)
Here's the trick that makes this cheesecake bakery-gorgeous: place a sheet of foil (shiny side UP) on the rack above the cheesecake. This reflects heat away from the top so it stays pale and smooth.
Bake at 325°F for 60-70 minutes. Do NOT open the oven before the 60-minute mark! You're looking for set edges and a center that still has a slight jiggle (like Jell-O, not soup).
Cool, Chill, Slice
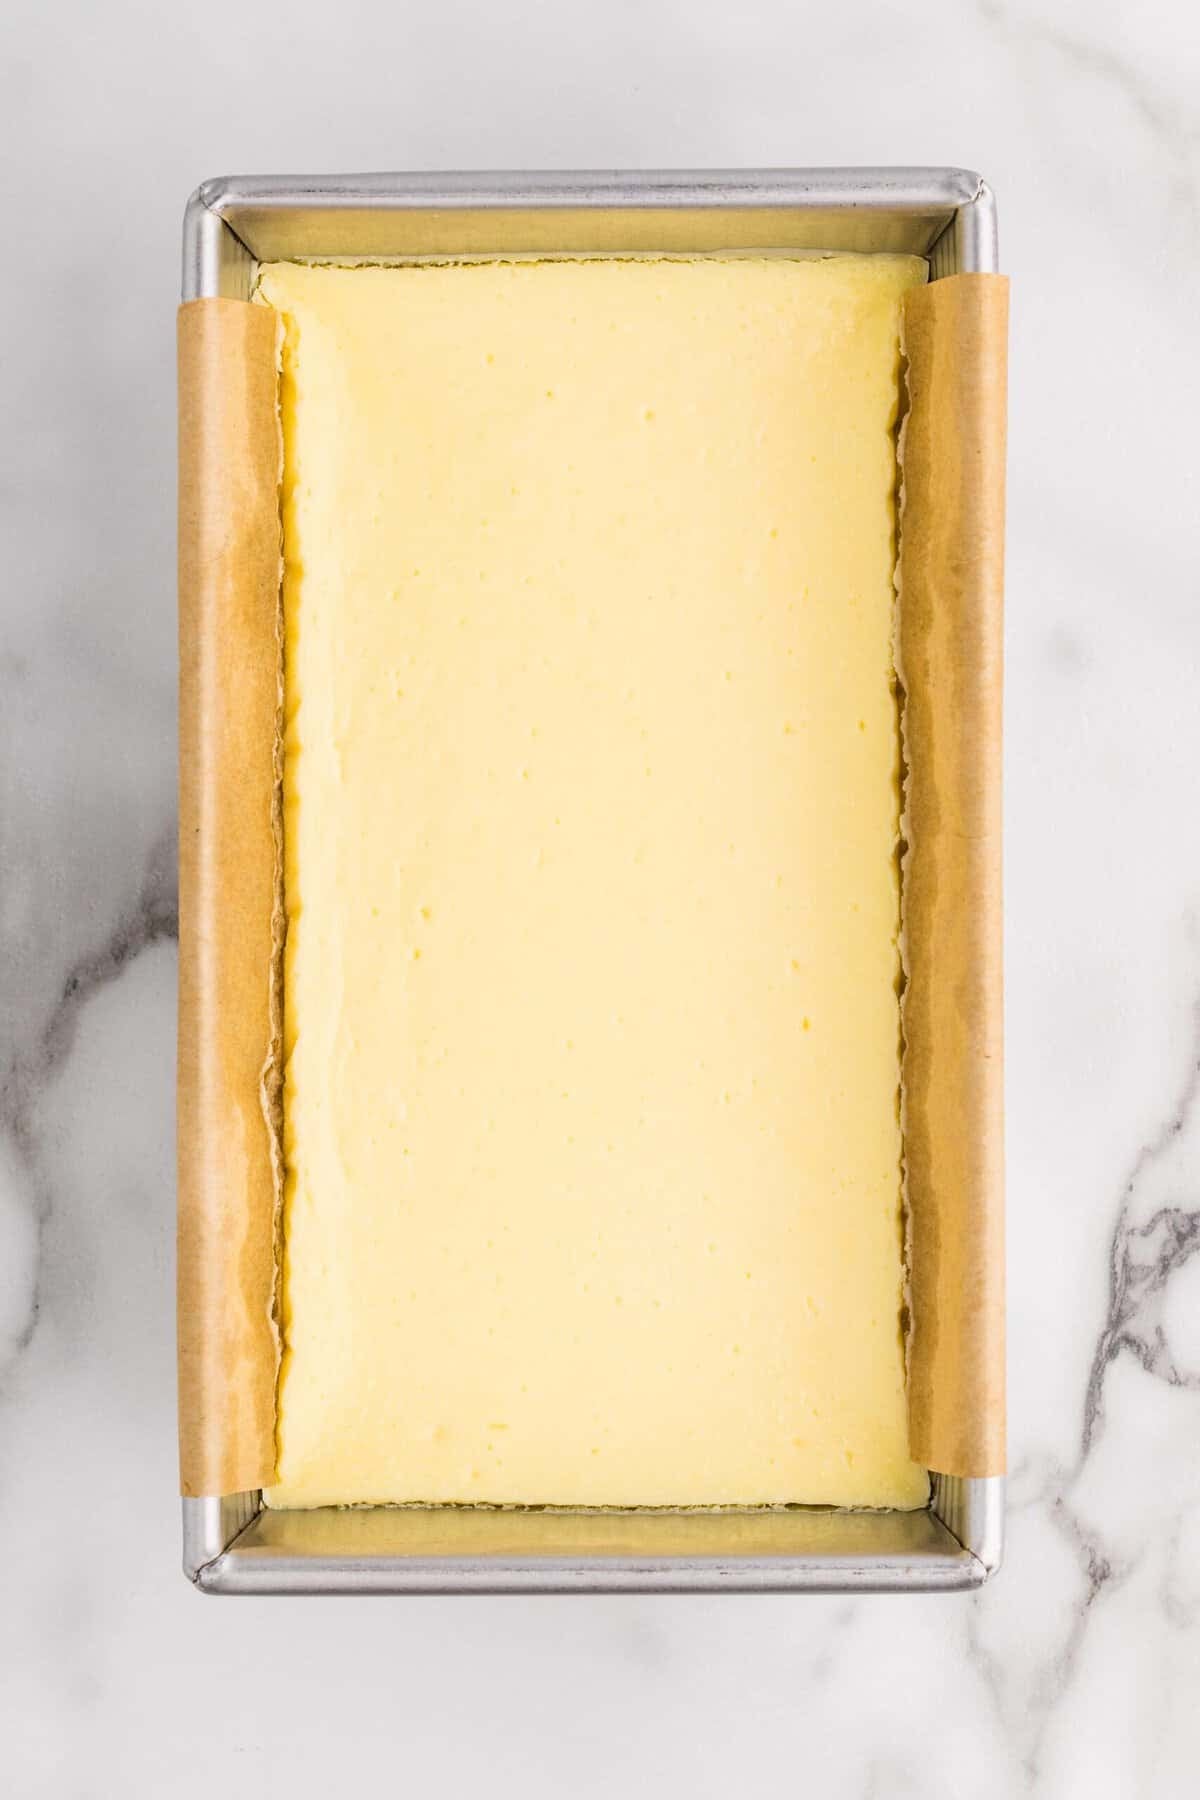
Cool it in stages. Turn off the oven, crack the door, and let the cheesecake cool in its water bath inside the oven for an hour. Then remove, dry the pan, and let it finish cooling at room temp. Wrap tightly and chill at least 4 hours (overnight is better!).
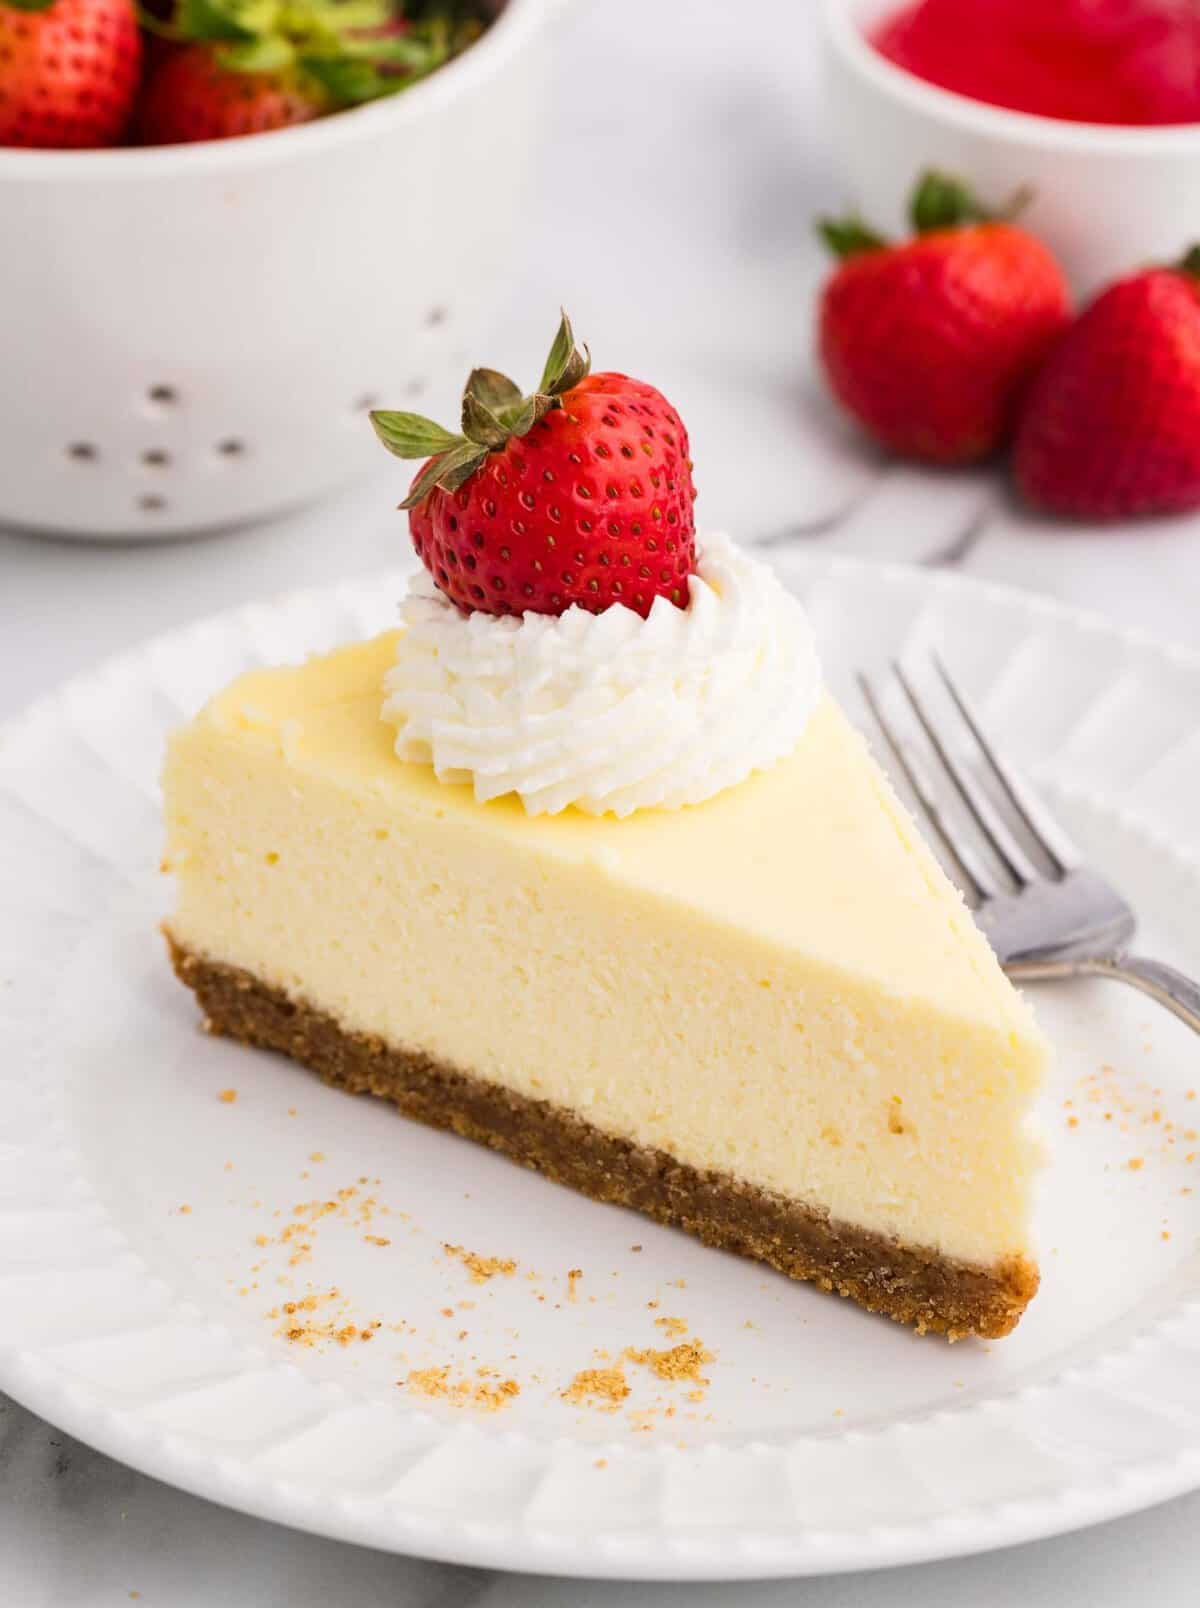
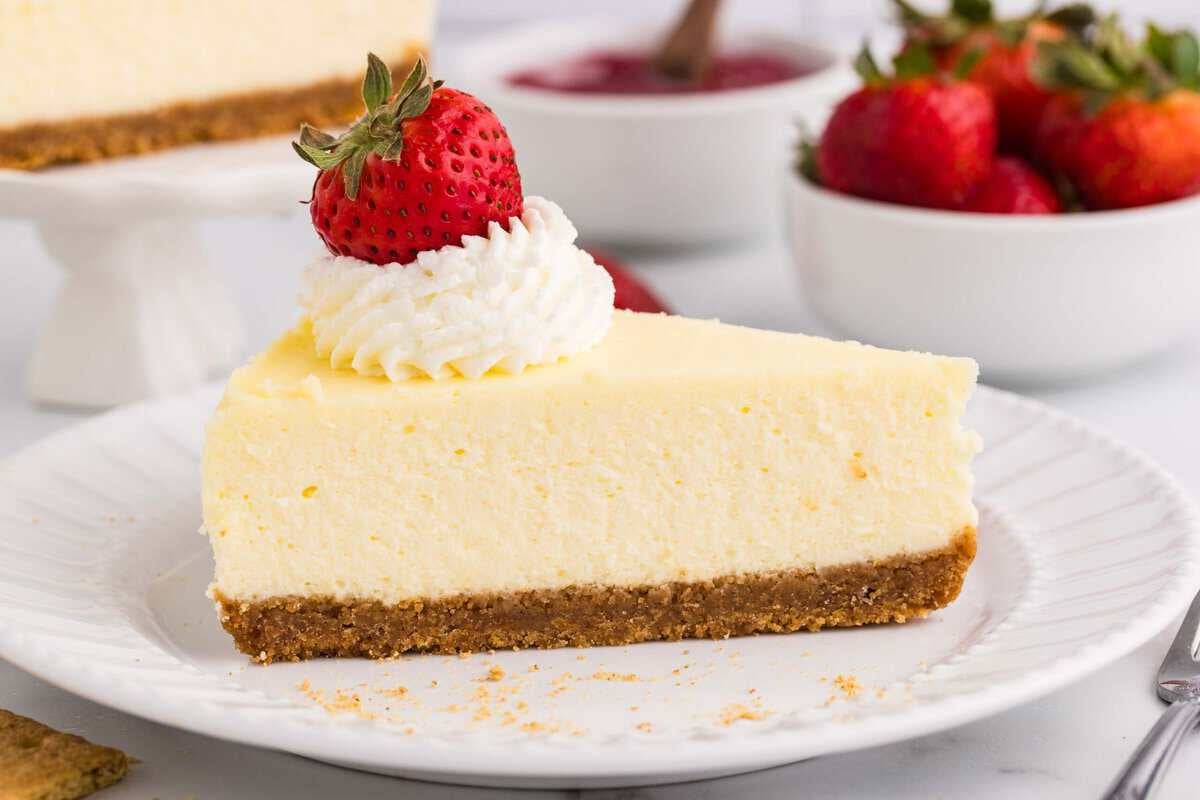
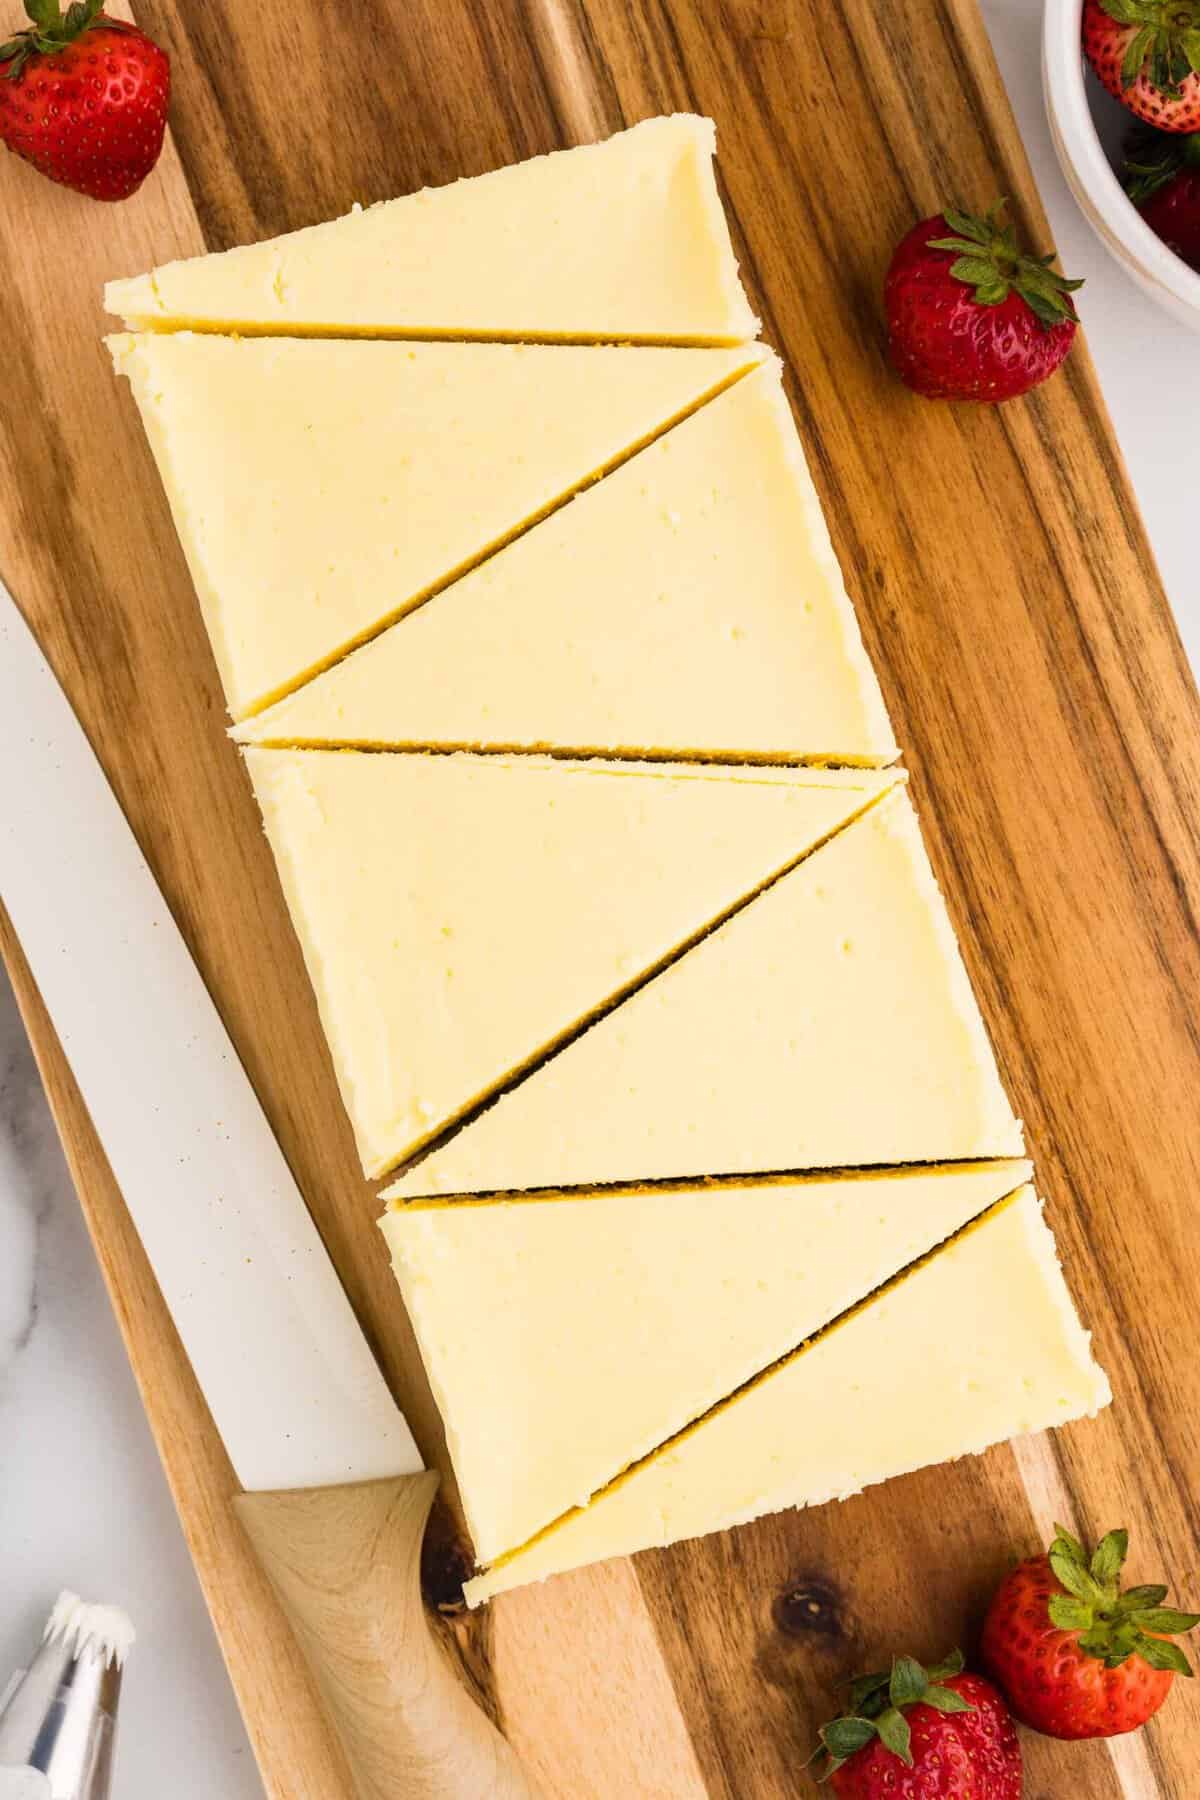
Slice like a pro. Run an offset spatula around the edges, lift the cheesecake out by the parchment, and slice with a long, sharp knife dipped in hot water and wiped dry between every single cut. This is THE step that gives you those clean, crisp edges.
Serve
Pipe whipped cream on top and crown each slice with fresh strawberries and a drizzle of strawberry glaze.
The cornstarch in the whipped cream helps stabilize it, so that you can pipe it ahead of time, if needed, and it won't "melt".
melissa's tips
Tips & Variations
- The foil trick is non-negotiable: If you skip the foil-on-the-rack-above step, you'll likely get a golden-brown top. That's fine for flavor, but it ruins the signature pale, creamy look. Every oven runs a little differently, so peek through the window (don't open it!) around minute 55 to see how you're doing.
- Hot-knife every slice: I know it feels fussy, but dipping your knife in hot water and wiping it dry between each cut will get you the crispest slices.
- Don't skip the room-temp ingredients: If your cream cheese is even a little cold, you'll get lumps in your batter that no amount of mixing will smooth out. Set everything on the counter 2 hours before you start baking.
- Topping swaps: Strawberries are the classic, but this is gorgeous with blueberry compote, lemon curd, or a salted caramel drizzle.
- Make ahead: This cheesecake actually tastes BETTER on day 2. Bake the day before you plan to serve it.

Frequently Asked Questions:
Covered tightly in the fridge, this cheesecake stays creamy and delicious for up to 5 days. You can also freeze it! Wrap individual slices (or the whole loaf) in plastic wrap, then foil, and freeze for up to 2 months. Thaw overnight in the fridge before serving.
Pro tip: add the whipped cream and strawberries RIGHT before serving. It's best not to store them on top, or the whipped cream will flatten a bit and the berries will bleed color onto your pretty cheesecake.
The most common culprits are overmixing (too much air in the batter), baking at too high a temp, or skipping the water bath. This recipe's low-and-slow method with a water bath and foil shield is designed to prevent cracks. But if one appears, just cover it with whipped cream! No one will know.
I really don't recommend it for this recipe. The water bath is what gives you that creamy, custard-like texture AND keeps the top pale and smooth. If you skip it, expect browning and potentially some cracking.
That's exactly what you want! A slight jiggle in the center means it's perfectly baked. It will continue to set as it cools. An overbaked cheesecake will be dense and dry, not creamy.
Stick with the 8.5 x 4.5"-inch" loaf pan for best results. A slightly larger 9x5" loaf pan will work, but your cheesecake will be slightly shorter and bake a few minutes faster (start checking around 55 minutes).
Looking for more easy desserts?
Creamy Loaf Pan Cheesecake
Ingredients
⭐️ Before you begin! If you make this, will you do me a huge favor afterwards and leave a review and rating letting me know how you liked this recipe? This helps my small business thrive so I can continue providing free recipes and high-quality content for you.
Instructions
- Preheat oven to 325℉.
- Grease and line an 8.5 x 4.5-inch loaf pan with parchment, leaving a slight overhang on each side so that you can lift out the cheesecake later. Set aside.
- In a medium bowl, mix together 1 cup finely crushed graham crackers, 5 tablespoons unsalted butter, 1 tablespoon light brown sugar, and pinch of salt. Press firmly into the prepared pan to create an even crust.
- Bake for 12-14 minutes until the top is firm and lightly golden brown.
- In a large bowl, mix softened 16 ounces full-fat cream cheese, ½ cup granulated sugar, and 1 tablespoon cornstarch on low speed until just incorporated and smooth (about 1 minute). If using a stand mixer, use the paddle attachment. Scrape down the sides and bottom to make sure all the cream cheese is incorporated.
- Add the ¼ cup sour cream, ¼ cup heavy cream, and 1 teaspoon pure vanilla extract and mix on low speed until combined.
- Add the beaten 2 large eggs in two stages while mixing on low speed, turning off the mixer and scraping in between. Do not overmix.
- Pour batter into the prepared loaf pan and spread the batter with a spatula until smooth. Gently tap the pan on the counter several times to remove any air bubbles.
- Place the loaf pan into a rimmed 9 x 13" pan and fill the 9 x 13" pan halfway full with hot water. Carefully place on the bottom rack of the oven and place a piece of foil on the rack above it, shiny side facing up. The foil will protect the top from overbrowning.
- Bake at 325℉ for 60-70 minutes. Do not open the oven before the 60-minute mark. The cheesecake is done when the edges are set and the center is still slightly jiggly.
- Turn off the oven, crack open the door, and let cheesecake cool for an hour in the oven, still inside the water bath, to prevent cracking.
- Remove cheesecake from the oven and take the loaf pan out of the water bath, and dry the sides.
- Allow to finish cooling to room temperature on the counter.
- Once fully cooled, cover tightly with plastic wrap and chill in the refrigerator for at least 4 hours, or overnight.
- When ready to serve, loosen the cheesecake from the sides using an offset spatula or a knife. Use a large knife to cut into slices or triangles. For clean cuts, use a long, sharp knife dipped in hot water and wiped dry between every slice. Top with whipped cream and strawberry.

- To make the whipped cream, add the 1 cup heavy whipping cream, 2 tablespoons powdered sugar, 1 teaspoon cornstarch, and 1 teaspoon vanilla bean paste or extract to a large bowl. Beat on medium-high speed for 2-3 minutes until stiff peaks. Use a large piping tip to pipe on top of chilled cheesecake.
Did you make this?
I'd LOVE to hear your thoughts! Leave a review & photo of your creation and be sure to mention @DesignEatRepeat or tag #DesignEatRepeat on Instagram!Team contributions
📸 Photography by Jane Campbell for Design Eat Repeat®
👩🍳 Recipe Development by Rachel Walters for Design Eat Repeat®
Wow! I rarely make cheesecake because it is just too fussy. This turned out so great! Creamy, delicious and so easy! I made this as part of a dessert table array, so I cut smaller pieces and had strawberry compote on the side. Just perfect!
#BakeAndTake!
Serving it in smaller pieces with strawberry compote on a dessert table sounds absolutely gorgeous!
This was easy peasy and we made it gluten free by using GF cheesecake! #bakeandtake