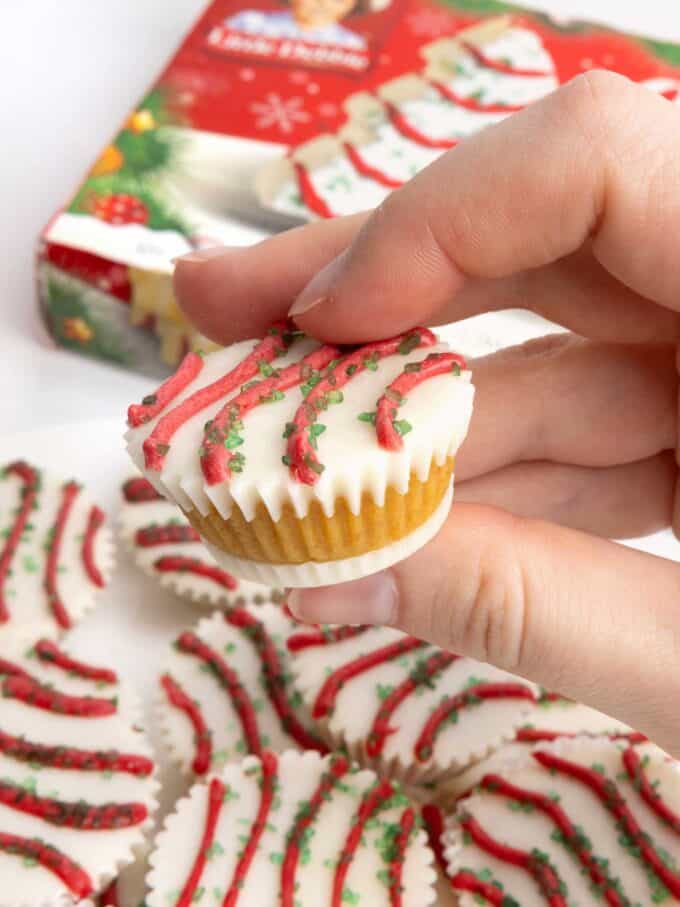
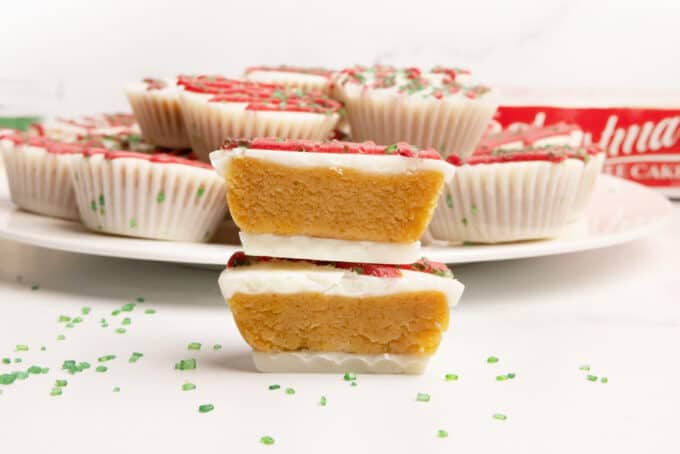
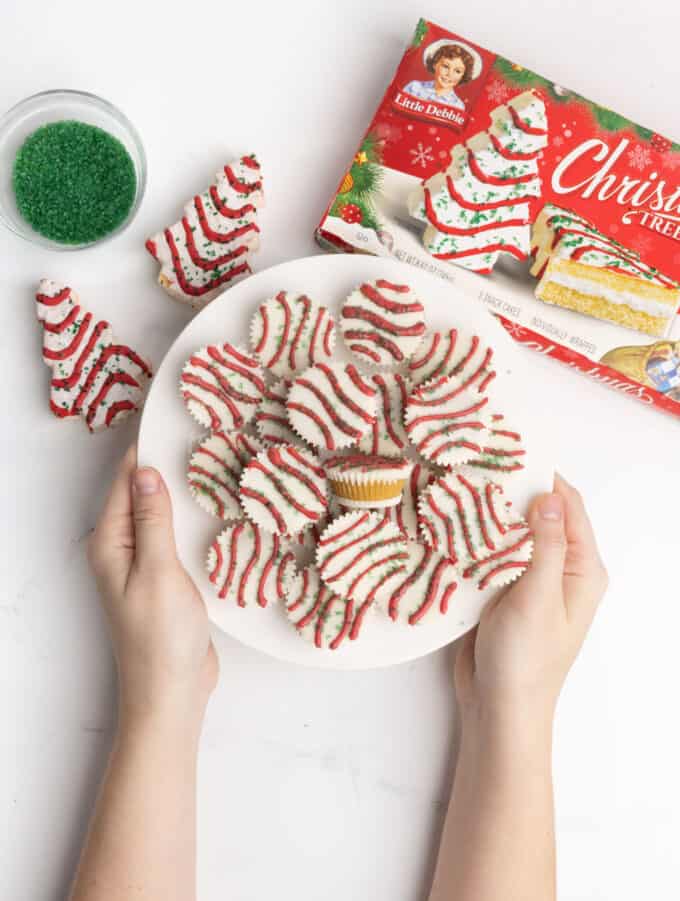
Hate the messy process of dipping cake balls? Make cake CUPS instead! These adorable bite-sized treats are pressed into a mini cupcake liner, making them easier to make and oh-so-cute!!
Save this Recipe!
Enter your email below and I'll send this recipe to you.
Why I Love These Cake Bite Cups
- No dipping! Dipping things in chocolate can get messy and time-consuming, but with these, you simply pipe it into the muffin liners!
- Bite-sized: These are the perfect size for adding to holiday cookie platters.
- Little Debbie inspired: These cake bite cups give off a nostalgic and flavor that we all know and love from the iconic Little Debbie tree cakes!
Want to make actual Little Debbie Tree Cakes? Use my zebra cake recipe and cut into trees with a cookie cutter!
Ingredient Notes & Supplies
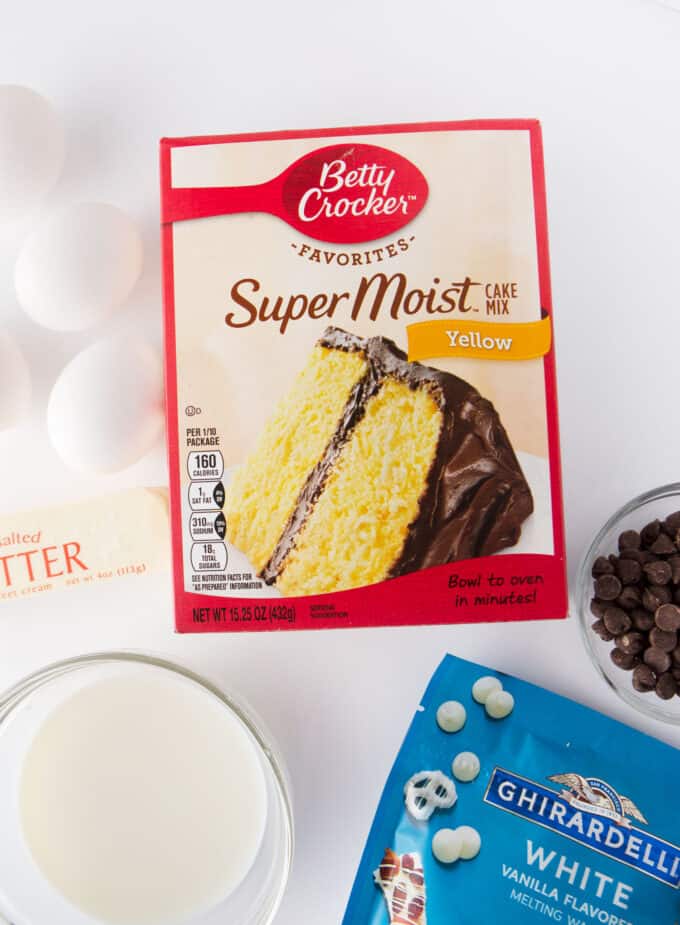
- Cake Mix: I used Betty Crocker yellow cake mix but you can use any brand you'd like.
- Frosting: In the spirit of ease, I just make cake bites with canned frosting (I like Pillsbury buttercream). But you can totally make these with homemade sugar cookie frosting.
- Almond Bark or Melting Wafers: I heavily prefer melting wafers over almond bark, as it melts thinner and is easier to control. Aldi has new melting wafers that tastes great and melt down just as well as Ghiradelli. If you're using almond bark, I suggest adding 1 tablespoon of Crisco vegetable shortening or vegetable oil (not butter) per cup of almond bark to help thin it out. In terms of brands, I typically use Kroger brand almond bark and it works well.
- Sprinkles: I got these green sugar sprinkles from Amazon.
- Mini Muffin Liners: I use these Wilton mini liners which are great since the candy doesn't stick to them.
Before you begin, watch me make these!
How to Make Cake Bite Cups
Step 1: Bake Cake
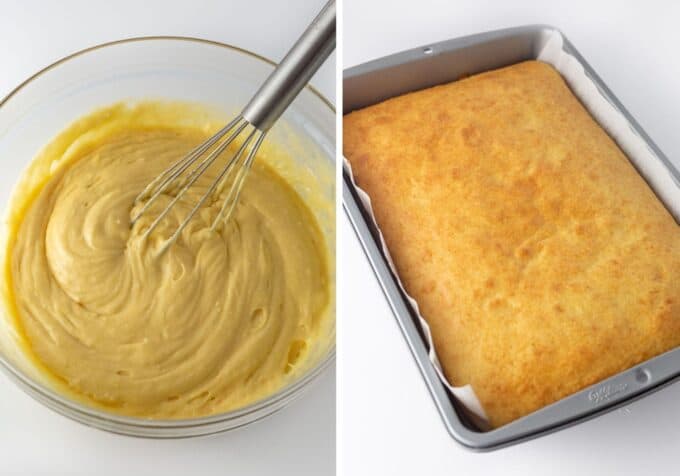
Bake the cake according to package instructions. Allow to cool, then crumble. Mix with vanilla frosting (¾ cup, i.e. half a can) until it’s combined and smooth. If you have a stand mixer, mixing with the paddle attachment works well.
Step 2: Melt White Chocolate
Melt 1-package (i.e. 16-ounces) of almond bark or melting wafers according to package instructions.
Line mini muffin tins with 48 liners. If you don't have tins, simply place the liners in a rimmed pan.
Spoon or pipe about 1 teaspoon of melted almond bark into each liner, then gently tap the pan on the counter to allow the chocolate to spread out and flatten. Allow to harden (can speed up in the fridge).
Step 3: Add Cake Mixture
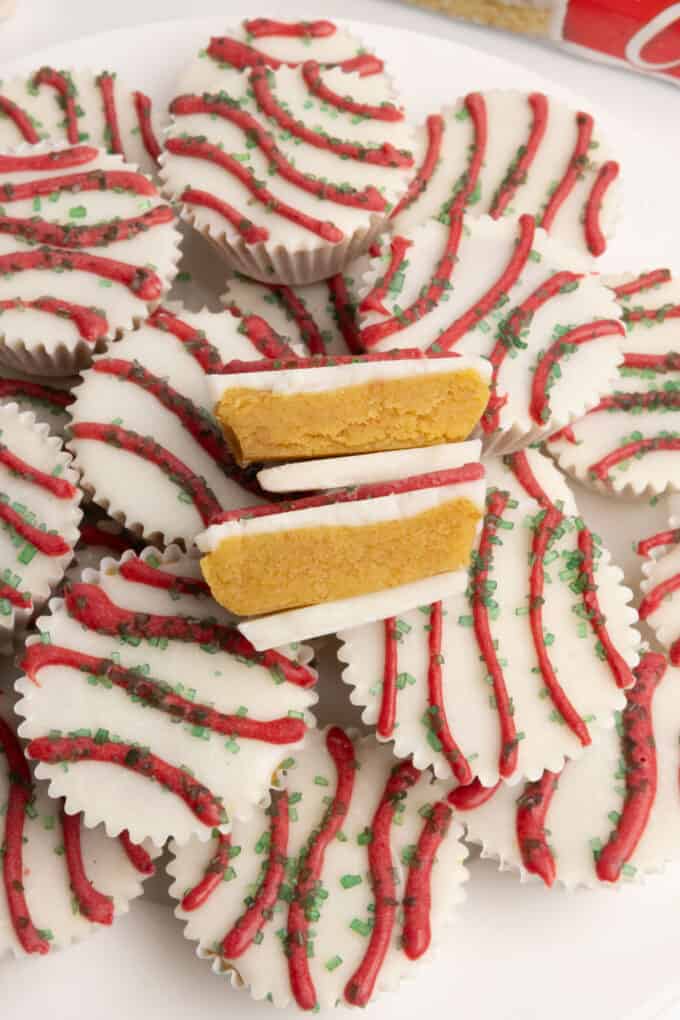
- Roll cake dough into 1-tablespoon sized balls and press flat into each liner. Leave a small space at the top to allow room for the top chocolate layer (or else it will run over the edge of the liner).
- Melt remaining package of almond bark and pipe on top.
Tip: I highly suggest only piping about 6 at a time before stopping to tap down the pan; this will ensure that the almond bark doesn't harden before you can smooth it out. This is especially crucial if you've chilled the cake pops, as the chocolate will harden quicker.
Step 4: Decorate
Color the remaining melted almond bark red with gel food coloring.
Use a piping bag to add the red stripes, then immediately add the sprinkles. Again, be sure to add sprinkles every 6 or else the stripes will harden too quickly!
Tip: Using gel food coloring will allow you to get a richer red color without having to use a lot. I use Wilton Red and typically add a drop of Wilton Crimson. Just be sure to only add a drop or two, as too much food coloring can cause the chocolate to seize. Gel or oil-based food coloring will also prevent your chocolate from seizing (which can happen with water based colorings).
Tips & Variations
- Use melting wafers: I heavily prefer melting wafers over almond bark, as it melts thinner and is easier to control. Aldi has new melting wafers that tastes great and melt down just as well as Ghiradelli (but at a cheaper price).
- Don't forget to stir! If you're using the microwave, be sure to melt according to package instructions and stir in between each increment to prevent hot spots from burning the chocolate. Even if your chocolate isn't melted yet, stirring is crucial.
- Make them chocolate! You can make these look like the Little Debbie chocolate tree cakes by using chocolate cake, chocolate frosting, and chocolate coating!
- Use sugar cookies! You can totally do this method with my sugar cookie truffles (you'll just need to keep them refrigerated since they contain cream cheese).
Storage & Freezing
- Storage: If you're using canned frosting, you don't need to refrigerate these. Store in an airtight container for up to 1 week.
- Freezing: You can make these ahead and freeze! Freeze in an airtight container for up to 1 month for optimal freshness.
Frequently Asked Questions:
Almond bark can be finicky, especially with certain brands. I heavily prefer melting wafers over almond bark, as it melts thinner and is easier to control. Aldi has new melting wafers that tastes great and melt down just as well as Ghiradelli.
If you're using almond bark, I suggest adding 1 tablespoon of Crisco vegetable shortening or vegetable oil (not butter) per cup of almond bark to help thin it out. In terms of brands, I typically use Kroger brand almond bark and it works well.
You also want to make sure you melt according to package instructions and stir in between each increment to prevent hot spots from burning the chocolate.
Using gel food coloring will allow you to get a richer red color without having to use a lot. I use Wilton Red and typically add a drop of Wilton Crimson. Just be sure to only add a drop or two, as too much food coloring can cause the chocolate to seize.
Gel or oil-based food coloring will also prevent your chocolate from seizing (which can happen with water based colorings).
I got the green sugar crystals on Amazon!
I use these Wilton mini liners which are great because the candy doesn't stick to them.
Did you make this recipe? If so, will you do me a huge favor and leave a review and rating letting me know how you liked this recipe? This helps my small business thrive so I can continue providing free recipes and high-quality content for you.
Christmas Cake Pop Cups
Ingredients
- 15 ounce box yellow cake mix baked according to package directions in a 9×13" pan
- ¾ cup vanilla frosting this is roughly half a can
- 32 ounces white almond bark or melting wafers Melting wafers typically melt smoother. If using almond bark, I recommend adding 1 tablespoon vegetable oil or shortening to help thin
- Red gel food coloring Note: Water based food coloring will cause the almond bark to seize
- Green sanding sugar sprinkles
- Mini cupcake liners
Before you begin! If you make this, will you do me a huge favor and leave a review and rating letting me know how you liked this recipe? This helps my small business thrive so I can continue providing free recipes and high-quality content for you.
Instructions
- Bake the cake according to package instructions. Allow to cool, then crumble.
- Mix with vanilla frosting (¾ cup) until it’s combined and smooth. If you have a stand mixer, mixing with the paddle attachment works well.
- Melt 1-package (i.e. 16-ounces) of almond bark according to package instructions.
- Line mini muffin tins with 48 liners. If you don't have tins, simply place the liners in a rimmed pan.
- Spoon or pipe about 1 teaspoon of melted almond bark into each liner, then gently tap the pan on the counter to allow the chocolate to spread out and flatten. Allow to harden (can speed up in the fridge).
- Roll cake dough into 1-tablespoon sized balls and press flat into each liner. Melt remaining package of almond bark and pipe on top. TIP! I highly suggest only piping about 6 at a time before stopping to tap down the pan; this will ensure that the almond bark doesn't harden before you can smooth it out. This is especially crucial if you've chilled the cake pops, as the chocolate will harden quicker.
- Color the remaining melted almond bark red with gel food coloring.
- Use a piping bag to add the red stripes, then immediately add the sprinkles. Again, be sure to add sprinkles every 6 or else the stripes will harden too quickly!
- Let harden and enjoy! If you used canned frosting, these do not need to be refrigerated and will stay fresh in an airtight container for up to 1 week or in the freezer for 1-2 months.
Last Step! Please leave a review and rating letting me know how you liked this recipe! This helps my small business thrive so I can continue providing free recipes and high-quality content for you.

Melissa says
These were really good. I used red cookie icing as it was easier than dying chocolate and it hardened nicely. These were added to my Christmas cookie collection.
Melissa says
I'm glad you enjoyed the cake bite cups, Melissa. Thanks so much for leaving a review. I appreciate it!
Jordan says
This is one of my fav recipes! Your cosmic brownie recipe is the best ever and this version of them is so cute!
Melissa says
I am so happy to hear you love this recipe, Jordan! Thank you so much for taking the time to leave a review, I really appreciate it!
Tomma Marcincuk says
I love this twist on a cake ball! And I especially loved the no dipping part!
Mollie says
My sister tried one of these and she made a face like she was eating a Wonka chocolate. Officially a winner!
Melissa says
Yay, I'm so happy y'all enjoyed this recipe! Thank you so much for leaving a review, I really appreciate it!
Misty says
Can you use white cake mix or do you have to use yellow?
Melissa says
You can use white!
Nico Swanson Villares says
These were both beautiful and delicious! I'm awful at any form of cake pops, but these were genuinely easy and fun to make :) I made them with GF flour, and they still turned out so so yummy!
Melissa says
I'm so glad to hear they turned out with the GF flour! Thank you so much for leaving a review, Nico!
Adrienne says
I love these unique treats! I made them as part of the Bite-Sized Baking Challenge and they are so tasty and come together so easily. So much easier than making cake pops!
Melissa says
So glad you loved this recipe as well, Adrienne! Thank you so much for leaving a review and for participating in the baking challenge! I'm so glad you are having so much fun making all of the bite sized treats! :)
Cathy M Swierczynski says
The print button on this recipe doesn't work. I'm looking forward to trying these though!
Melissa says
Hi Cathy! Thanks for letting me know. You can print directly at this link! https://www.designeatrepeat.com/wprm_print/40612
Cristy Bushatz says
I really like them I like to bake
Cristy Bushatz says
I really love them I like to bake
Stacie Metz says
What a fantastic idea! Thank you so much. I can't wait to try it. I love cake pops, but I only ever fail when trying to dip. This is the solution!
Jamie Bland says
These are so cute and taste great! Thank you for sharing the recipe!
Melissa says
Thank you so much for leaving a review, Jamie! I am so glad you loved this recipe!
Tori says
Loved this idea vs dipping cake pops! Also wouldn’t have thought about making them look like Christmas tree cakes! They do take like them! Thanks!
Melissa says
I am so happy to hear you enjoyed the recipe, Tori! Thank you so much for trying it out and leaving a review!