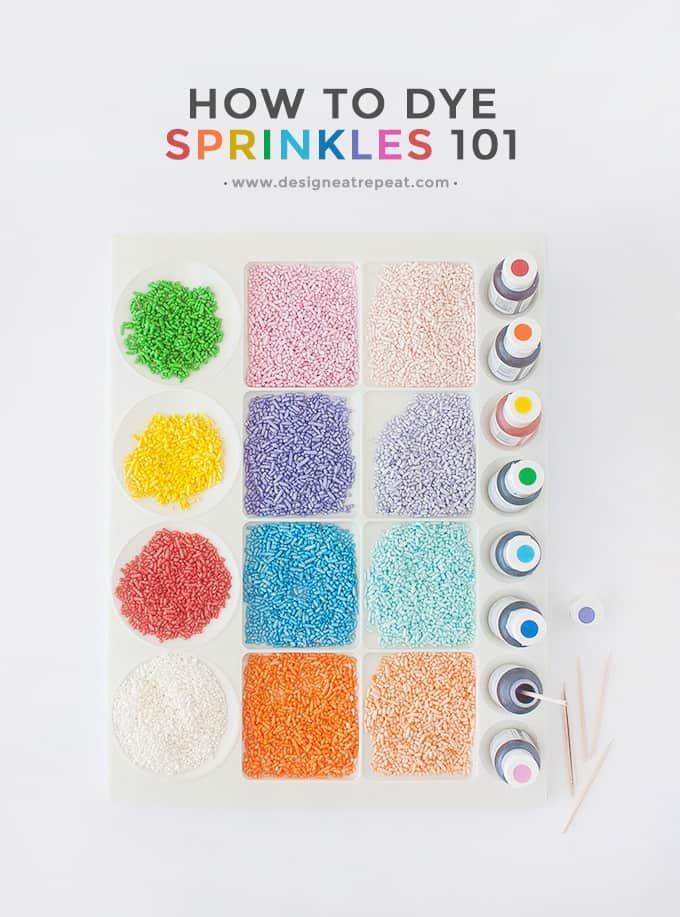
With the rainy Spring days upon us, what better way to spend your time trapped indoors than to dye sprinkles! I've gotten asked a few times where I buy most of my sprinkles, so today I'm spilling the beans (or should I say spilling the sprinkles?) about where I find these tiny bits of fun.
My sprinkle collection originated years ago when my family would visit nearby Amish shops each summer. Their shops were filled with bulk goodies, but the tubs of super cheap sprinkles were my main plan of attack each time we visited. I'd walk out of those cute little shops with a plastic bag filled with about every color they had for sale (all for about $10!) and get strange looks from people who probably already knew sprinkle hoarding was in my future.
Now that I'm older, we don't make those trips as often as we used to, so it's safe to say that my sprinkle sources have changed. Now days, I usually just hit up Amazon to buy a big bag of white sprinkles & food coloring to concoct a palette of DIY sprinkles . Oh, how times have changed this 90's child.
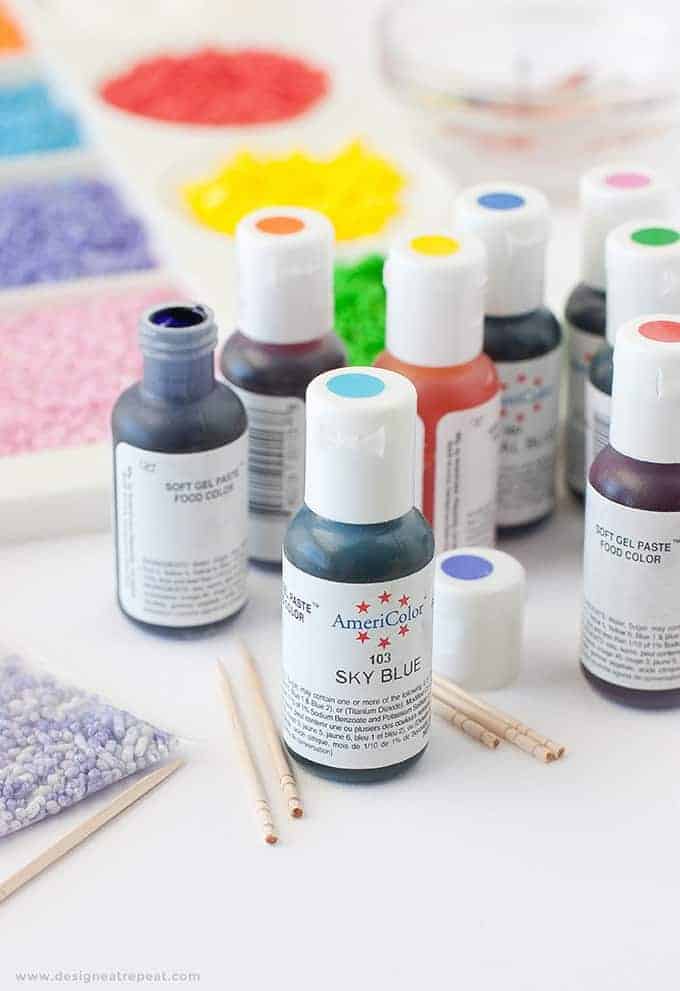
I bought this set of gel food coloring a few months back, and it has been sitting on my craft table for this exact day. I used to use these type of gel colors when I was big into cake decorating, so I already knew how well they performed in the vibrancy department. I'll warn you now that this post is probably going to sound like a big sponsored advertisement for AmeriColor.
But considering they don't even know I exist, it's merely a happy customer who happens to have a sprinkle obsession. But seriously, the AmeriColor gel coloring is the best I've found and they pack a huge color punch, in even the tiniest drop of gel. Meaning, they will last forever because you don't have to use half a bottle in order to get the color you want!
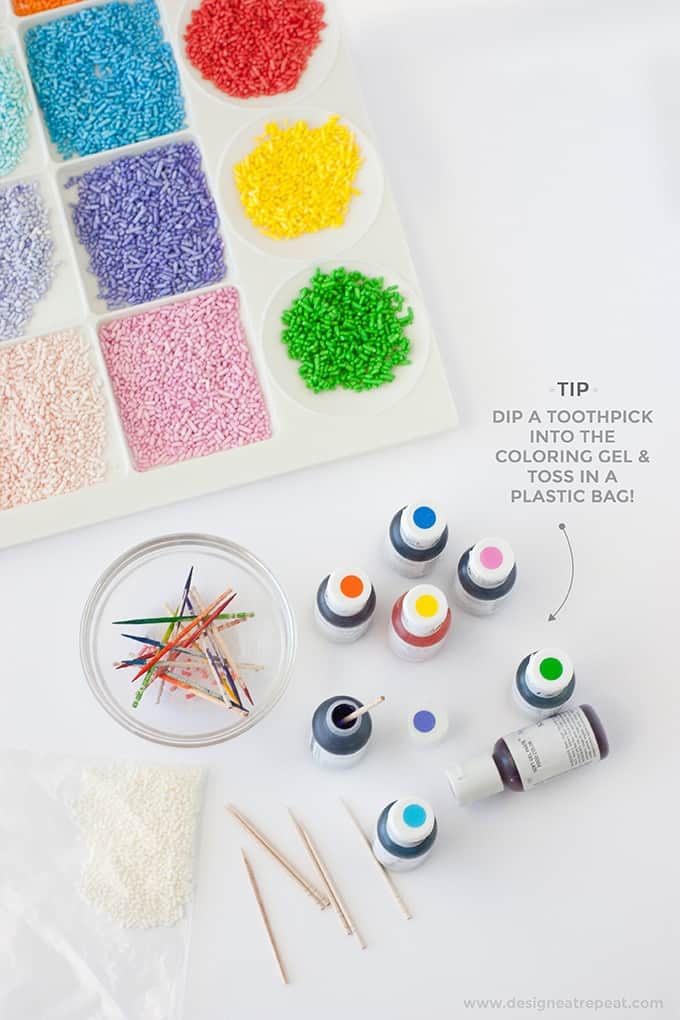
 Since it is a gel rather than a liquid coloring, it's a little tricky to get the correct amount of gel simply by squeezing drops into the bag. So what I like to do is remove the cap, dip the end of a toothpick into the gel, and then toss the whole toothpick into the bag of white sprinkles. After giving the bag a shake & shimmy, you can then decide if you need to add another toothpick to brighten up the colors even more.
For lighter/pastel colors, you seriously only need the tiniest amount of gel on the toothpick (about .25 inch). If you're wanting a more vibrant color, you can dip the toothpick further into the bottle. This method assures that you don't drown your sprinkles in too much dye, and it also helps you control the color more!
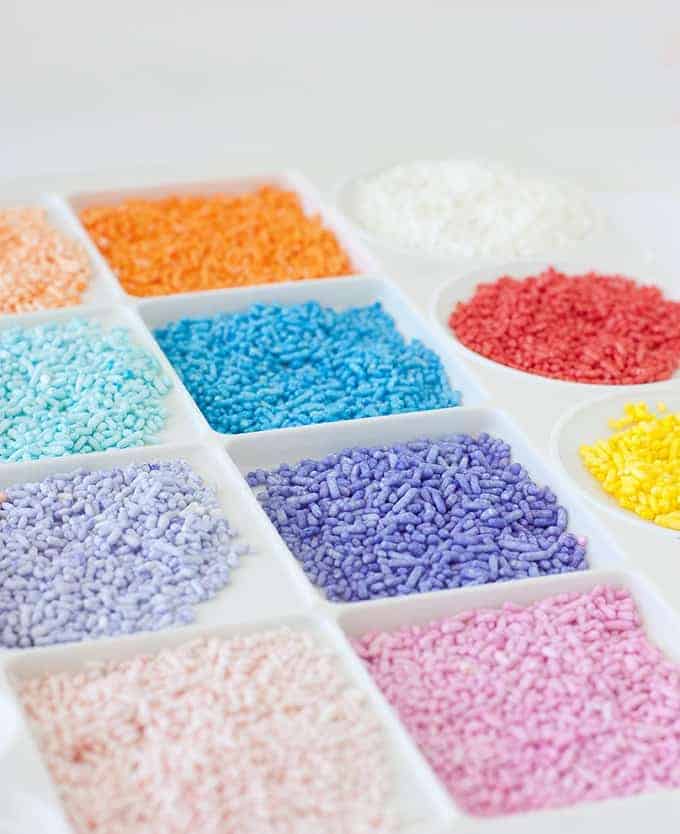
 I use generic plastic bags to mix the sprinkles in, so that I can contain the mess and toss the bag when I'm done. For the colors you see above, I just added 1 tablespoon of white jimmies to each bag, and then about .25 - 1 inch of gel on each toothpick. I didn't even use half the bag of white sprinkles and I was able to get all the colors you see here.
Materials/Where to Buy Supplies:
White Sprinkles // Food Coloring Gel
Plastic Ziploc Bags // Sturdy Toothpicks (Avoid flimsy ones that could break off)
I'm planning to use all these sprinkles in upcoming photoshoots, and the best part is that I can always mix more if I'm missing a certain color! If you're looking for a few ways to use these DIY sprinkles, hop on over here for some fun ideas! I hope this post was informative & helped all you curious cats who have been asking about this method.
This method also works for any type of white sprinkle (pearls, nonpareils, etc.), so have fun with it, and experiment with different kinds (although I haven't tried sanding sugar yet!). If you have any questions, leave them below and I'll be happy to help!
This is NOT a sponsored post by Americolor. All materials are personally recommended & loved!


Leave a Comment